Asus Vivobook Flip 14 TP410U LCD Assembly Replacement
Duration: 45 minutes
Steps: 5 Steps
Over time, your display might start to fade or stop working properly—whether it’s from too much love or a bit too much damage. No worries though! Just follow this guide to replace the LCD assembly and get your screen back to looking brand new.
Step 1

– Power off your laptop and unplug the AC cable. Time to disconnect and give it a breather!
Step 2


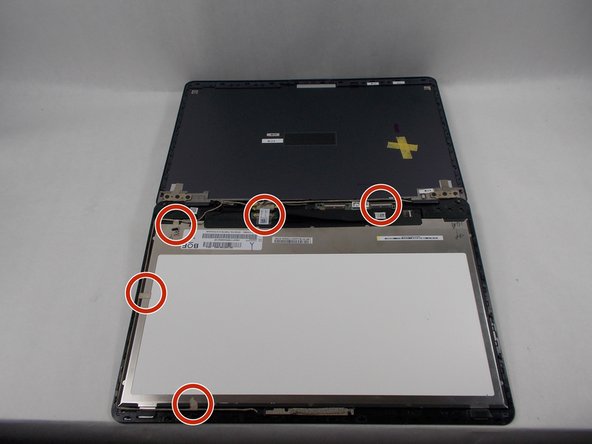
– Pop off the rubber covers hiding the two screws at the bottom of the screen—no tools needed, just gentle prying. Then, grab your Phillips #00 screwdriver and unscrew those two 6.4 mm screws marked in the diagram. If you need a hand, you can always schedule a repair.
Tools Used

Step 3

Be gentle with those connections—too much force can cause a hiccup in the system.
Spin the screen a full 360 degrees to make things a bit easier to handle.
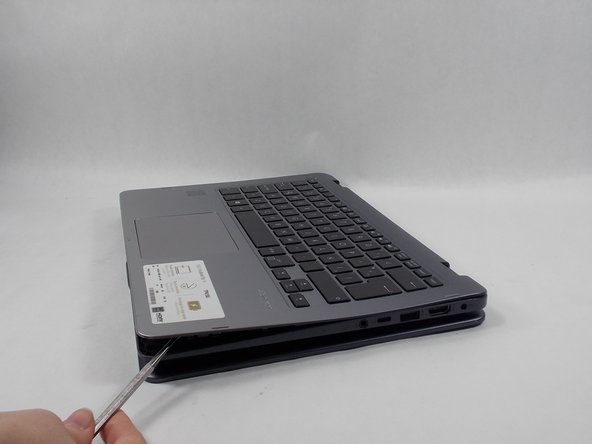
– Start by gently wedging your opening tool into the corner where the screen meets the base of the laptop.
– Carefully work your way around the edge to pry the screen free from the front cover—patience is key here.
– As you lift the display, disconnect each connector carefully as you go, keeping everything organized.
Step 4

Be gentle and avoid using too much muscle! Applying excessive force could cause some unwanted damage. Take it easy and everything will go smoothly!
– Carefully disconnect the cable linking the touch display, front camera, and motherboard. Then, gently peel away each piece of tape holding those cables in place. Stay patient and keep it steady—you’ve got this. If you need help, you can always schedule a repair.
Step 5

Handle the touch screen sensor gently—it’s pretty sensitive and won’t appreciate any rough moves. Keep the pressure light on that cable during reassembly!
Make sure your shiny new LCD display is fully unboxed and ready to go before you start. Getting it out of the box and prepped keeps things moving smoothly and helps you avoid any last-minute surprises. If you need a hand, you can always schedule a repair.
– Take out the old LCD display and set it aside—out with the old, in with the new!
Success!

