Samsung Galaxy A5 2017 Back Cover Replacement Guide
Duration: 45 minutes
Steps: 4 Steps
Watch out for that waterproof seal! If it gets damaged, your device might not function normally.
Don’t let it lose its water-protection; keep it safe and sound!
Remember, a little replacement adhesive can go a long way in keeping things together!
Let’s get this back cover replaced! This guide will walk you through the process of swapping out the back cover on your Samsung Galaxy A5 2017. Keep in mind that opening up your phone will compromise its waterproof seal. No worries, though! Your phone will still work just fine, but it’ll lose its water-resistance. If you’re feeling a little extra bold, you can use a dropper or syringe to apply some isopropyl alcohol (over 97% strength) around the edges of the back cover to help loosen the adhesive. And hey, when you’re putting everything back together, don’t forget to grab some replacement adhesive for the back cover. Need a helping hand? You can always schedule a repair.
Step 1

That Samsung Galaxy A5 (2017) adhesive is tough! It’s like the glue that holds a happy family together, extra strong! Don’t worry, we’ve got you covered. If you’re struggling, try using a hair dryer, heat gun, or a hot plate. But, be careful not to get too hot! The display and battery are sensitive to heat, so don’t burn them! If you get stuck, you can always schedule a repair.
– First things first, let’s power down your phone before we dive into the disassembly adventure!
– Grab an iOpener and let’s get that back cover loose! Stick it on for a solid two minutes. If things still feel a bit stuck, don’t hesitate to give it another go or two during the cover removal process.
Tools Used

Step 2


If you’re having trouble getting that opening pick in between the back cover and the frame, no worries! Grab a trusty suction handle and make a little gap. It’s like giving your phone a gentle hug to get it to open up. If you need help, you can always schedule a repair
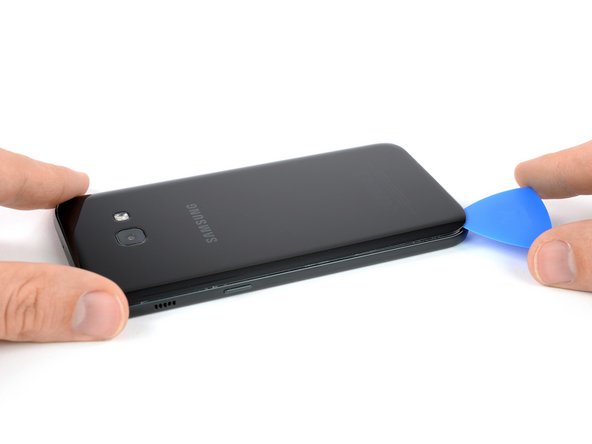
– First things first, slide an opening pick into the bottom edge of your phone. You’ve got this!
– Now, gently glide the tip of that pick to the bottom left corner and start slicing through that pesky adhesive like a pro.
– Keep the pick snugly in the bottom left corner so the adhesive doesn’t try to sneak back in. Grab a new opening pick, and let’s tackle the adhesive on the left side of your phone!
Tools Used

Step 3


If the adhesive gets stubborn, don’t be afraid to reuse your iOpener. Remember, the back cover is under tension during removal, so make sure that adhesive is nice and loose to avoid any breaks. If you need help, you can always schedule a repair
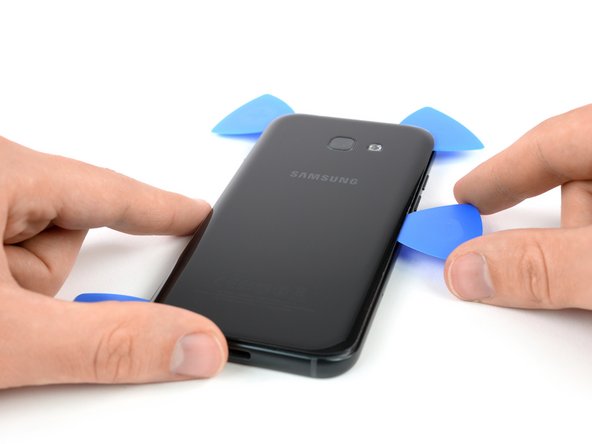
– First, use an opening pick to carefully cut the adhesive on all sides of your phone. To keep things from getting sticky again, leave one pick in each corner.
– Next, insert an opening pick into the right side of your phone – now that the adhesive is cut, you’re making progress. Gently flip it sideways until you’ve got a good grip on the back cover. If you need help, you can always schedule a repair
Tools Used
Step 4
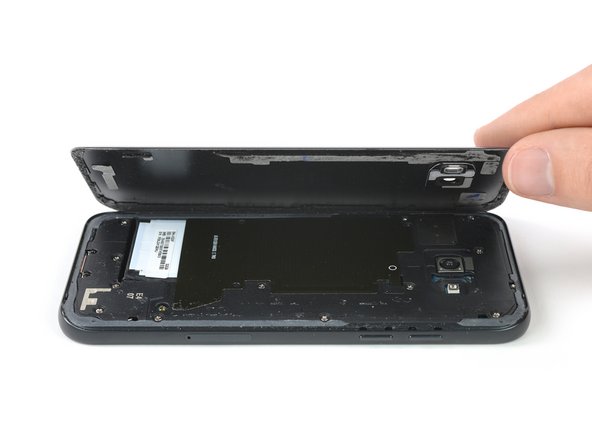
– Let’s get started by gently taking off the back cover of your phone. No need to rush, just a smooth move!
– Before you slather on that fresh adhesive, make sure to clear away any leftover sticky stuff from both the back cover and the frame. Grab some isopropyl alcohol and a lint-free cloth to give those areas a good clean. You’ll want them squeaky clean for the best bond!