Samsung Galaxy A5 (2016) Display Replacement Guide: Step-by-Step DIY
Duration: 45 minutes
Steps: 15 Steps
Ready to give your Samsung Galaxy A5 a fresh look? This guide will walk you through replacing that cracked screen or busted display. We’ll make it easy, so don’t worry! If you need a hand, you can always schedule a repair.
Step 1


Alright, let’s start by powering down your phone. We’ll get this thing fixed in no time!
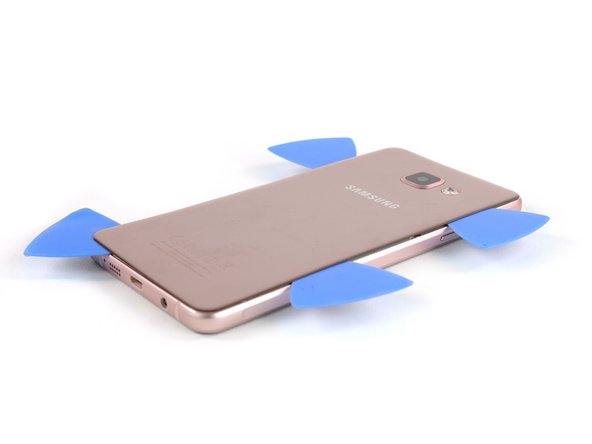
– Let’s get this back cover off! Warm things up a bit by applying an iOpener to soften the glue holding it in place.
– Now, grab that trusty suction handle and gently lift the back cover. Slip an opening pick in there to create a little space to work with.
Tools Used

Step 2


– Gently slide the pick up to the center to help free the back cover from the frame.
– Pop in a second opening pick and glide it around the right corner, then along the bottom and up around the left corner.
Step 3


– Grab another opening pick and keep working your way towards the top corner – you’re making great progress!
– Now, use one more pick to finish the job at the top. If you need help, you can always schedule a repair


Step 5


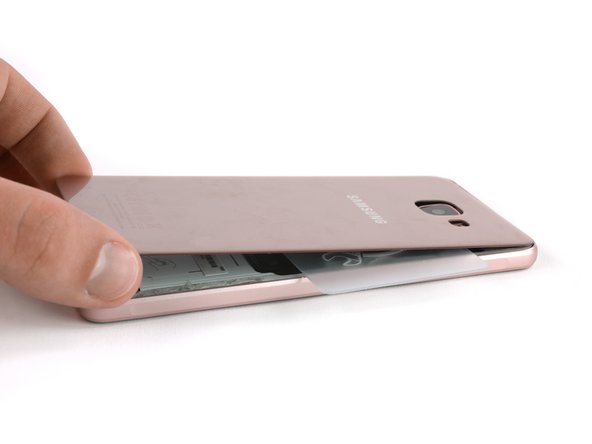
Before you start prying, give the back cover a quick peek to make sure you don’t accidentally bump into any important bits like the NFC antenna. It’s like a little dance party for your phone, and we want to keep everyone safe! If you need help, you can always schedule a repair.
– Give that back cover a little warmth again so you can slide the plastic card up towards the top with ease.
– Keep moving that plastic card until you hit the camera bump. Now, gently lift the back cover and take it off like a pro.
– Don’t forget to clean off any leftover glue and slap on some fresh adhesive when you’re putting it all back together.
Step 6


– Let’s get started – take out the SIM card tray to begin your repair journey.
– Next, remove the 17 Phillips #00 screws from the midframe. If you need help, you can always schedule a repair
Step 7


– Give that battery a little push away from the midframe. We’re separating these components like best friends going their separate ways (but still staying in touch!).
– Hey, don’t lose that IMEI sticker on your old battery! It’s like your phone’s ID card. Pop it over to the new battery so your phone knows who it is. If you need help, you can always schedule a repair


Step 9

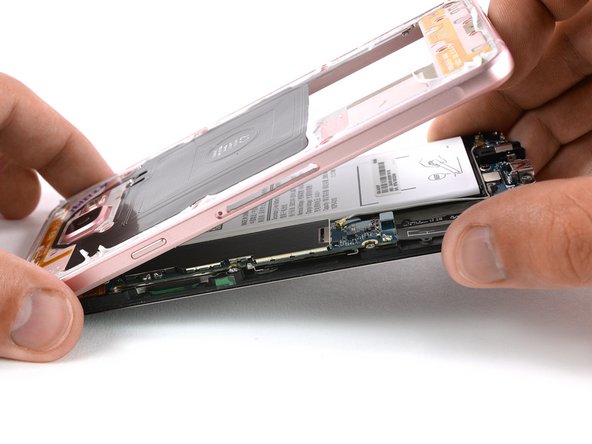
Just slide the tip of your opening pick right where the display cable is hanging out. You’ve got this!
– Grab a Jimmy and gently slide it between the frame and the front panel.
– Lift the display unit just a tad so you can sneak an opening pick behind it.
– Slide the pick down the side to break the adhesive seal. At the bottom, you can push the pick in a bit more to prevent the glue from sticking back together.
Tools Used

Step 10


– Do the same thing on the other side, easy peasy.
– Insert the opening pick about half an inch to loosen the glue behind the battery.
– Slide down to where the display ends. You got this!
Step 11


Hey there, buddy! Be super careful with the touch buttons on each side, there are two of them behind the front panel. In the middle, only go as deep as the home button starts. If you need help, you can always schedule a repair
– Now, slide that glue right off the bottom!
Step 12

– Alright, let’s get this party started! We’re going to need to heat up the display unit for the next few steps. Don’t worry, it’s a quick and easy process. If you need help, you can always schedule a repair.
Step 13


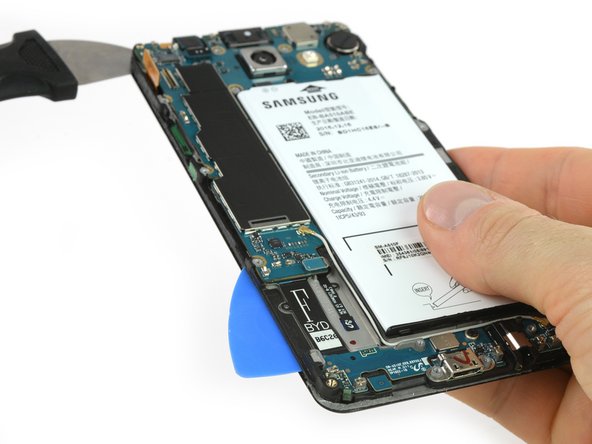
– Now it’s time to get a little deeper – swap out that opening pick for a plastic card on the left side, where the motherboard lives, to tackle the glue hiding behind the battery.
– Keep going until you hit the display cable, gently working that adhesive loose.
Step 14


– Gently detach the display from the frame and snip the remaining glue at the top with an opening pick.
– Carefully slide that display cable out of its slot in the frame. If you need help, you can always schedule a repair.
Step 15

Clear away any sticky stuff from the display and back glass, then give it another go with fresh adhesive if needed.
– Before you start putting everything back together, plug the new display into the motherboard and give it a quick test by powering on your phone. Make sure the display lights up and the touch screen works like a charm.