Samsung Galaxy A5 Display Replacement Guide: Step-by-Step DIY
Duration: 45 minutes
Steps: 4 Steps
Get ready to breathe new life into your Samsung Galaxy A5 by replacing that broken or cracked display. Our clear and easy-to-follow guide will walk you through the process step by step. If you need help, you can always schedule a repair.
Step 1


To kick things off, gently slide the tip of your opening pick into the seam and glide it along the edge to break free that stubborn glue. For now, let’s keep the top and bottom undisturbed.
Got a cracked screen? No worries! Just cover that front panel with some tape to keep those pesky glass shards at bay and give yourself a better grip for lifting it off.
– First things first, power down your phone. You got this!
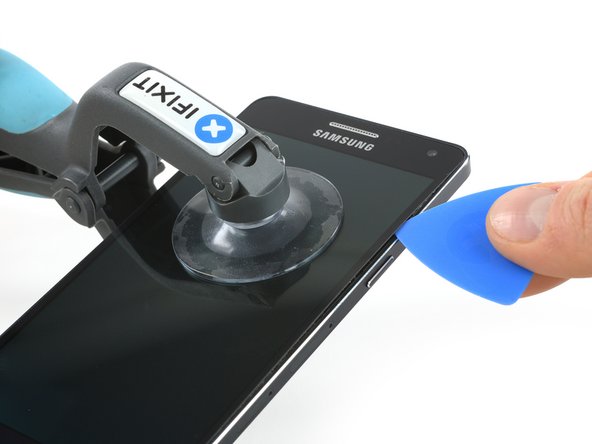
– Grab an iOpener and give the glue along the edge of the display a little warmth. Focus on the sides first, then move onto the bottom.
– Now, using an iSclack or a suction handle, gently lift the display a bit to create a tiny gap. That’s where you’ll slip in an opening pick.
Tools Used


Step 2


Be careful when working around the software buttons in the lower left and right corners of the screen – they have delicate ribbon cables glued to the display. Make sure your pick cuts between the screen and buttons without damaging these wires. If you’re not feeling confident, don’t worry – you can always schedule a repair and let the pros handle it.
– Once the glue has loosened enough, gently lift the display a bit more so you can slide an opening pick underneath.
– Grab a second opening pick and carefully work your way around the bottom edge.
– Repeat the last two steps on the other side for a smooth transition.
Step 3


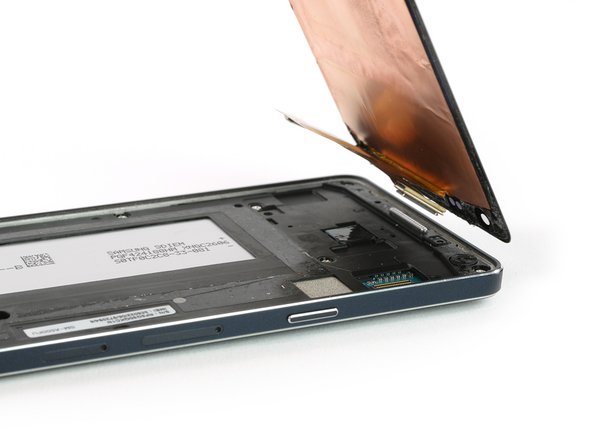
Hey there! Just a gentle reminder: don’t swing that display open all the way just yet—it’s still connected to the motherboard!
– Time to grab that trusty iOpener again! Let’s warm up the top and bottom sections to make that glue nice and soft.
– Now, gently nudge those picks at the bottom closer to the home button, and you’ll be able to lift the display up towards the top.
– Keep an eye on the home button—it might decide to stick with the display assembly or hang out on the midframe. If your new display doesn’t come with one already attached, just be aware!
Tools Used