Samsung Galaxy A41 Repair Guide
Duration: 45 minutes
Steps: 5 Steps
Step 1
– Start by warming up the back of your device with a heat gun or, if you have it, a heat plate.
– Next, place the suction handle on the lower half of your device and give it a tug while sliding a plastic pick between the midframe and back plate.
– Once the pick is in, work your way around the device with a few more picks.
– Watch out for the camera bump and the middle of the device because of the exposed battery.
Tools Used

Step 2
– Kick things off by loosening those 16 Phillips #00 screws in the midframe—7 on the top half and 9 on the bottom half. You’ve got this!
– Next, grab a plastic pick and gently slide it between the colorful midframe and the sleek black plastic frame around the display. An opening tool can be your best buddy here. I found it easiest to start in the top right corner (where there’s no camera bump), but feel free to find your own groove depending on your device.
– Now, work your way around the device to pop those two frames apart. Just a heads up—be extra careful around the SIM card tray since the plastic frame is a bit delicate there. And remember, don’t go too deep into the device to avoid any mishaps with the internal components, especially the cameras.
– Finally, unplug the battery flex cable and you’re on your way!
Step 3
– First things first, gently unplug those three flex cables from the board, and don’t forget the white antenna cable chilling on the left side.
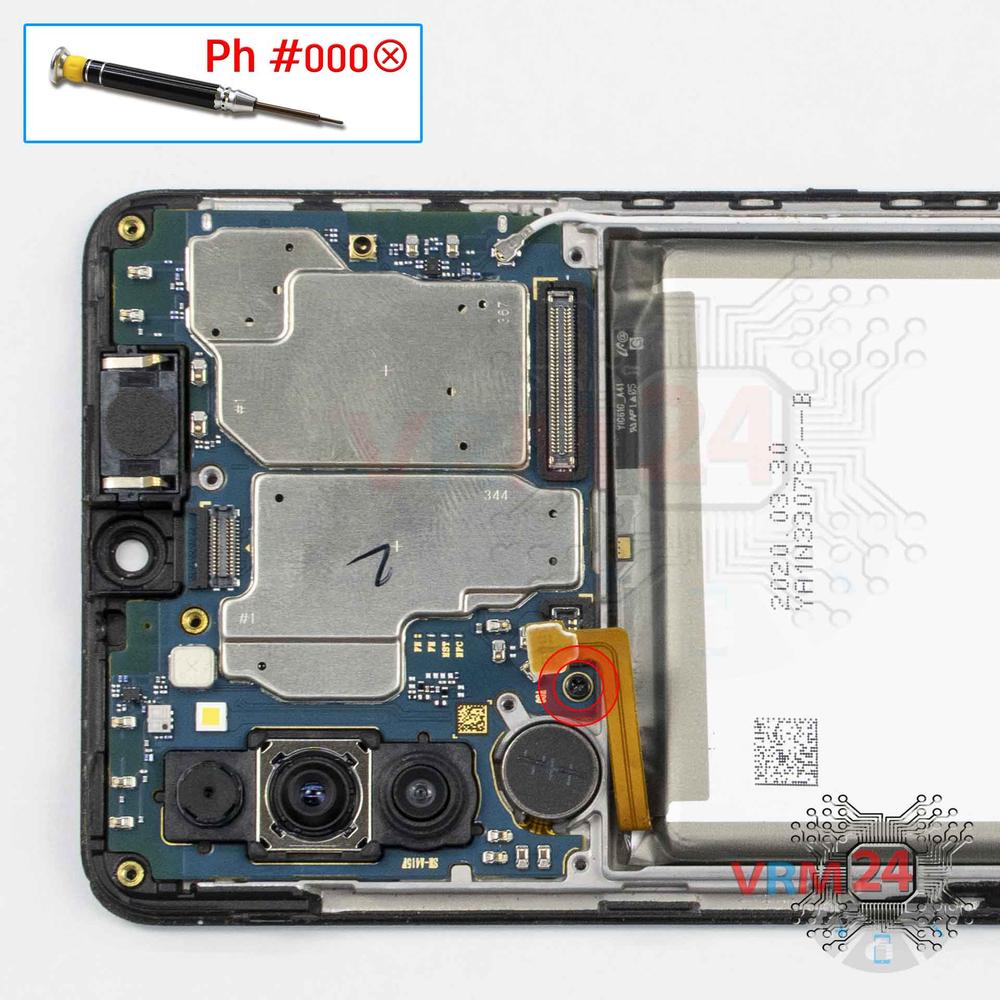
– Next up, grab your Phillips #00 screwdriver and remove the single screw right in the center of the board near the charging port. Keep that one separate from the frame screws, as they’re a bit different in length.
– Now, with care and finesse, lift out the board like a pro.
Step 4
– First things first, gently disconnect the interconnect flex cable and the antenna cable hanging out at the bottom right. They’ve had a long day!
– Next up, say goodbye to the front-facing camera! Unplug it from the top and take it out with care.
– Now, it’s time for a little unscrewing action! Remove that lone black screw and carefully lift the board out like a pro.
Step 5
– Now you’re in! You’ve got access to pretty much everything inside the device.
– The battery’s glued down, but hey, it looks like it has some pull tabs to help you out. (Still need to double-check this!)
– The vibration motor, ear piece, and fingerprint reader are all stuck in place too. Time to gently work around them!
