Samsung Galaxy A40 Screen Replacement Guide
Duration: 45 minutes
Steps: 25 Steps
Get ready to breathe new life into your Samsung Galaxy A40 with a brand new screen. If the frame is damaged, replacing it is crucial to ensure the new screen fits perfectly and doesn’t get damaged from uneven pressure. Before you start, make sure to discharge your battery to below 25% to minimize the risk of it catching fire or exploding if accidentally punctured. Note that this guide is designed to replace the screen while keeping the original frame and motherboard intact. However, some replacement screens come with a new frame, which requires a different approach. Double-check that you have the correct part before starting. You’ll also need some replacement adhesive to reattach components when putting everything back together. If you need help, you can always schedule a repair.
Step 1


When putting the cards back, just remember to line them up right in the tray for a smooth fit!
– Grab your trusty SIM card eject tool, a SIM eject bit, or even a straightened paper clip, and gently insert it into the tiny hole on the SIM tray found on the left side of your phone.
– Give that SIM card eject tool a firm push to pop out the SIM card tray like a pro.
– Carefully pull out the SIM card tray and voilà!
Tools Used

Step 2

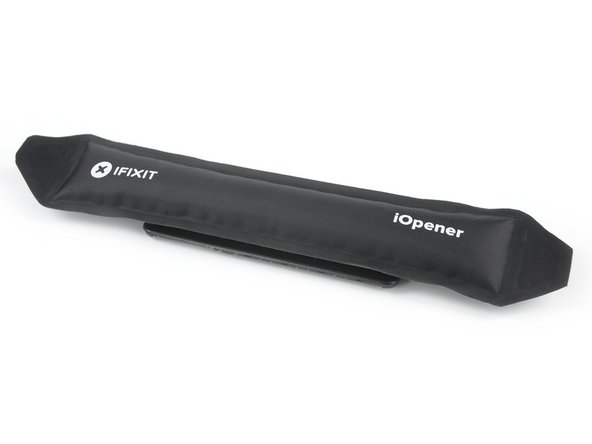
– Time to get this repair started. Apply a heated iOpener to the back cover for at least two minutes to loosen the adhesive underneath. If you need help, you can always schedule a repair
Tools Used

Step 3


If the back cover of your phone is a bit worse for wear, the suction handle might not have the best grip. No worries! Give it a shot with some sturdy tape, or get creative and use superglue to hold the suction handle in place while it sets. Then you’ll be good to go!
Having a tough time creating that gap? Just apply a little more heat to help soften the adhesive a bit more. Make sure to follow the iOpener instructions to keep everything nice and safe from overheating.
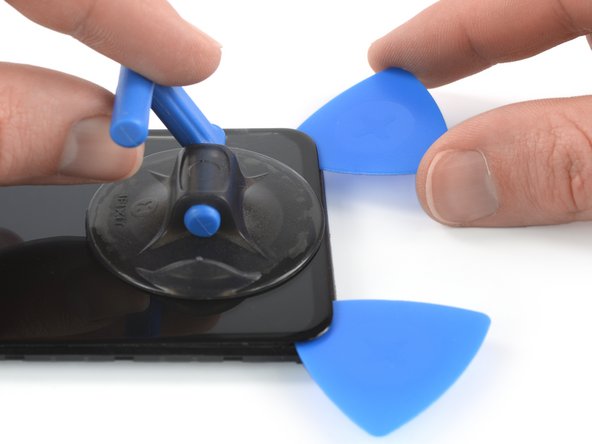
– Stick a suction handle right on the edge of the back cover – the closer, the better!
– Now, gently lift the back cover with your suction handle to create a tiny gap between the cover and the frame. You got this!
– Slide an opening pick into that little gap you made. Smooth move!
Tools Used

Step 4


– Slide the opening pick down to the bottom right corner, and leave it there. This will keep the adhesive from sticking back together while you work.
Step 5


You’re at the point where you can totally ditch the suction cup or keep using it for a little extra grip. Your call!
– Alright, let’s get this party started! Slide your first opening pick into the bottom right corner of your phone. It’s like a dance party for your pick!
– Now, for the grand finale – gently slide the opening pick along the right edge of your phone. This is how we cut through that pesky adhesive holding the back cover in place.
– Hold on to your pick like a champion! Leave it nestled in the top right corner, ready for the next step in our repair journey.
Step 6


If the adhesive gets tricky to cut, it’s probably cooled off. Grab your iOpener and warm it up again. If you need help, you can always schedule a repair
– Pop in a third opening pick right at the top right corner of your phone! You’re doing great!
– Now, gently slide that pick along the top edge to slice through the adhesive like a pro.
– Keep that opening pick snug in the top left corner to stop the adhesive from getting cozy again.
Tools Used
Step 7


– Now it’s time to add a fourth opening pick – slide it into the top left corner of your phone and get ready to make some progress.
– Gently slide the opening pick along the left edge of your phone to cut through the adhesive. You’re doing great!
– Leave the opening pick in the bottom left corner for now. If you need help or feel stuck, you can always schedule a repair with Salvation Repair.
Step 8


To slice through the adhesive along the bottom edge, gently slide the opening pick in about 0.4 inch (1 cm). Take your time and let the pick do the work!
– Now it’s time to bring in the fifth opening pick to tackle that stubborn adhesive at the bottom edge of your phone. Grab your pick and carefully cut through the remaining adhesive to move forward with your repair. If you need help, you can always schedule a repair
Step 9


Hey there! Just a quick tip: when you’re lifting that back cover, give the fingerprint reader a gentle press down. It’ll help prevent any accidental tearing of the fingerprint cable. You’re doing great!
– Alright, time to get that back cover off! Just gently fold it upwards and it should come right off. Piece of cake, right?
Step 10

– Time to unscrew! Grab your Phillips #00 screwdriver and carefully remove the thirteen 3.4mm screws. Keep them organized so they don’t disappear on you!
Step 11


– Gently slide an opening pick between the left edge of your phone assembly and the midframe. You’re doing great!
– Carefully glide that pick along the left edge of the phone to pop those pesky plastic clips free from the midframe. Keep it up!
Step 12


– Alright, let’s get this party started! Slide your trusty opening pick around the bottom right corner of your phone. Those plastic clips holding the assembly down? Time to give ’em a little love tap and set them free! It’s like a mini dance party for your phone, but without the music.
Step 13


– Gently glide the opening pick along the right edge of your phone assembly to pop free those pesky plastic clips that are keeping the midframe snug. You’re almost there!
Step 14

– Alright, time to give that midframe the boot! Carefully pop it off, and we’ll be on our way.


Step 16


– Grab your trusty spudger and gently pop off that display flex cable nestled in the bottom right corner of your phone. You’ve got this!
Tools Used
Step 18


If your phone’s screen is cracked, the suction handle might not stick as well as you’d like. No worries, just try lifting it with some strong tape or superglue the suction handle in place and let it cure – then you’re good to go. If you need help, you can always schedule a repair
– First things first, let’s warm up that screen! Once it’s nice and toasty, grab a suction handle and stick it on the bottom edge of your phone.
– Now, give that screen a gentle lift with the suction handle. Just a little nudge to create a small gap between the screen and the frame.
– Next up, take the tip of your opening pick and slide it into that gap you just created between the midframe and the screen.
– Time to make some moves! Slide the opening pick all the way down to the bottom left corner to slice through that sticky adhesive. Leave it in there so it doesn’t seal back up on you!
Tools Used
Step 19

– Now it’s time to bring in some backup – insert a second opening pick and slide it down to the bottom right corner of the screen to cut through that adhesive. You’re making great progress!
– Leave those picks right where they are, so the adhesive doesn’t get a chance to reseal. You’re doing a great job, and if you need help, you can always schedule a repair
Step 20


If the adhesive is giving you a tough time and feels like it’s playing hard to get, it probably just needs a little warmth. Grab your iOpener and give it a little reheat action to get things moving again!
– Slide a third opening pick into the bottom left corner of your phone, just like a pro!
– Gently glide that pick up to the top left corner to slice through the adhesive. Keep it there to make sure the adhesive doesn’t decide to seal up again.
Tools Used
Step 21


When you’re working near the front-facing camera, just slide in the tip of the opening pick—this way, you’ll steer clear of any mishaps with the camera lens.
Watch out for the top speaker grill above the front-facing camera; it has a tendency to pop out and could go missing if you’re not careful. Keep an eye on it!
– Grab a fourth opening pick and wedge it into the top left corner of the device.
– Gently slide the pick along the top edge to slice through the adhesive. Leave the pick in the top right corner to keep the adhesive from sealing up again.
Step 22


– Slide in a fifth opening pick and glide it along the right edge of your phone to slice through that stubborn adhesive.
– Keep those opening picks in place to stop the adhesive from sticking back together.

Step 24


Step 25


– Gently guide that display flex cable through the midframe’s little gap and pop off the screen. You’ve got this!
– Take a moment to compare your shiny new replacement part with the old one. You might need to transfer some bits or peel off those adhesive backings from the new part before you install it. Easy peasy!