Samsung Galaxy Tab 7.0 Front Panel Replacement
Duration: 45 minutes
Steps: 9 Steps
Follow this guide to swap out that cracked front panel with ease. If you need help, you can always schedule a repair.
Step 1

– Grab your trusty metal spudger (the flat end, of course) and give those two plastic tabs near the dock connector a gentle nudge. They’re just hanging on, so don’t be afraid to give ’em a little love. Popping them off the rear case is a breeze!
Step 2

– Let’s get started by removing the two 4.1 mm Tri-Wing screws located near the edges of the dock connector. If you need help, you can always schedule a repair
Step 3

Get ready to gently pop off a few clips (marked in red) around the edge of the rear case. These little guys are a bit on the delicate side, so take your time and be careful. You’ve got this!
Step 4

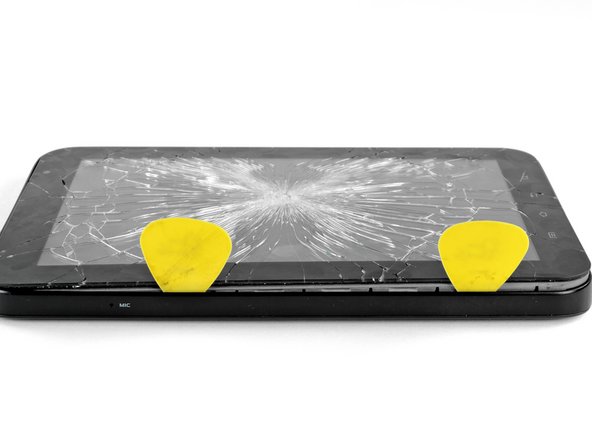
– Hey there, repair guru! We’re gonna get your Galaxy Tab back in tip-top shape. Don’t worry about the cracked front glass, this guide’s got you covered no matter what.
– Grab your trusty plastic opening tool and slide it in near the bottom left corner of the back case.
– Now, gently use the tool to create a teeny gap between the front and back panels near that bottom left corner.
– Let’s keep going! Run the tool along the left edge to widen that gap between the panels.
– Time to bring in the cavalry (aka your guitar picks!). Carefully slide two of those into the gap you just created.
Step 5


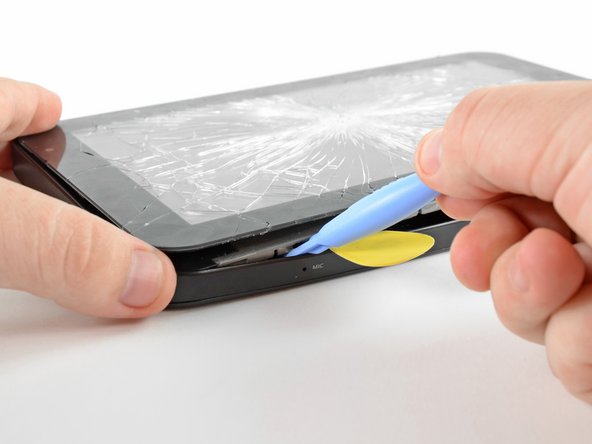
– Slide that plastic opening tool into the dock connector and gently nudge it under the front panel/motherboard assembly.
– Give the plastic opening tool a little push downwards to open up a gap near the lower left corner of the front panel assembly.
– Now, slip a guitar pick into that fresh gap you just made near the lower left edge of the Galaxy Tab.
Step 6

Hey there, tech whiz! As you’re carefully lifting that front panel off your Galaxy Tab, keep an eye on that microphone ribbon cable (the one in red in the first image). It’s pretty delicate, so treat it with care. If you need a helping hand, you can always schedule a repair.
Position the tool under the inner framework to get the best leverage for releasing the clips. If you need help, you can always schedule a repair
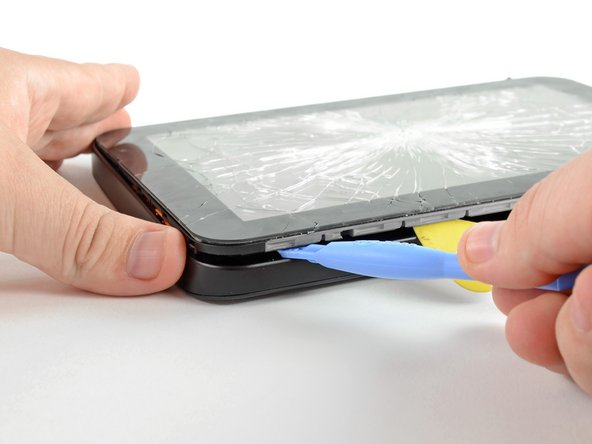
– Approach the top left corner of the Galaxy Tab with care. Follow the next step like a pro.
– Use a plastic opening tool to gently pop it into the gap next to the left side of the guitar pick.
– Lift up and run the plastic opening tool along the top left corner of the Galaxy Tab to release the Front Panel Assembly from the retaining clips.
Step 7

Don’t go lifting that front panel assembly just yet! It’s still hanging out with the rear panel, connected by some clips up top, down below, and over to the right. You wouldn’t want to cause any trouble, would you? If you need help, you can always schedule a repair.
– Gently raise the left side of the front panel assembly to free it from its snug spot in the rear panel housing.
Step 8
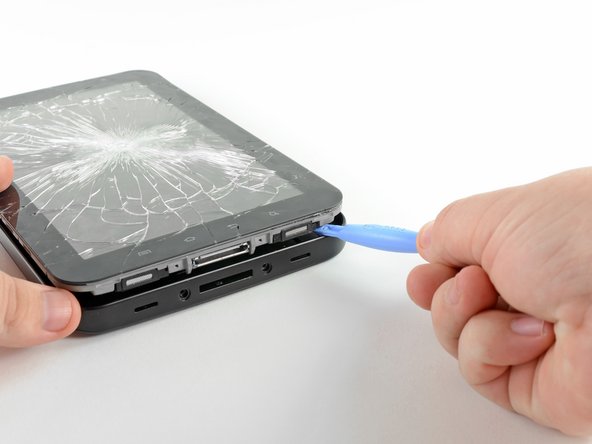

– Slide the flat edge of your trusty opening tool between the front and rear panels, right by the dock connector. You’ve got this!
– Gently nudge the bottom right corner out of its cozy spot in the rear panel using a plastic opening tool. Just a little wiggle and it should pop right out!
Step 9

– Gently lift the front panel assembly away from the rear panel and set it aside.