Asus U50F-RBBAG05 Ports (USB/Audio Jack/Microphone Jack/E-SATA) Replacement
Duration: 45 minutes
Steps: 23 Steps
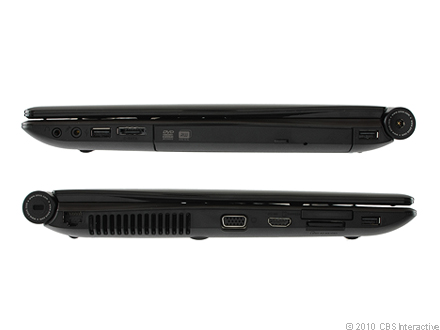
Ready to swap out those stubborn ports on your Asus U50 Series laptop? Whether it’s the USB, audio jack, microphone jack, or E-SATA, replacing these ports is a smart move if they’re being stubborn or just not working right. For example, if plugging in multiple USB devices into one port gets zero response from your laptop, it’s a clear sign that something’s up and it’s time to replace. All the ports are located on the same panel, so you’ll need to remove the entire panel first. Once that’s done, you can focus on fixing the individual port that’s giving you trouble. Remember, take your time with this repair—there are a lot of tiny screws that can easily get lost, and be gentle with the wires as they can get damaged if not handled carefully. Also, keep all your components safe—dropping anything could lead to long-term damage. If you’re feeling stuck, no worries! You can always schedule a repair if you need some extra help.
Step 1

Keep the right tab held in place to the right to keep the slot unlocked while you carefully remove the battery.
– Flip your laptop over so the bottom is chilling on top.
– Slide those two tabs on the bottom outwards, aiming for the laptop’s edges.
– Push the left tab all the way left—it’ll stay put in the unlocked spot. If you see red next to the tab, you nailed it, it’s unlocked.
Step 2


– Press down the tab on the right side and start gently sliding the battery out of its spot.
– Take out the old battery and set it aside.
– Slide the fresh battery into the empty slot. Let go of the right tab to start locking it in. Now, push the left tab to the right until it clicks—no more red showing near the left tab means your battery is locked in and ready to roll!
Step 3

– Grab your Phillips #1 screwdriver and remove the six screws. They’re ready to be unscrewed, so give them a twist and keep them safe for the next step!
Step 4

– Gently lift the lower panel using your fingernail or a spudger—just a little nudge should do the trick.
Tools Used

Step 5


– Gently lift the panel up and take it off—like opening the lid of your favorite snack box.
Step 6

– Grab your Phillips #1 screwdriver and gently unscrew those two screws. Keep them safe so you don’t lose track of them later!
Step 7
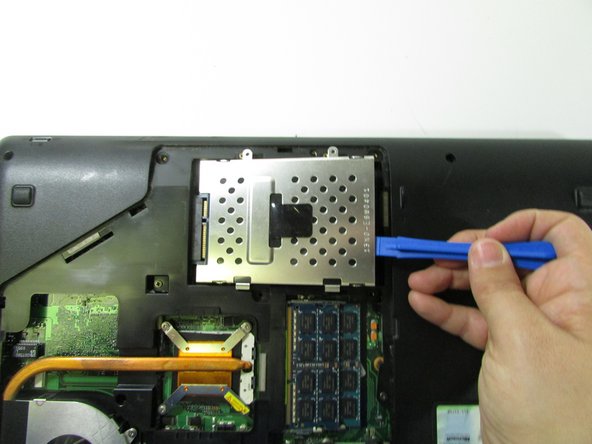

– Give the hard drive a gentle push with your finger to slide it back into place.
– Use an opening tool or your trusty fingernail to carefully lift the drive out.
Step 8
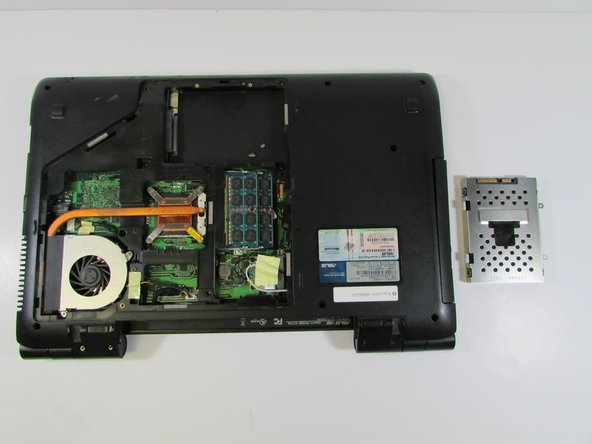

– Gently slide the hard drive back and then lift it up and out—like you’re pulling a cookie from a jar.
– Take the component out completely and set it aside. Nice work!
Step 9

– Grab your screwdriver and carefully unscrew the single screw holding things in place. You’re doing great—keep it up!
Step 10

– Grab your trusty plastic opening tool and gently nudge the drive out from the back. You’ve got this!
Step 11

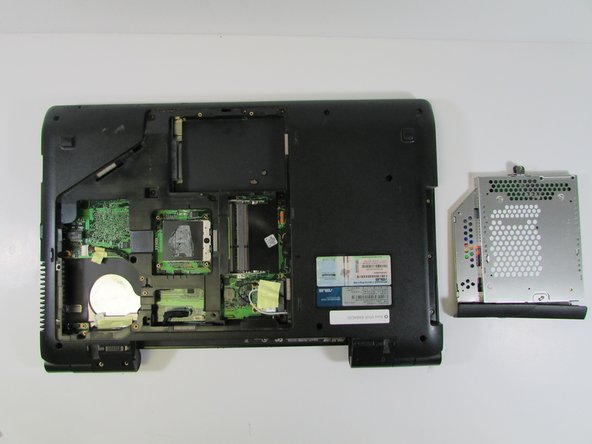
– Carefully remove the drive by pulling it straight out, making sure to take it all the way out.
– When putting everything back together, position the laptop with the bottom side facing down. Gently push the drive in until it clicks into place. If you don’t, the drive might get stuck and make reassembly tricky. If you need a hand, you can always schedule a repair.
Step 12


– Grab one pry tool and slide it under the top corner, then take the second tool and wedge it under the side of the same corner. Be sure to get under the metal of the keyboard, not just the thin plastic layer. Once you’re in, gently pry the corner down and out from under the little overhang it’s hiding under.
– Now, slide the pry tool along the top to the next overhang and insert the second tool on the other side. Press down and carefully pry the keyboard out.
– Keep going, repeating the process all the way to the opposite corner. Patience is key, but you’re doing great!
Step 13


– Once the keyboard is loose, gently lift it up a bit and disconnect the cable underneath. Easy does it!
Step 14


– Last, remove the keyboard completely from the computer.
Step 15

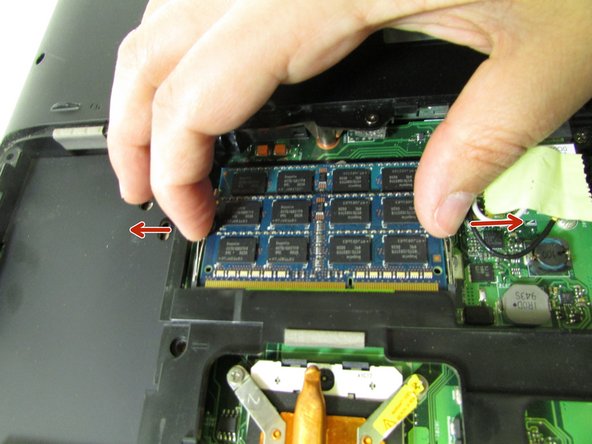
– Gently press back on the silver clips just like in the photo—wait for that little pop, and you’re golden.
Step 16


– Gently pull back the RAM card and slide it out.
– Do the same for the lower RAM card, and you’re good to go.
Step 17

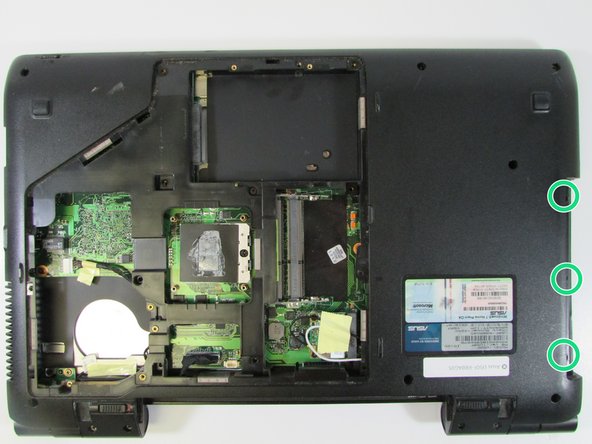
– Let’s start by unscrewing the six screws holding the outer lower case in place. You’ve got this!
– Next up, remove the four screws from the hinges. This step is quick and easy, just keep those screws in a safe spot!
– Now, tackle the three screws on the inner lower case. Almost there!
– Finally, remove the three screws around the optical drive area. You’re nearly done – just a few more steps and you’re good to go!
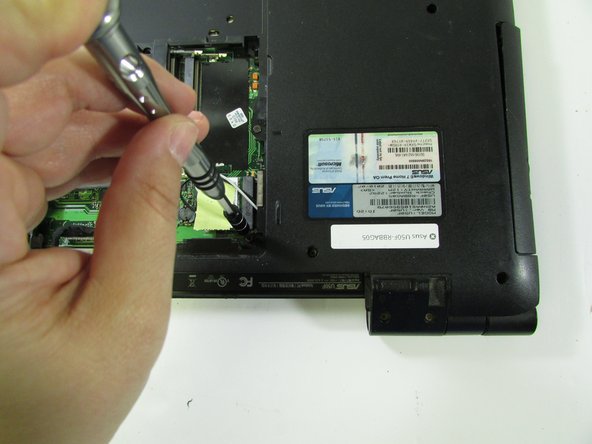
Step 18


– Loosen and remove the two screws holding the metal frame in place. Keep at it until the frame is free to come out and you’re ready for the next step. If you need help, you can always schedule a repair.
Step 19


Heads up: Give that cable a gentle, even pull—keep all the wires happy and nobody gets stressed.
Keep your eyes peeled: These connectors don’t show up often, so look for a release mechanism before tugging on the ribbon itself.
Pro tip: When you pull, use the whole width of the cable so no single wire is working overtime.
– Gently pull the two bundled cables away from the connector, following the direction of the individual wires. Keep it steady!
– Carefully remove the no-fuss ribbon cable by pulling it straight out of the connector. Easy does it!
– Grab the single bundled cable and pull it away from the connector, just like the individual wires are running. Simple and smooth!
Step 20

– Gently lift up and take off the top cover. You’ve got this!
Step 21

– Grab your screwdriver and carefully unscrew that single tiny screw holding things together. You’re doing great—keep going, and if you need a hand, you can always schedule a repair.
Step 22

Gently pull the cable straight across, making sure all the little wires share the load—nobody likes a tug-of-war with their wiring!
– Gently wiggle the cable out, moving in the same direction as the wires—think of it as sliding spaghetti out of a tight spot.
Step 23

– Carefully lift up and take out the port panel to get started.
Success!