DIY Samsung Galaxy A22 A22 5G Screen Replacement Guide
Duration: 45 minutes
Steps: 5 Steps
Get ready for a full screen replacement on your A22/A22 5G! Just a quick heads up: while you’re taking apart and putting together your device, handle those delicate components with care—they’re a bit on the fragile side. If you need help, you can always schedule a repair.
Step 1


– First things first, let’s get that SIM card out of the way!
– Now, it’s time to warm things up! Grab your iOpener or heat gun and gently heat the back of the phone all around the edges.
– Once it’s nice and toasty, take your pry card and carefully slide it around the edges to break the adhesive seal. Patience is key here, so take your time and be gentle.
– Oh, and keep an eye out for those two cables in the middle of the phone—let’s not accidentally give them a bad day!


Step 3
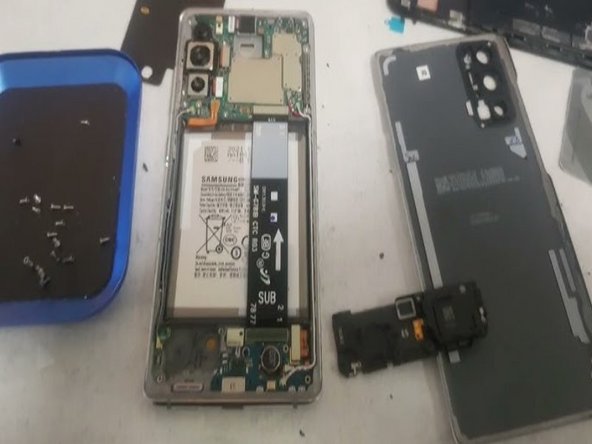

– Disconnect the three ribbon cables for the screen and battery.
– Remove the speaker cover to reveal the ribbon cable connected to the screen.
Step 4

– First up, let’s get that old screen off! Grab your iOpener or heat gun and a trusty pry cart. Work your way around the edges to gently lift off the old display.
– Make sure to check all around the edges, cleaning away any leftover adhesive. A clean front makes for a happy new screen!
– Now, slide that ribbon cable into the gap of the frame and get ready to assemble it all together.
– Time to add some fresh adhesive around the phone’s frame. Carefully place your new screen on top, and voila!
Step 5

– Wrap it all up tight and grab those trusty clamp holders to press around the entire phone screen. Make sure it sticks like your favorite sticker!
– Now flip that phone over and tuck all those ribbon cables back into their cozy spots. Double-check that your shiny new screen is ready to rock!
– Seal the back cover with some fresh adhesive and use those clamp holders again to ensure everything is snug as a bug in a rug.
– No clamp holders? No problem! Rubber bands can come to the rescue!