Samsung Galaxy A20 Motherboard Replacement Guide: Step-by-Step
Duration: 45 minutes
Steps: 4 Steps
If your Samsung Galaxy A20 is throwing a tantrum with frequent overheating, pesky WiFi issues, or a display that’s not quite right, it might be time for a motherboard swap! Overheating can mess with the motherboard, WiFi glitches could hint at module troubles, and display hiccups often trace back to faulty motherboard parts. When software troubleshooting just isn’t cutting it, swapping out that motherboard can bring your device back to its happy place. If you need help, you can always schedule a repair.
Step 1


Before you dive in, be sure to unplug and power off your device. Safety first, friends!
– First things first, let’s get that SIM card and its tray out of the way.
– Next, grab your trusty iOpener or a heat gun and warm up that adhesive holding the back cover in place.
– Once it’s nice and toasty, slide an opening pick into the seam between the back cover and chassis.
– Now, gently glide that pick all around the perimeter like you’re giving your device a little spa treatment.
– Finally, it’s time to remove the back cover and reveal the inner workings!


Step 2


– First up, let’s tackle those thirteen 3.6 mm Phillips screws holding the midframe in place. Get them out of there!
– Now, grab your trusty opening pick and gently pry out the midframe. You’ve got this!
Step 3

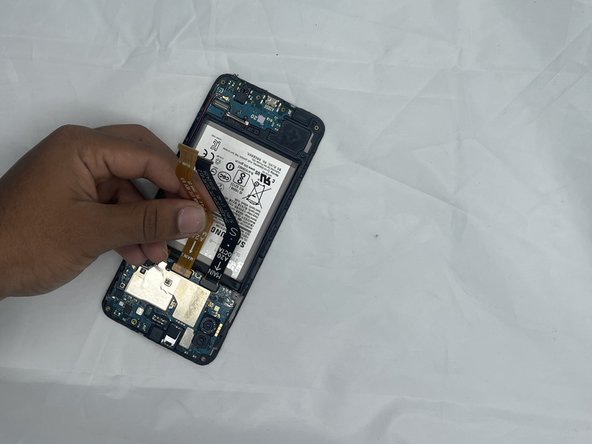
– Grab your trusty opening tool and gently wiggle it to lift those two motherboard press connectors. You’ve got this!
Step 4

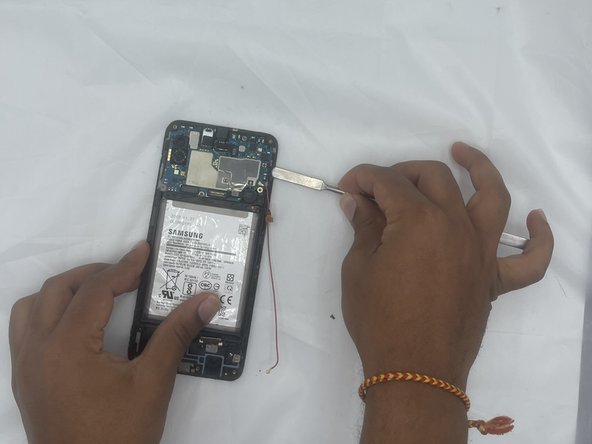
– First up, grab your trusty screwdriver and unscrew that lone 3.6 mm Phillips screw holding the motherboard in place. You’re almost there!
– Next, take an opening pick and gently pry up the motherboard. Just a little nudge is all it needs!
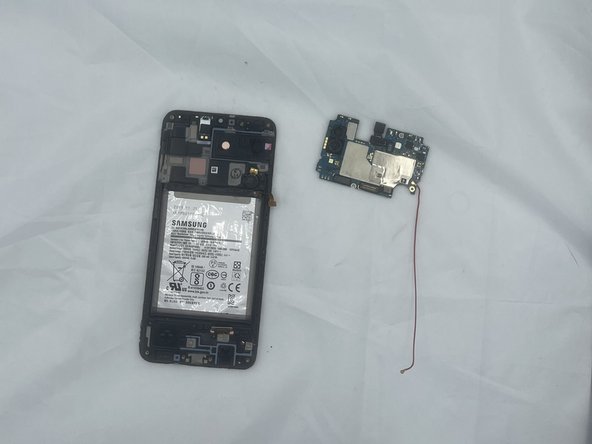
– Finally, lift out the motherboard and give yourself a pat on the back. You’re doing great! If you need help, you can always schedule a repair.