DIY Macintosh PowerBook 165c Keyboard Replacement Guide
Duration: 45 minutes
Steps: 16 Steps
Get ready to breathe new life into your device by swapping out that tired or broken keyboard! Let’s dive in and tackle this together with some easy steps. If you need help, you can always schedule a repair.

Step 3

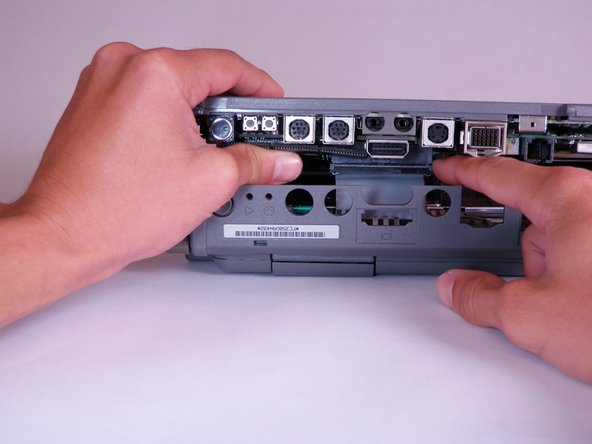
– Flip your device so it’s right side up, with the back facing you. Let’s get to work!
– Go ahead and pop open that Input/Output (I/O) door. It’s time to dive in!
Step 4

– Gently shape the door into a nice arch until one of those little pins decides to take a vacation from its slot.
– As soon as a pin is feeling free, go ahead and lift that I/O door right off your computer.
Step 5

– Flip your computer over so the bottom is up and the back is facing you. You’ll want to be able to see that Macintosh label while you work your magic.
Step 6

– Grab your trusty T8 torx screwdriver and get ready to tackle that 6.8mm screw hanging out above and to the right of the modem jack.
– Give it a twist to the left to pop that screw out!
Step 7

– Grab your trusty T10 torx screwdriver and let’s get to work! Carefully unscrew those four screws that are 18mm long from the lower case. You’ve got this!
Step 8

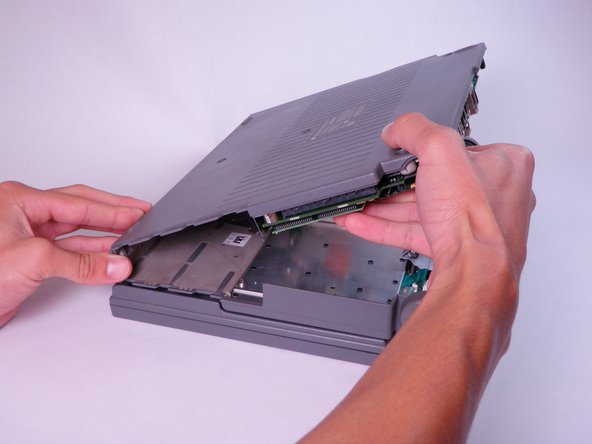
Heads up: You’ll want to hold off on tackling the lowercase until those two plastic clips at the front corners are set free. Check out the next step for all the deets.
– Get cozy with your device by placing your hands on the lower case, just above the I/O panel. Now, gently lift that lower case up a few inches like you’re giving it a little hug.
– Now, it’s time to free the large, gray interconnect ribbon cable located just behind the I/O panel. Give it a little nudge to release it and keep the good vibes going!
Step 9

– Ready to take this baby apart? Place your thumb on the upper case, inside the empty battery slot, and your index finger near your thumb on the left side of the lower case.
– Time to work your magic! Pinch your thumb and index finger towards each other to release the clip. Keep the momentum going by using your index finger to push the lower case upwards.
– Voila! Lift the lower case with a smile to remove it like a pro.
Step 10
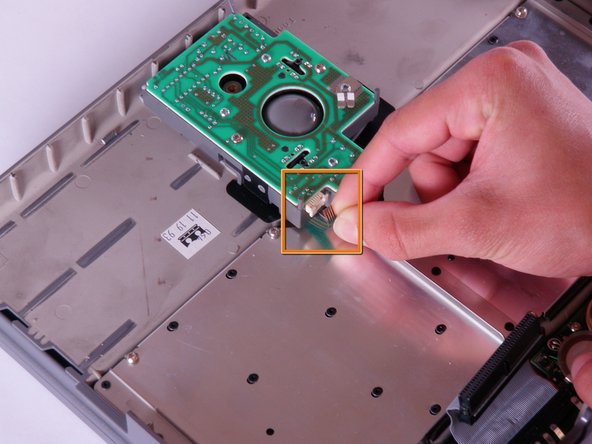

– First up, find the trackball assembly! It’s hanging out in the upper case, and you can spot it thanks to its nifty green circuit board.
– Next, give the white tab fastener a little tug on each side to open it up. Don’t forget to carefully remove that green and silver ribbon cable!
– Now, gently pull the green and silver ribbon cable away from the open tab fastener. You’re almost there!
Step 11

– Grab your trusty T8 torx screwdriver and show those six, 6.8mm long screws who’s boss on the top of the green circuit board.
Step 12

– Let’s kick things off by removing all four components of the trackball assembly. Lift each one upwards with care and precision!
– What are these four components, you ask? Well, they’re the green circuit board, a cool metal support, the trusty track ball, and the reliable casing.
Step 13


– First up, let’s tackle that leftmost white tab fastener in the lower left corner! Just pull up on each side like you mean it.
– Next, with a gentle touch, remove the ribbon cable by carefully pulling it away from the tab fastener you just opened. You’ve got this!
Step 14
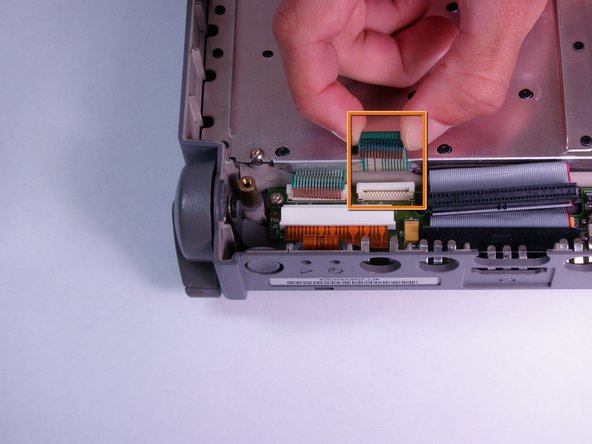
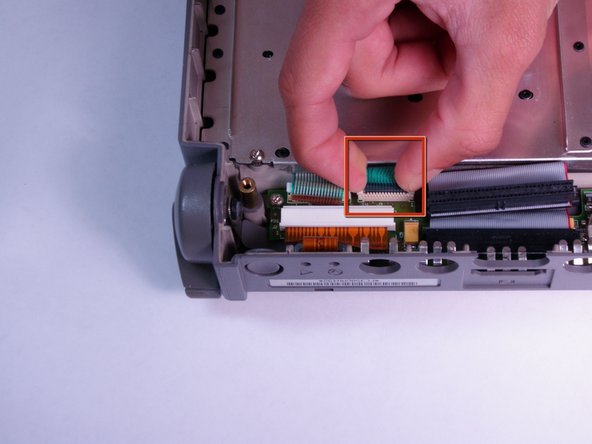
– Gently lift up on both sides of the two small white tab fasteners on the right side. You’ve got this!
– Carefully detach the green and silver ribbon cable from the tab fastener. Easy peasy!
Step 15

– Grab a T8 torx screwdriver and let’s tackle those seven screws! They’re 6.8mm long and holding the metallic panel tight. Time to loosen them up and get your device one step closer to being fixed!
Step 16

– Gently lift the keyboard straight up and away from the main body of your computer, like you’re giving it a little hug goodbye.