Apple Watch Adhesive Replacement Guide: Step-by-Step Tutorial
Duration: 45 minutes
Steps: 10 Steps
Hey there! Just a friendly reminder to take your time and be careful while working on your device. If you run into any bumps along the way, don’t hesitate to reach out for help. You can always schedule a repair if you need a hand!
Removed your Apple Watch’s screen and don’t need to replace the Force Touch sensor? This guide is your go-to for installing a strip of pre-cut adhesive and sealing your watch closed. If you need help, you can always schedule a repair
Step 1


– Grab a plastic opening tool and gently scrape away the adhesive from the back of the screen. You’ve got this!
Step 2


After you’ve peeled away all the adhesive bits, give your screen a little spa treatment by cleaning off any leftover residue with an alcohol-dabbed q-tip. If you need help, you can always schedule a repair.


Step 4


– Place the adhesive tape around the Force Touch sensor, right at the edge of the case where the screen sits snugly.
– Begin in one of the corners, getting the tape as close to the wall as you can.
– Use a plastic opening tool to press down on the brown backing paper, ensuring the adhesive sticks securely all around the perimeter.
Step 5


Watch those fingers! Keep them away from the contacts, as the oils from your skin might mess with the connection. Better safe than sorry!
– Grab a trusty plastic opening tool and get those display data and digitizer cable connectors back together. If it feels a bit tricky, remember, you’ve got this! Need a hand? You can always schedule a repair.
Step 6


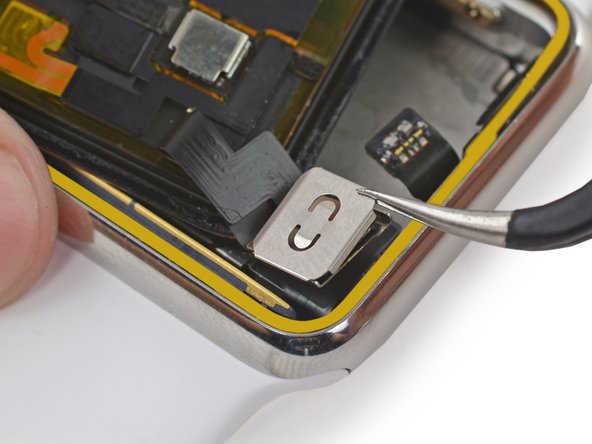
– To get that metal bracket back where it belongs, aim that lone tab for the slot up top of the lower half, and glide it on in.
– Click that upper bracket into place like a pro. Nicely done!
Step 7


– Alright tech guru, let’s match up that battery connector with its partner on the cable inside the watch’s cozy little home.
– Grab those trusty tweezers and gently nudge the two connectors until they unite like a tech-savvy love story.
Tools Used
Step 8


If your new battery comes with adhesive already attached, go ahead and peel off that protective tab. It’s time to get sticky!
Now’s the perfect moment to see if your watch springs back to life! If it doesn’t light up, take a second to check all three connectors and give it another shot.

Step 10


Feeling fancy? You can wrap some screen vice clamps around your device for a snug fit and to help seal that new adhesive like a pro. If you need help, you can always schedule a repair.
