How to Replace Hard Drive in Asus K200MA-DS01T Laptop
Duration: 45 minutes
Steps: 14 Steps
Hey there! Remember to handle your device with care; it’s not a football! If things get a bit tricky or you feel like you need an extra set of hands, don’t hesitate to schedule a repair. We’ve got your back!
Ready to swap out that hard drive in your Asus K200MA laptop? You’ve come to the right place! This guide is here to walk you through the process step by step. Remember, if you need help, you can always schedule a repair.
Step 1


– Alright, let’s get this party started! With the opening facing you, gently flip your laptop over and let’s tackle that back panel. First up, you’ll need to remove these screws:
– Six 4mm Phillips screws—grab your trusty Phillips #0 screwdriver and get to work!
– And don’t forget the one 12mm Phillips screw right in the center—still using that Phillips #0 screwdriver, of course!
Tools Used

Step 2


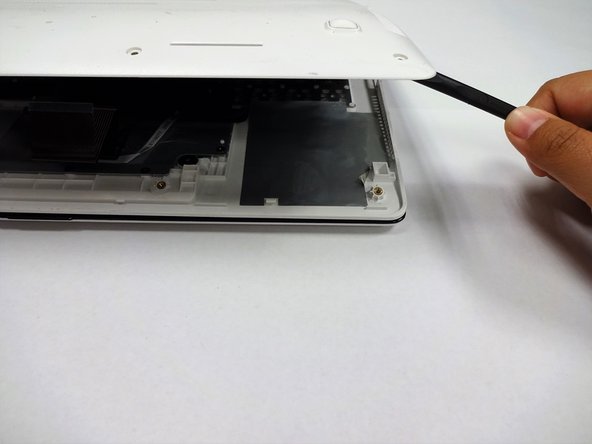
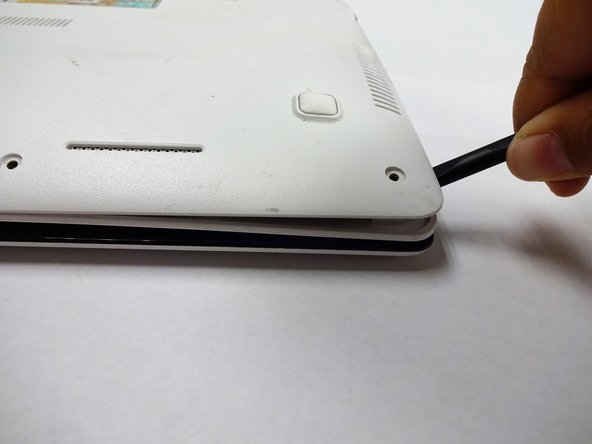
– Grab your trusty plastic spudger and gently pop off the two rubber stoppers near the hinge. This will uncover the hidden screws just waiting to be revealed!
Tools Used

Step 3

– Let’s get started by taking out some screws:
– You’ll need to remove two 4mm Phillips screws using a Phillips #0 screwdriver. Easy peasy!
Tools Used
Step 4

Grab one spudger and slide it between the back panel and keyboard, then use another one to gently pry it open from a different angle. You’re doing great!
– Grab a trusty plastic spudger and channel your inner strength! With a bit of determination, gently pry the back panel away from the keyboard to set it free.
Tools Used
Step 5

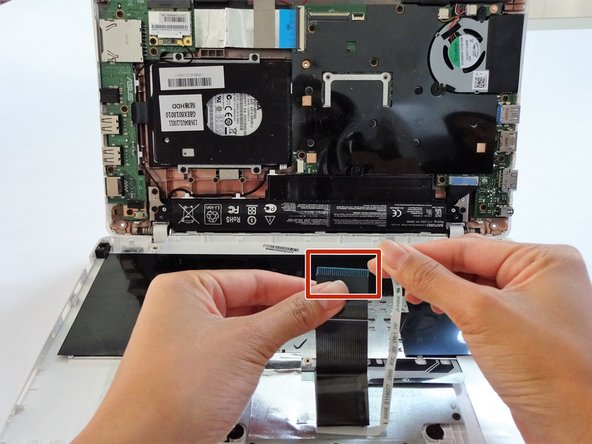
– To liberate those keyboard connectors from the keyboard and back panel, just give the wide keyboard connector a gentle tug to set it free.
– Next, kindly coax the narrow connector away from the keyboard with a gentle pull.
Step 6

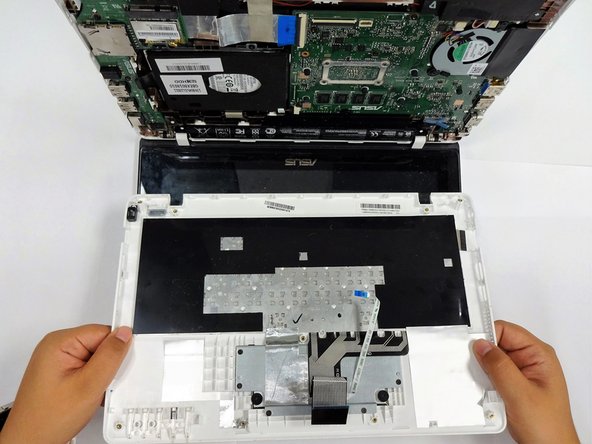
– With the keyboard connectors unplugged, gently lift the keyboard away from the back panel hinges like you’re unveiling a surprise gift!
Step 7
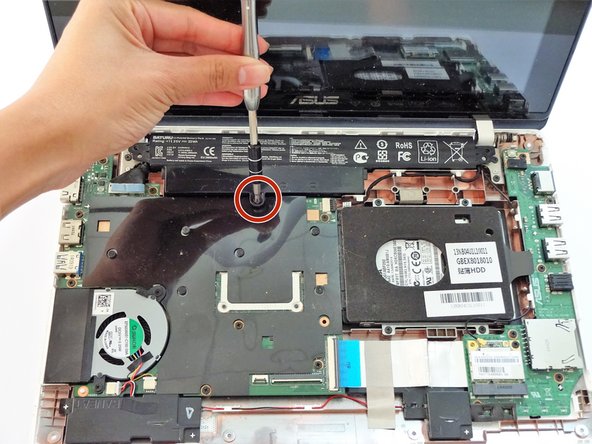

– Alright, let’s get this show on the road! Start by flipping your computer over so the motherboard, that big green beauty, is facing up.
– Next up, it’s time to tackle those screws! Remove the following screws from both the middle and the far ends of the battery:
– You’ll need to take out three 4mm Phillips screws using a Phillips #0 screwdriver. You’ve got this!
Tools Used
Step 8


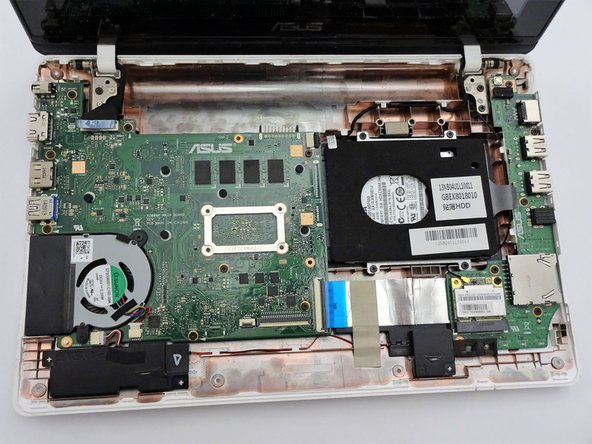
– With a firm grip on the wider left section, gently lift the battery up and away from the computer. You’ve got this!
Step 9
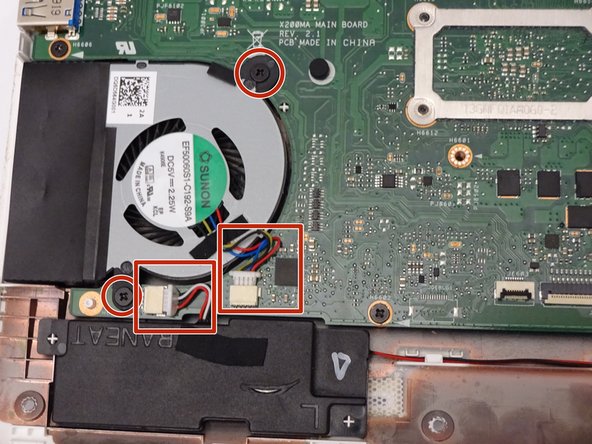

– Find the fan, two screws, and those snazzy color-coded wires hanging out in the bottom left corner of your computer. You’ve got this!
Step 10

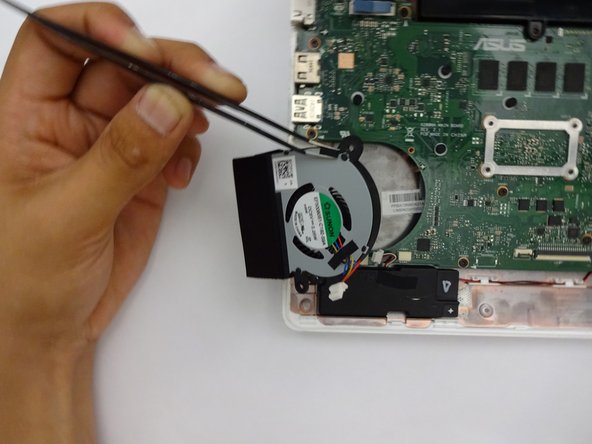
– Let’s get this party started by unscrewing the fan! First up, grab your trusty Phillips #0 screwdriver and remove two 4mm screws.
Tools Used
Step 11

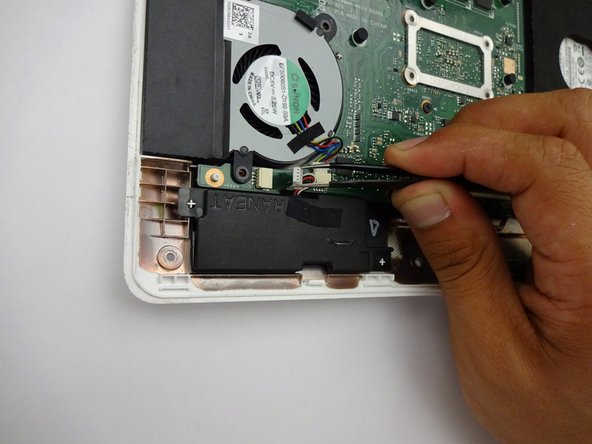
– Gently tug those colorful wires away from the wire slot like you’re giving them a little dance!

Step 13
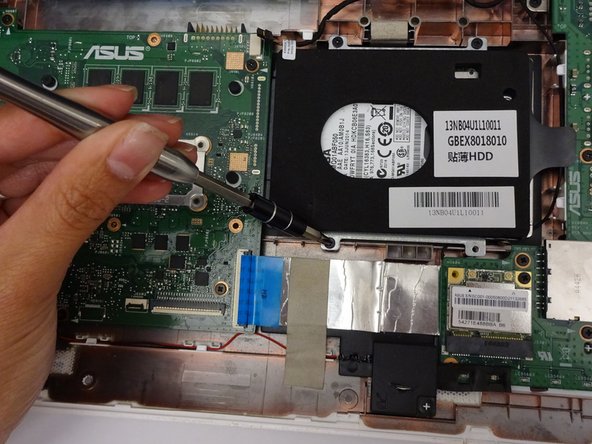

– Let’s get started by taking out some screws:
– Four 4mm Phillips screws using a Phillips #0 screwdriver. Remember, a little twist goes a long way!
Tools Used
Step 14

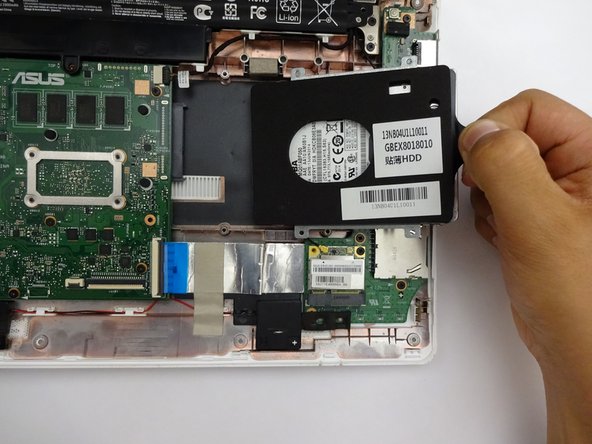
– Gently slide the hard drive to the right and away from the computer, using the handy tag on the right side to assist you. You’ve got this!