How to Replace Asus K200MA-DS01T Fan Guide
Duration: 45 minutes
Steps: 12 Steps
Hey there! Before diving into the repair world, just a friendly reminder: always make sure you’re working in a safe environment. Keep those tools organized and your workspace tidy! If you need help, you can always schedule a repair. Let’s make this a smooth ride!
Ready to give your Asus K200MA laptop a breath of fresh air? This guide is here to help you swap out that fan like a pro! Let’s dive in and get your device running cool again. And remember, if you need help, you can always schedule a repair.
Step 1


– With the laptop’s opening facing you, it’s time to give it a little flip and show its back panel some love! Start by removing these screws:
– Six 4mm Phillips screws – grab your trusty Phillips #0 screwdriver for this task.
– And don’t forget that one 12mm Phillips screw sitting right in the center, also needing your Phillips #0 screwdriver.
Tools Used

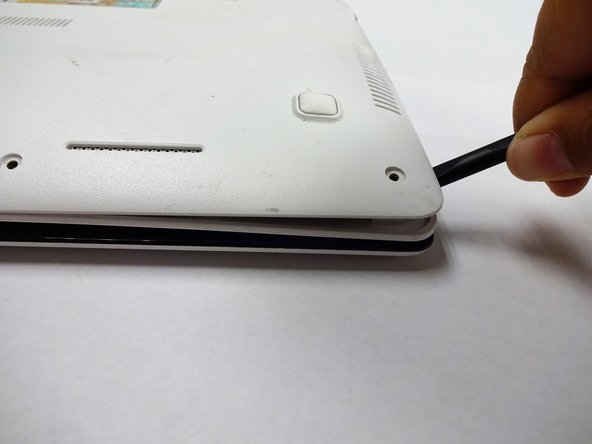
Step 2


– Grab your trusty plastic spudger and gently pop off the two rubber stoppers near the hinge. This will unveil the hidden screws waiting for you underneath!
Tools Used

Step 3

– Let’s get started by taking out some screws:
– You’ll need to remove two 4mm Phillips screws using a Phillips #0 screwdriver. Easy peasy!
Tools Used
Step 4

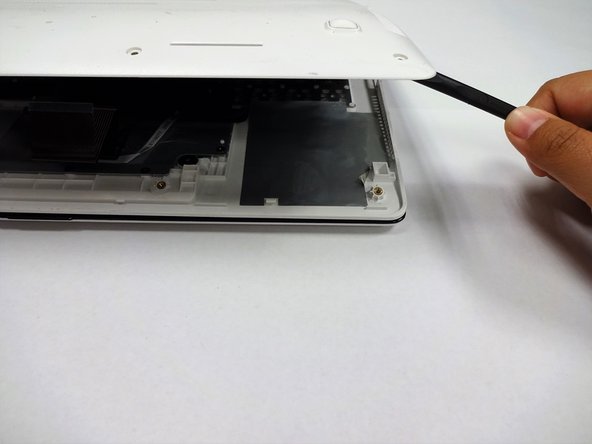
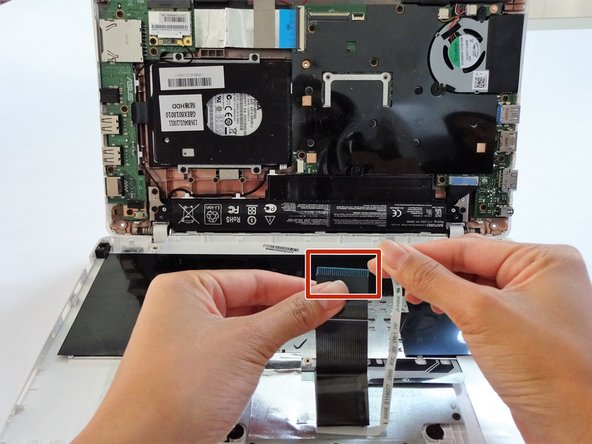
You might want to grab one spudger to slide between the back panel and keyboard, while using another to gently nudge it open from a different angle. Just think of it as a little teamwork for your device!
– Grab your trusty plastic spudger and channel your inner strength! Gently but firmly pry the back panel away from the keyboard to pop it off.
Tools Used

Step 6

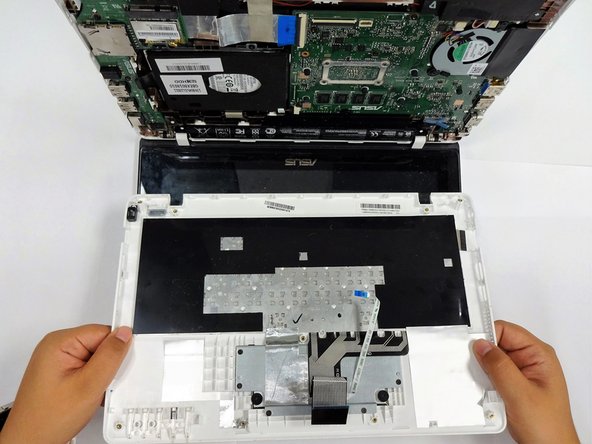
– With the keyboard connectors now unplugged, gently lift the keyboard away from the back panel hinges. You’ve got this!
Step 7
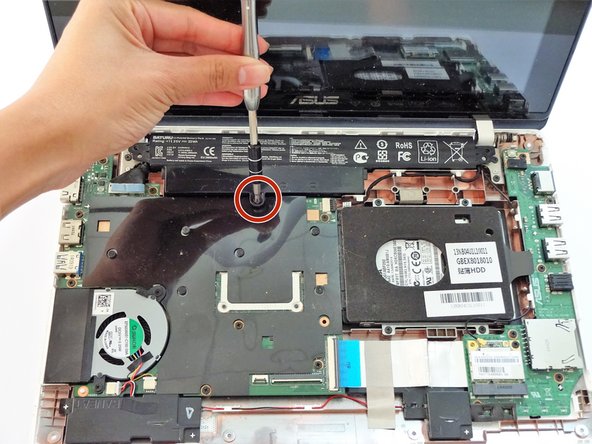

– Alright, let’s get this show on the road! First, flip your computer over so the side with the motherboard—yep, that big green beauty—is facing up.
– Next up, it’s time to unscrew some stuff! Remove the screws from the middle and far ends of the battery:
– You’ll need to tackle three 4mm Phillips screws with your trusty Phillips #0 screwdriver.
Tools Used
Step 8


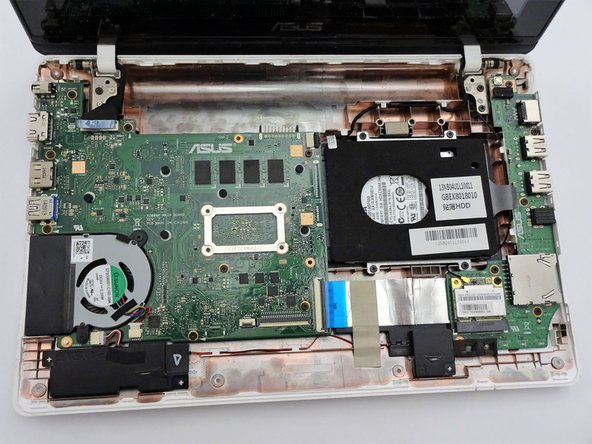
– With a firm grip on the wider left section, gently lift the battery up and away from the computer. You’ve got this!
Step 9
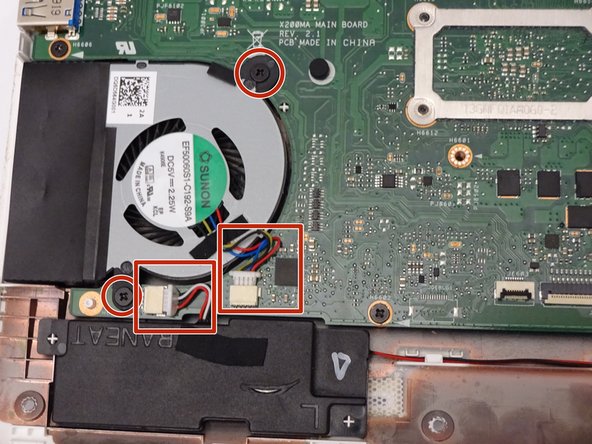

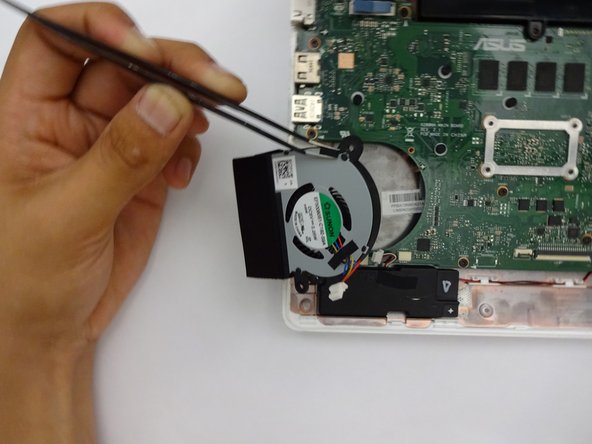
– Find the fan, along with two screws and two color-coded wires, hanging out in the bottom left corner of your computer.
Step 10

– Let’s get things moving! First up, it’s time to take out those screws holding the fan in place:
– You’ll need to grab a Phillips #0 screwdriver and remove two 4mm screws. Easy peasy!
Tools Used
Step 11

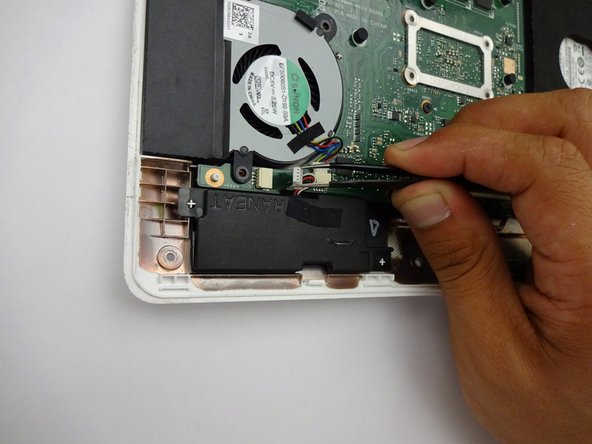
– Gently tug those colorful wires away from the wire slot with a firm grip. You’ve got this!