Asus K200MA DIY Back Panel Removal Guide
Duration: 45 minutes
Steps: 4 Steps
Uh-oh, it looks like something’s not quite right! Don’t sweat it; with just a little bit of TLC, you’ll have your device up and running in no time. Remember, if you find yourself in a pickle or need some extra hands, you can always schedule a repair!
Ready to dive in? Let’s tackle the back panel of your Asus K200MA laptop together! Follow these steps, and you’ll be uncovering the inner workings of your device in no time. If you need help, you can always schedule a repair.
Step 1


– Alright, let’s get this show on the road! With the opening facing you, gently flip your laptop over and let’s tackle that back panel. First up, you’ll need to remove these screws:
– Six 4mm Phillips screws—grab your trusty Phillips #0 screwdriver for this task.
– And don’t forget the one 12mm Phillips screw right in the center, also using your Phillips #0 screwdriver.
Tools Used

Step 2


– Grab your trusty plastic spudger and gently pry off the two rubber stoppers near the hinge. This will unveil the hidden screws waiting for you underneath!
Tools Used

Step 3

– Let’s get started with a little screw action:
– Grab your trusty Phillips #0 screwdriver and remove those two 4mm Phillips screws.
Tools Used
Step 4

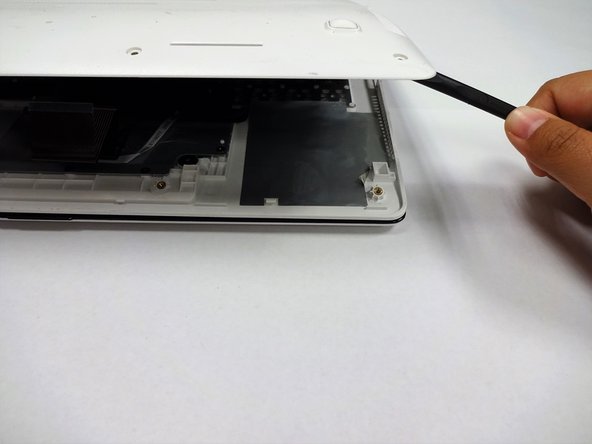
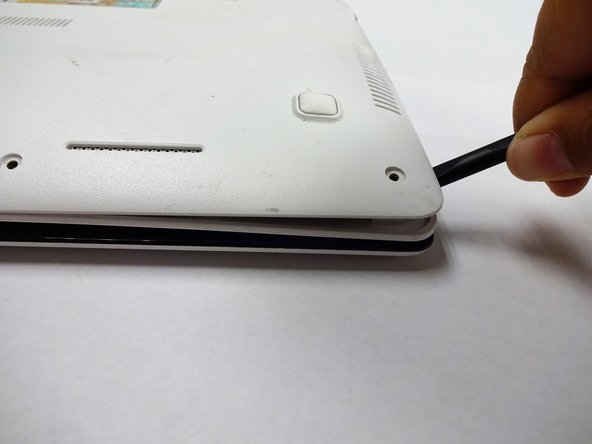
You might want to grab one spudger to slide between the back panel and keyboard while using another to gently pry it open in a different spot. If you need help, you can always schedule a repair.
– Grab a trusty plastic spudger and channel your inner strength! With a bit of determination, gently pry the back panel away from the keyboard to set it free.
Tools Used