How to replace Asus F6A-X2 fan step-by-step guide
Duration: 45 minutes
Steps: 10 Steps
Hey there, tech wizard! Just a friendly reminder to take it slow and steady during this repair journey. If you hit a snag or need a hand, feel free to schedule a repair. You’ve got this!
Step 1

Power down your laptop and unplug any cords. Trying to swap out parts while the laptop is still powered up could lead to a shocking experience or even some serious damage. Let’s keep it safe and sound!
The battery isn’t featured in this snapshot.
– First things first, flip your laptop over so the battery is looking at you. You got this!
– To pop that battery out, place a finger on each of those two black slide tabs. Now, give them a gentle push towards the center of the laptop to unlock it. Easy peasy!
– Now, just slide the battery towards you and lift it out like a pro. You’re on your way to a smooth repair!
Step 2


– Alright, flip that laptop over so it’s looking at the ground! Now, give it a little twist so the battery pack is peeking away from you.
– Next up, let’s tackle those six tiny 1.5 mm Phillips #1 screws on the back panel. They’re just waiting for you to remove them!
Step 3


– Slide your finger into one of the little slots on the bottom panel. You’ve got this!
– Now, with a gentle lift, raise it upwards, and watch as the back panel of your laptop pops off like it’s saying hello!
Step 4


– First up, grab your trusty screwdriver and take out those three 2.0mm Phillips #1 screws holding the metal guard in place. It’s like playing a little game of screw extraction!
– Once you’ve freed the screws, gently lift the metal guard out of your laptop. It’s time for that guard to take a break!
Step 5

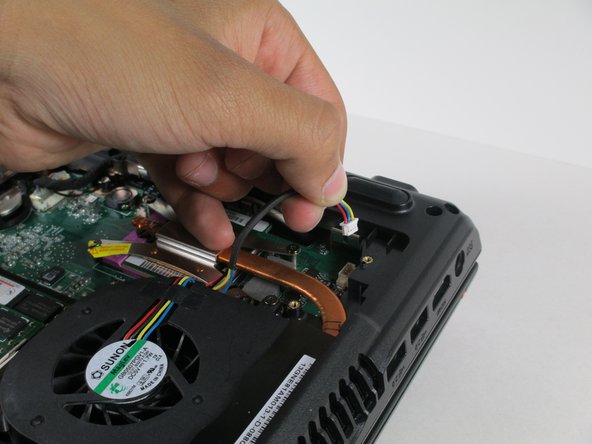
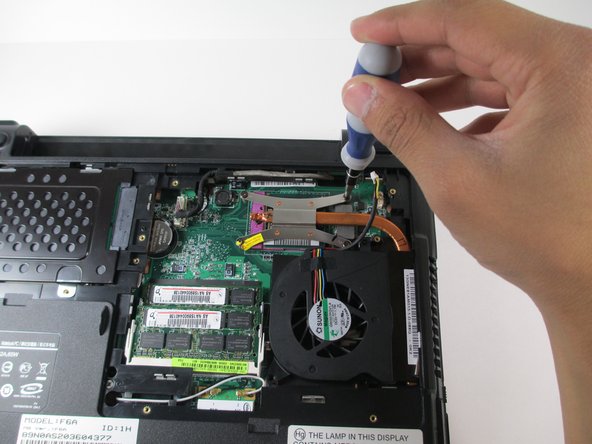
– Gently lift the black cord straight up to disconnect the fan from the motherboard. You’ve got this!
Step 6

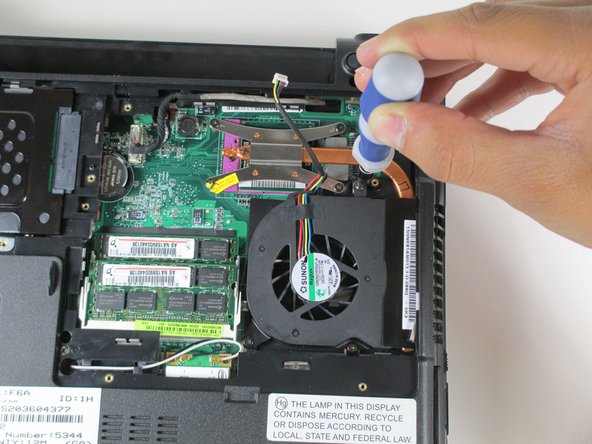
– Take out those 1.5mm Phillips #1 screws that are holding the fan snugly to the motherboard. You’ve got this!


Step 8

– Let’s get those four pesky 1.25 mm Phillips #1 screws out of the way so we can free the heat sink!

Step 10

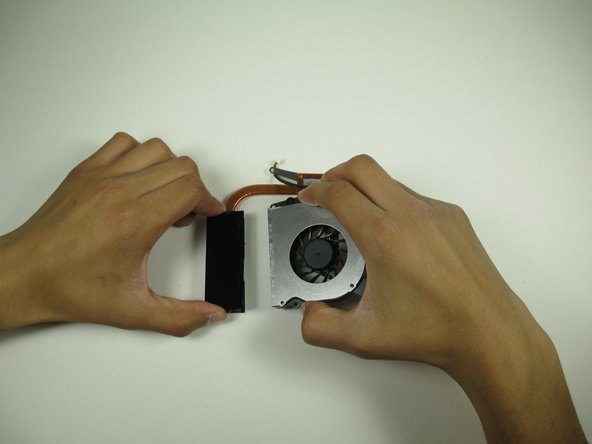
– Turn the fan and heat sink upside down so the shiny metal side of the fan is facing up, then set it down flat.
– Grab your trusty spudger and gently work the flat end underneath the adhesive holding the fan to the plastic, prying it off carefully.
– With the adhesive out of the way, just pull the fan away from the plastic to free it up!
Tools Used