How to Replace Asus F554LA-WS52 Touchpad Guide
Duration: 45 minutes
Steps: 6 Steps
With a little bit of care, swapping out the touch pad is a breeze! All you need is a #0 Phillips screwdriver and a plastic opening tool to get into your Asus notebook and take out the old touch pad. But hey, before you dive in, make sure your notebook isn’t just in need of a good old reboot. And don’t forget to power down your device and unplug it from the charger before you start your adventure!
Step 1


Before you dive in, make sure your notebook is unplugged and taking a little nap! Power it down completely before you start exploring inside.
You’ll need six (6) pieces at 9.6mm and four (4) pieces at 12.7mm. Get ready to rock that repair!
– Time to flip that notebook over and tackle those 10 screws on the back plate like a pro! Grab your trusty #0 Phillips head screwdriver and let’s get to work.
Step 2


– After you’ve successfully removed those screws, gently lift both edges of the plastic keyboard/touch pad cover using a trusty plastic opening tool. You’ve got this!
Step 3

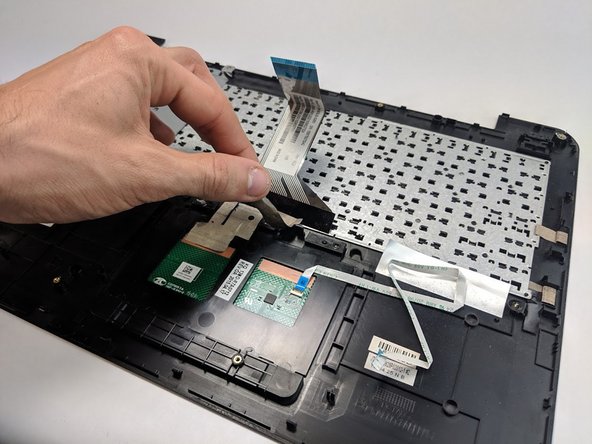
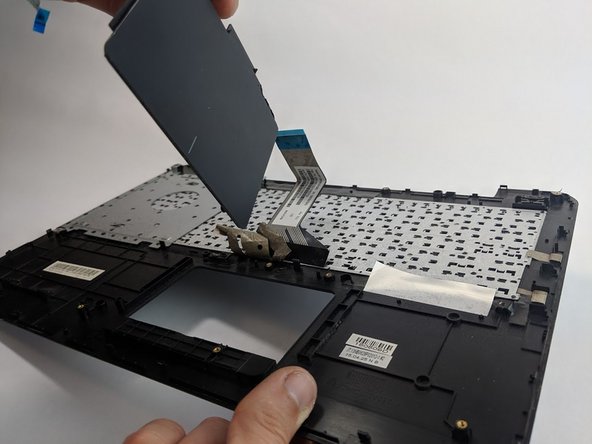
– Gently lift the plastic cover and disconnect the three data cables (not all shown) nestled beneath it, linking the keyboard and motherboard.
Step 4

– After you’ve popped off that plastic cover, give it a little flip!
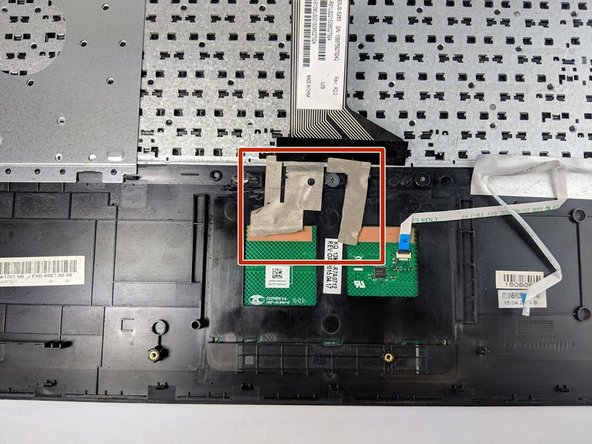
– Now, gently peel away the tape from the underside of your touch pad. You’ve got this!
Step 5

– Find those three 3.2 mm screws hanging out at the top edge of the touch pad and give them a spin with your trusty Phillips #0 screwdriver. You’ve got this!
Tools Used

Step 6
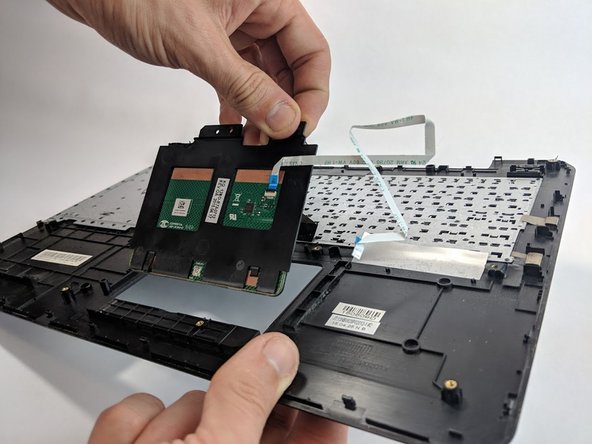

– With a gentle nudge, push the front of the touch pad with your finger to pop it out of its cozy spot in the keyboard.
– Now, simply slide in the new touch pad and you’re all set!


