How to Replace Asus F554LA-WS52 Fan Guide
Duration: 45 minutes
Steps: 9 Steps
Hey there, repair champ! Just a friendly heads-up: take your time with each step and make sure to double-check your work. If you run into any bumps along the way, don’t sweat it! If you need help, you can always schedule a repair. You’ve got this!
If your notebook’s running hot and feeling a bit too toasty, it might be time for a fan swap! This guide will walk you through the steps to replace the fan in your Asus F554LA notebook. Grab a plastic opening tool and a Phillips #0 screwdriver head, and let’s get this cooling system back in action! And remember, if you need help, you can always schedule a repair.
Step 1


Ensure your notebook is powered down and unplugged from any outlet. Let’s keep it safe while we work our magic!
You’ll need six (6) screws measuring 9.6mm and four (4) screws that are 12.7mm. You’re all set to get started!
– Turn your notebook upside down and get ready to tackle those 10 screws on the back plate using a #0 Phillips head screwdriver. You’ve got this!
Step 2


(Not pictured) Go ahead and disconnect those three cables linked to the keyboard along with the one for the touch-pad. You’re doing great!
– Using a plastic opening tool, carefully lift and detach the back cover to reveal the inner workings of your device.
Step 3


(Not pictured) Time to give that hard drive a little vacation! Go ahead and remove it.
– Grab your trusty #0 Phillips head screwdriver and unscrew those three 5.7 mm screws connecting the hard drive to the motherboard. You’ve got this!
– Now, gently lift out the small rectangular hard drive-motherboard connection board. Easy peasy!
Step 4


– Grab your trusty #0 Phillips head screwdriver and take out those four 5.7 mm battery screws. You’ve got this!
– Now, gently lift out the battery and say hello to your device’s innards!
Step 5


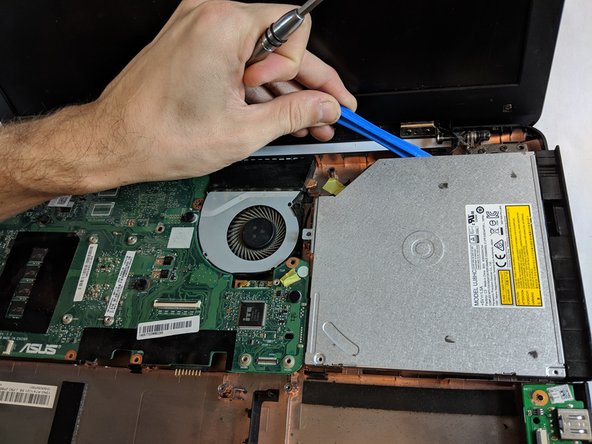
– Time to channel your inner handyman! Grab that trusty Phillips #00 screwdriver and let’s unscrew those two 2.7 mm screws and the one 5.7 mm screw from the CD drive.
– Now, with your plastic opening tool in hand, gently work your magic by prying the drive free from those metal brackets holding it snugly in place.
Tools Used

Step 6

– Let’s tackle this together! Start by grabbing your Phillips #0 Screwdriver and carefully unscrew the eight 5.7mm screws. You’ve got this!
Tools Used

Step 7
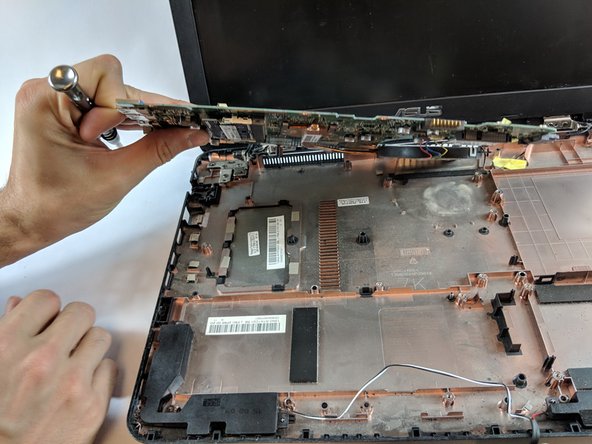

– Grab your trusty Phillips #0 screwdriver and unscrew those two 5.7mm screws from the fan. Just a little twist and they’ll be out in no time!
– Now, gently lift the motherboard and fan to reveal the hidden treasures underneath. It’s like unwrapping a surprise!
Tools Used
Step 8

– Get ready to rock! Grab your trusty Phillips #0 screwdriver and unscrew those four tiny 0.01mm screws holding the heatsink in place. It’s time to show that heatsink who’s boss!
Tools Used