Asus F554LA-WS52 CD Drive Replacement Guide DIY
Duration: 45 minutes
Steps: 5 Steps
Heads up, savvy fixer! Before diving into this repair adventure, make sure you’ve got all your tools ready and the right parts on hand. If you find yourself in a pickle, don’t hesitate to schedule a repair. We’ve got your back!
The Asus F554LA-WS52 notebook has a few components that are a bit tricky to take out and put back in. But don’t worry, we’ve got a step-by-step guide for you! Just grab your trusty plastic opening tool and a Phillips #00 screwdriver head, and let’s get to it! And remember, if you need help, you can always schedule a repair.
Step 1


Ensure your notebook is completely powered down and unplugged from any outlet before you dive in.
You’ll need six (6) screws that are 9.6mm long and four (4) that are 12.7mm.
– Turn your notebook upside down and carefully take out the 10 screws holding the back plate in place using a #0 Phillips head screwdriver. You’ve got this!
Step 2


(Not pictured) Go ahead and disconnect those three cables linked to the keyboard and one for the touchpad. You’ve got this!
– Using a plastic opening tool, carefully lift and take off the back cover to reveal the inner workings. It’s like unwrapping a present, but way more techy!
Step 3


(Not shown here) Go ahead and gently take out the hard drive. You’ve got this!
– Grab your trusty #0 Phillips head screwdriver and unscrew those three 5.7 mm screws connecting the hard drive to the motherboard—it’s like a little treasure hunt!
– Next, gently lift away the small rectangular hard drive-motherboard connection board. You’ve got this!
Step 4


– Grab your trusty #0 Phillips head screwdriver and unscrew those four 5.7 mm battery screws like a pro!
– Now, gently lift out the battery and give it a little wave goodbye.
Step 5


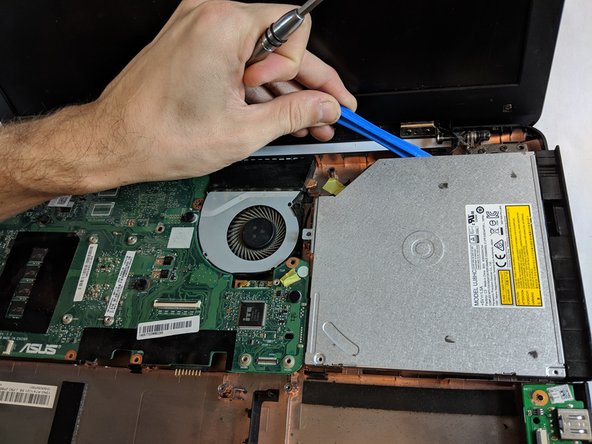
– Grab your trusty Phillips #00 screwdriver and go ahead and unscrew those two 2.7 mm screws and that one 5.7 mm screw holding the CD drive in place. You’ve got this!
– Now, take your plastic opening tool and gently coax the drive out from the metal brackets that are keeping it snug. A little finesse goes a long way!
Tools Used