DIY Guide to Replace HDD SSD in Asus Eee PC 1005PXD-BLK024S
Duration: 45 minutes
Steps: 9 Steps
Hey there! Just a friendly heads up – make sure to double-check all your tools and parts before diving in. If you hit any bumps along the way, no worries! You can always schedule a repair and let the pros handle it. Happy repairing!
Get ready to dive into some fun! These easy-to-follow steps will help you swap out the 2.5’’ HDD/SSD currently hanging out in your ASUS Eee PC, model 1005PXD-BLK024S. Don’t worry, the process is pretty much the same for any laptop sporting a 1001PXD board, so you’re in good hands. If you need help, you can always schedule a repair.
Step 1


– Alright, let’s kick things off! When you’re getting ready to take apart any electronic device, the first step is to make sure it’s unplugged. So, double-check that the AC adapter isn’t still connected to your laptop before diving in.
– Now, flip that laptop over so the battery side is facing you. Give the left slider a little push to the left to unlock it. It should stay in its new position, ready for action!
– Next up, slide the right slider to the right. This one’s a bit of a free spirit, so it won’t lock in place. While you’re pressing that slider to the right, gently slide the battery towards you to remove it. Easy peasy!
Step 2


– Flip your laptop upside down and crack open that lid! You’ll spot four tiny pins hanging out next to the top of the keyboard.
– Grab an opening pick and nudge those pins away from the keyboard. If you’ve got a small flathead screwdriver, that’ll work too. Start with the middle clips for an easier time!
– To keep those pesky clips from locking the keyboard back up, try holding the keyboard vertically while you work, or use another opening pick to lift the keyboard after you’ve pressed the first clip.
Step 3

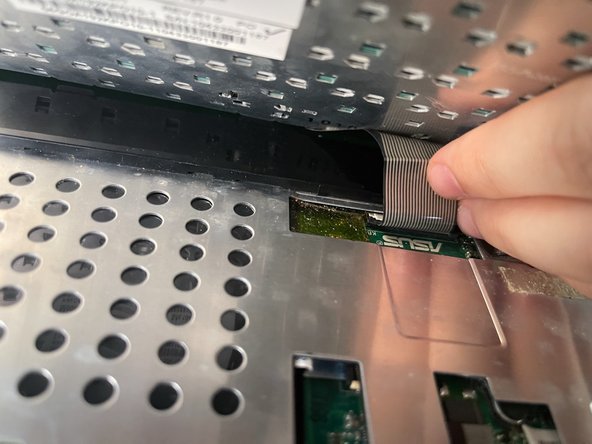

– Gently lift the top part of the keyboard away from the laptop, just a tad.
– Next, reach behind the keyboard and carefully disconnect the ribbon cable from the motherboard. Just give it a little tug to pop it out of the connector.
– Now, slide the keyboard up and out, and you’re all set!
Step 4

– Alright, time to give your laptop a little spa day! First, close the lid and flip your computer over like a pancake.
– Next up, let’s tackle those pesky Phillips screws. You’ll find four of them, one in each corner, just waiting for you to remove them. Grab your screwdriver and let’s get to work!
Step 5

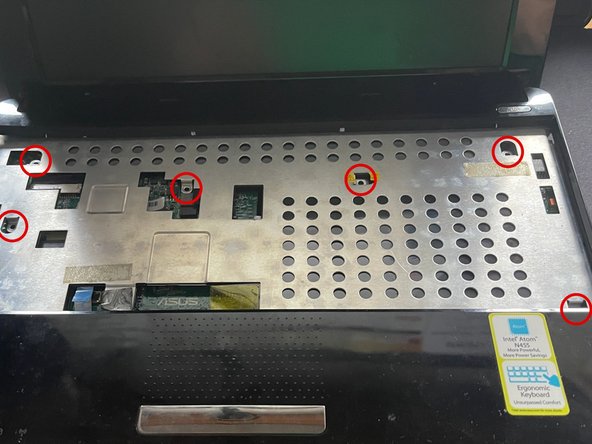
– Alright, let’s flip that laptop upside down and gently disconnect the little ribbon cable from the motherboard. To do this, just lift the black tab on the connector and give that ribbon cable a gentle tug from its blue tab towards you.
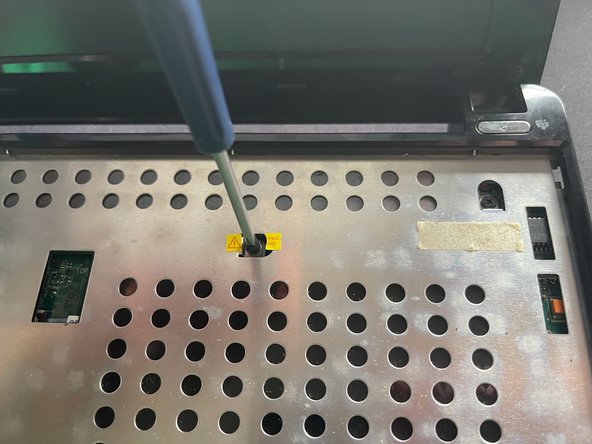
– Next up, grab your Phillips screwdriver and remove those 6 screws holding the metal shield in place. Just a heads up, diving into this step might void your warranty, depending on where you are, so it’s a good idea to check your local laws before you proceed.
Step 6


– Grab a guitar pick or something similar and gently work your way around the frame to pop it apart from the bottom. Take your time with this part!
– Just a heads-up: be super careful not to detach the plastic frame from the metal shield—trust me, I learned that the hard way in one corner! It might break a few of those little plastic tabs, but don’t sweat it too much; it’s not the end of the world if a couple go rogue.
– Once you’ve successfully separated the top from the bottom, set it aside and give yourself a pat on the back!
Step 7
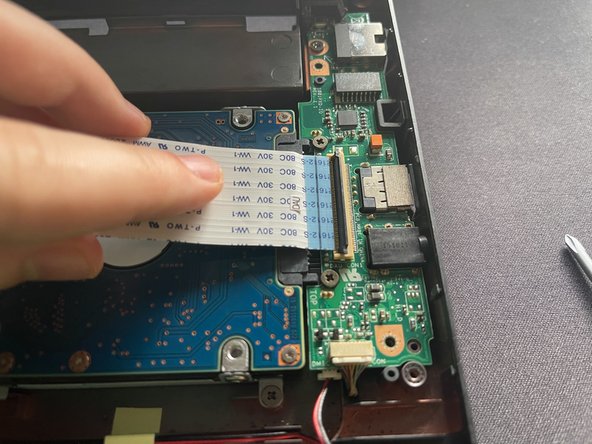

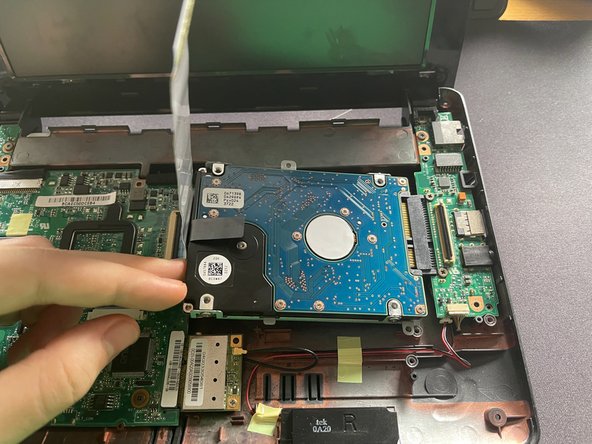
– Alright, let’s tackle that ribbon cable sitting on top of the storage drive! It’s the one connecting the motherboard to a smaller daughter board with the SATA connector and those right-side ports. Time to disconnect it!
– To do this, simply lift the black tab on the daughter board’s connector and gently pull the ribbon cable to the left. Easy peasy!
– Once you’ve done that, you can lift the ribbon cable, which will allow you to remove the 2.5” drive bay a bit later on. You’re doing great!
Step 8

– First up, grab your trusty screwdriver and take out that one lonely Phillips screw holding the drive bay in place. You’ve got this!
– Now, gently lift the ribbon cable and give the left side of the drive bay a little nudge upwards—just enough to slide it to the left and disconnect it from the daughter board. Easy peasy!
Step 9

– Now that you’ve got the drive bay out of the computer, let’s get those pesky 4 Phillips screws unscrewed so we can release the HDD/SSD from its cozy home in the drive bay.
– Time to say goodbye to the old drive! Gently remove it from the bay and pop in a shiny new replacement. You’ve got this!