Asus A53U-ES21 RAM Replacement Guide Step-by-Step Tutorial
Duration: 45 minutes
Steps: 6 Steps
Hey there! Just a friendly heads-up: be careful while handling those components. A little extra caution goes a long way in keeping your device safe and sound. If you run into any snags, no worries—feel free to schedule a repair for some professional backup!
Think of your computer’s RAM as its supercharged ‘working’ memory! Every time you fire up the operating system or any app, it needs a bit of that memory magic to get things done. The more RAM you’ve got, the more tasks your computer can juggle at once. Upgrading the RAM in your Asus A53U-ES21 to something faster and bigger can really give its performance a nice boost. If you need help, you can always schedule a repair.
Step 1


Double-check that your laptop is powered down and ready for some TLC.
– Turn that laptop upside down so the battery is waving hello to you!
Step 2


– Slide those two sliders outwards like you’re opening a treasure chest! It’s all about that smooth motion.
– With your left hand, gently lift the battery out while keeping the right slider in place. You’ve got this!
Step 3


– Grab your trusty Phillips #1 screwdriver and gently unscrew the 5mm screw that’s keeping the RAM panel snug. You got this!
Tools Used

Step 4
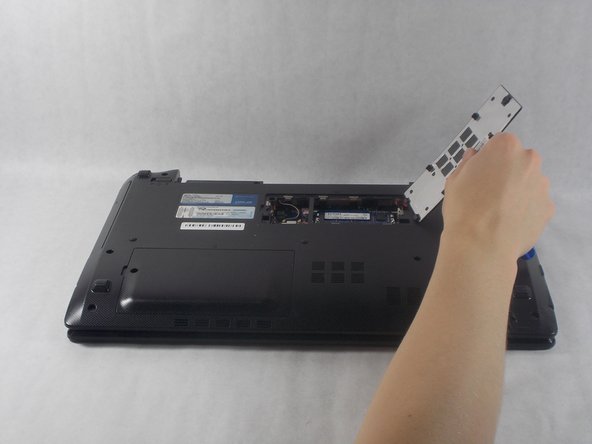

– Gently pry off the panel using your trusty plastic opening tools.
– Carefully glide the tool along the edge to pop open the various catches holding it in place.
Step 5

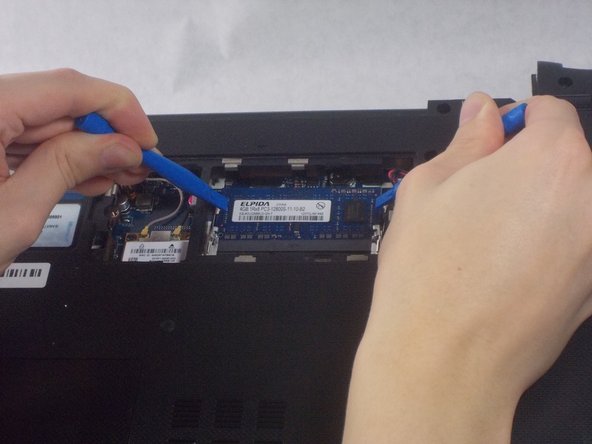
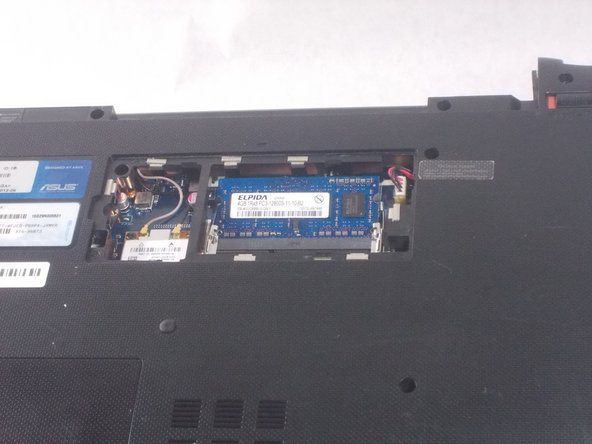
– Grab those trusty plastic opening tools and gently nudge those metal clips holding the RAM in place to the outside. You’ve got this!
Step 6

– Carefully wiggle the RAM free from its cozy little home.