Asus 1015E-DS03 Hard Drive Replacement Guide: Step-by-Step DIY
Duration: 45 minutes
Steps: 14 Steps
Feeling stuck? Don’t worry, our team at Salvation Repair is here to help! If you need assistance, you can always schedule a repair with us. Let’s get this device back up and running in no time!
If your device is crashing more often than a clumsy dancer or you’re losing data like it’s going out of style, it might be time for a hard drive swap! Plus, upgrading can give you extra space for all those cat videos. So, roll up your sleeves and let’s get started!
Step 1

– Grip your laptop with both hands, ensuring the battery is facing up like it’s ready to take off!
Step 2

– Using your thumbs, gently nudge the two tabs located beneath the battery towards each other. You’ve got this!
Step 3

– Gently nudge the battery upwards and slide it out of the laptop, just like you’re giving it a little farewell wave!

Step 5

Watch out for the tiny screws! They’re small enough to play hide and seek, so keep a close eye on them to avoid a game of lost and found.
– After carefully disconnecting the battery, grab your trusty #0 Phillips head screwdriver and start unscrewing those highlighted 3mm screws (4) like a pro!
Step 6


Once you’ve gracefully detached the keyboard from your laptop, don’t forget there’s a ribbon cable still hanging out with the motherboard! Check out the next step before you fully say goodbye to that keyboard.
Don’t be alarmed if you hear some satisfying pops and cracks as you gently remove the keyboard – it’s all part of the process!
– Once you’ve successfully taken out all four screws, flip your laptop over so the keyboard is facing up and ready for action.
– Grab a spudger and carefully work your magic along the edges where the keyboard meets the laptop, gently prying it up on all sides until it pops free.
Tools Used

Step 7

Handle the ribbon cable with care—it’s delicate and doesn’t like to be torn or ripped!
– With the keyboard out of the way, you’ll see the ribbon cable that connects it to the laptop’s motherboard just hanging out. Time to take a closer look!

Step 9


– Carefully slide the strip out of its snug little home in the square slot.
Step 10
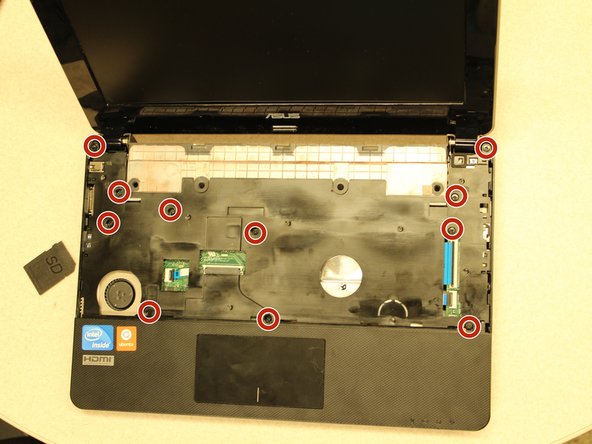

Heads up! One little screw is hiding behind a warranty sticker (not featured here). To move forward, you’ll need to peel off that sticker, which means saying goodbye to your laptop’s warranty. But hey, that’s part of the adventure!
– Now that you’ve successfully popped off the keyboard, take a moment to admire the open space of the base plate. It’s like a mini treasure chest waiting for you!
– Next up, grab your trusty #0 Phillips head screwdriver and remove those 3mm screws (11) like a pro. You’ve got this!
Step 11

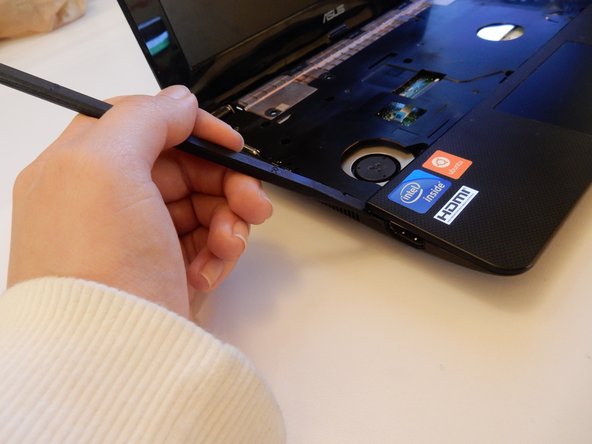
You’ll hear some popping sounds, and while that’s totally part of the process, just be careful when you’re separating the track-pad base from the laptop. You’ve got this!
– Grab your trusty spudger and get ready to ‘pop’ open the track-pad base starting from the corner that’s begging to be freed!
– Once that corner is popped, feel free to use your fingers to pop off the entire track-pad base with ease.

Step 12

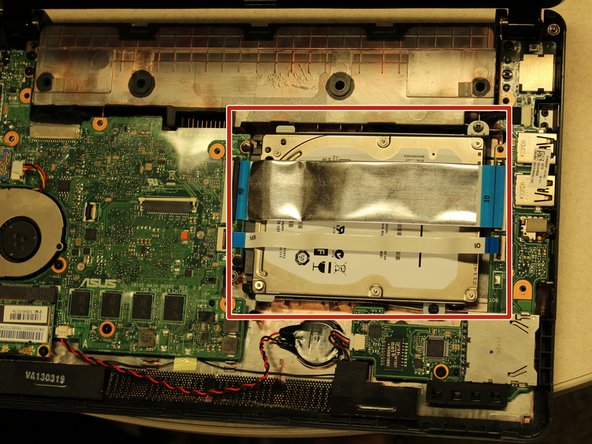
– Time to give it a little lift! Gently raise both sections of the base to reveal the hard drive waiting for you inside.
Step 13

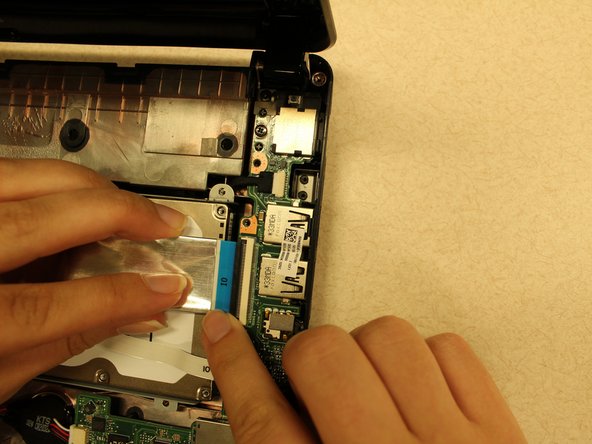
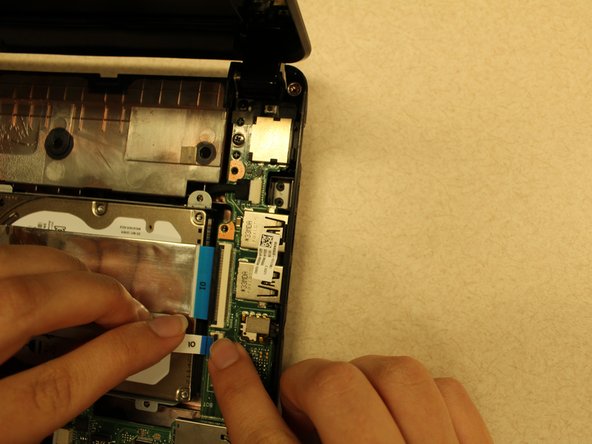
– Gently release those two ZIF connectors labeled ‘IO’. It’s as easy as flipping a pancake! Just swing that white bar away from the ribbon cable, and then you can smoothly pull the ribbon cable out from the connector. You’ve got this!
Step 14


– Carefully slide the hard drive out of the laptop by giving it a gentle nudge to the right. You’ve got this!