How to Replace Acer Nitro Series TouchPad Step-by-Step Guide
Duration: 45 minutes
Steps: 11 Steps
Hey there, repair hero! Just a heads-up: make sure you’re working on a clean, clutter-free surface. We want your repair journey to be as smooth as possible. If you find yourself in a pinch or need a hand, don’t hesitate to schedule a repair. You’ve got this!
Get ready to swap out that TouchPad in your Acer Nitro 5 AN515-53-55G9! If your track pad is feeling a bit under the weather, no worries—it’s totally replaceable. Let’s dive in and bring your laptop back to life! If you need help, you can always schedule a repair.
Step 1


Before diving into the replacement adventure, make sure your laptop is powered down and unplugged. Safety first, friends!
– Give your laptop a little flip so its bottom is looking up at you!
– Spot the RAM tray on the underside of your laptop.
Step 2


– Grab your Phillips #0 screwdriver and get ready to rock! It’s time to tackle that sneaky 9mm screw hanging out in the bottom left corner of the RAM tray covering.
– Show that RAM tray cover who’s boss by gently prying it up with your trusty spudger. You’ve got this!
Tools Used


Step 3


– Locate the Hard Drive tray positioned on the left side of your device.
– Unscrew using a #0 Philips screwdriver.
– Gently lift the Slot covering with a handy spunger.
Step 4

– Grab your trusty Phillips #0 screwdriver to say goodbye to those 9mm screws holding the back cover tight.
– Bid farewell to the hard drive screws and slide that baby out of its snug spot.
Tools Used
Step 5


Make sure to take out the hard drive before diving into the back shell! If it’s built in, it could lead to some cable and component chaos.
Take it easy when separating the shell; a little patience goes a long way to prevent any shell shenanigans!
– Gently detach the back shell from your device, making your way around the edges with care and precision.
Step 6


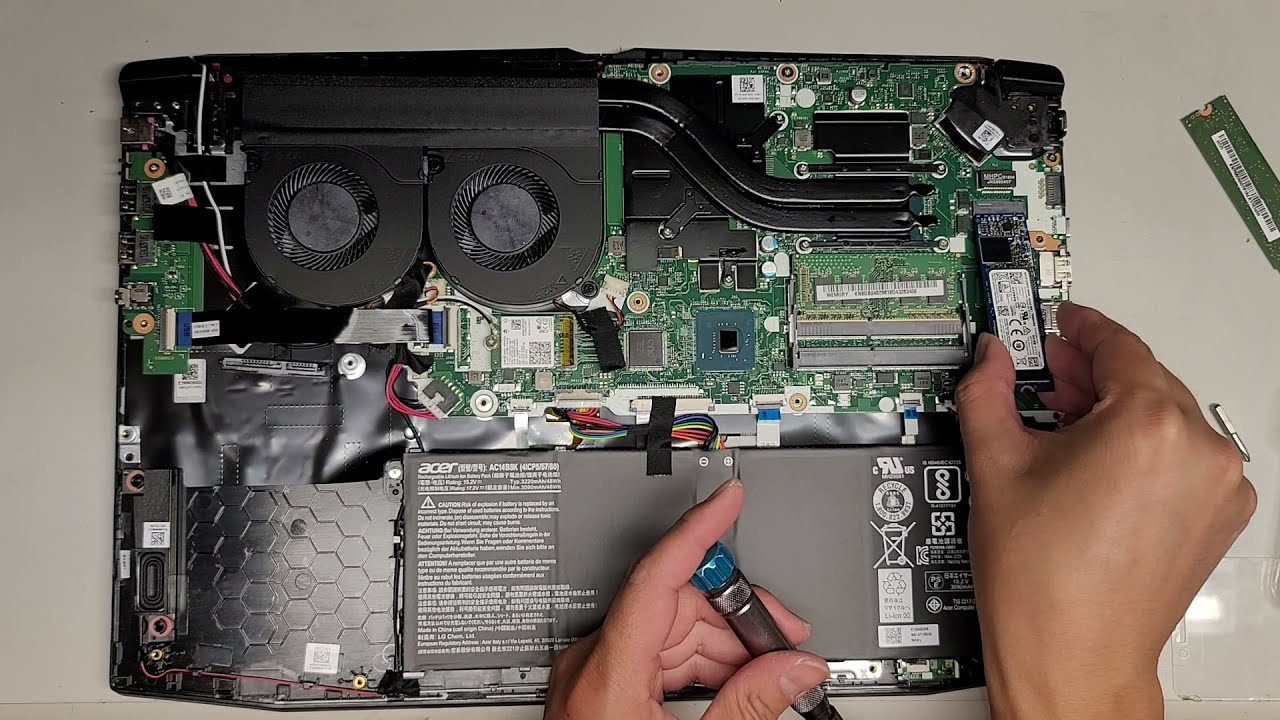
– Let’s get that back shell off your computer! Once it’s off, you’ll see something like this.
– Now, check out the battery – it’s hanging out at the bottom middle of your laptop when you look at it this way.
Step 7


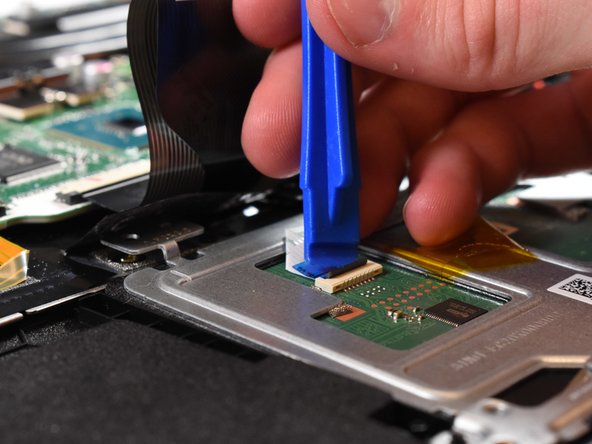
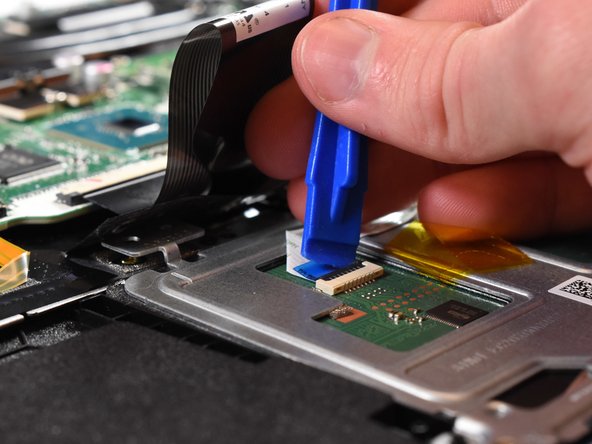
– First things first, find that battery connector snuggled up to the motherboard.
– Once you’ve spotted it, gently slide it out with your fingers like you’re on a treasure hunt!
Step 8

– Pop that battery out of your device!
Step 9
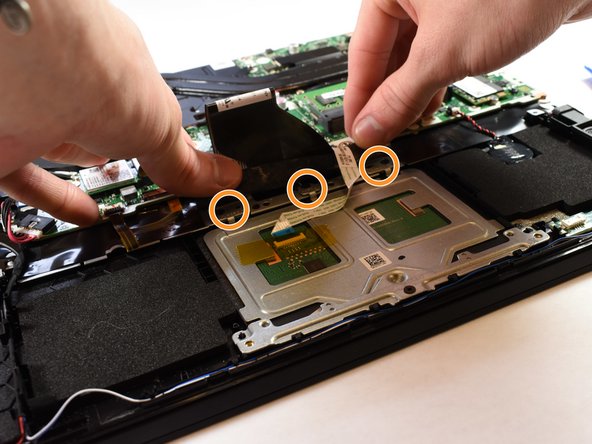

– First things first, find that Touchpad hanging out in the lower middle of your device. It’s like the heart of your setup!
– Next up, grab your trusty screwdriver and locate those 4mm screws that are keeping the Touchpad snug and secure. Time to loosen them up and set that Touchpad free!