Acer Aspire E3-111-C0WA Touchpad Replacement Guide: Step-by-Step DIY
Duration: 45 minutes
Steps: 10 Steps
Hey there, repair superstar! Just a friendly reminder to handle your device with care and keep those screws organized. If you hit a snag, don’t sweat it; you can always schedule a repair. You’ve got this!
Hey there! Ready to give your computer a touchpad makeover? This guide is your ticket to a smoother, more responsive trackpad. Let’s dive in and get your computer feeling brand new!
Step 1


– Time to get your screwdriver ready! Carefully unscrew the 13 indicated screws (6.2 mm) using a Phillips #1 screwdriver. You’ve got this!
Tools Used

Step 2


– Hey there! Time to work some magic. Grab your plastic opening tool and slide it like a pro between the bottom case and the laptop body.
– Now, let’s add some finesse! Use your tool as a cool lever and press down gently to pop the bottom up.
– Keep grooving around the case with your tool, giving it some love taps now and then to raise the bottom with style.
– And lift off we go! Say goodbye to the bottom as you remove it from the laptop. You got this!
Step 3


Before diving into your repair adventure, let’s keep things smooth and safe! Slip on that anti-static wrist strap and clip it to something metal, so you don’t accidentally zap any of those delicate components. Trust us, your device will thank you!
– Give that battery discharge button on the motherboard a good press and hold it for 5 seconds to help it take a little break and drain the battery. You’ve got this!
Tools Used

Step 4


– Unlock the battery’s connector to the motherboard with the plastic opening tool, gently prying at the small plastic tabs on each side of the connector.
Step 5


– Get ready to unscrew the two 6.2 mm Phillips #1 head screws flanking the battery, just like a pro.
Step 6


– Gently lift the battery away from the laptop, like you’re giving it a little hug goodbye.
Step 7

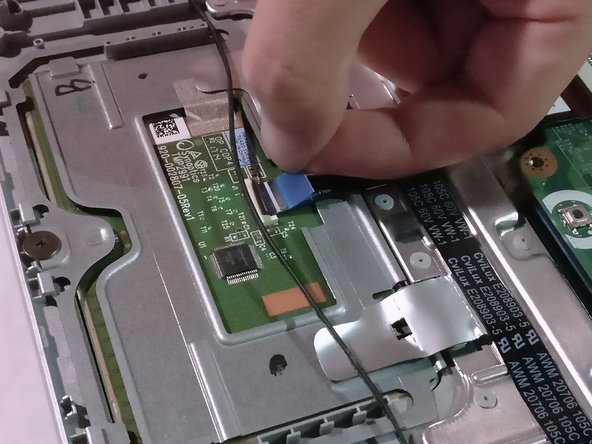
– Gently lift up the cool black tab to set free the ribbon cable hugging the touchpad.
– Give a little tug on the super chill blue tab to say goodbye to the cable chilling in the connector.
Step 8


– Gently lift the shiny silver tape that’s keeping the touchpad cable cozy against the case, and voilà! You’ll uncover two sneaky screws hiding underneath.
Step 9


– Time to get your screwdriver! Go ahead and remove those three 6.2mm Phillips #1 screws that are keeping the touchpad snug in its spot. You’ve got this!
Step 10


Double-check that the tiny strip of conductive tape connecting the copper pad on the PCB to the metal assembly is sticking like it should. You’re doing great!
– Gently lift the touchpad assembly out of its cozy case by holding onto the corners like you’re lifting a fluffy cloud.
– With a smooth, cool move, slide the touchpad out from under the speaker cable in the chassis, making sure to give the cable some love and not let it feel the pressure.


