Acer Aspire E11 Touchpad Replacement Guide DIY Tutorial
Duration: 45 minutes
Steps: 17 Steps
Hey there! Just a friendly reminder: be extra careful while you’re tinkering with your device. Mishaps can happen, but with a little patience and caution, you’ll be back on track in no time. And remember, if you need help, you can always schedule a repair!
Get ready to dive into the world of tech repair! This guide is your trusty companion as you take on the adventure of swapping out the Touchpad on your Acer Aspire E 11. Let’s roll up those sleeves and get to it—you’re going to do great! And if you hit a snag, remember, you can always schedule a repair.
Step 1


– Get ready to unleash your inner detective! Locate and unscrew the thirteen 6.2mm Phillips #1 screws snugly seated on the underside of your device.
Step 2


– Gently pry off the back panel with your trusty plastic opening tool. Take your time and work your way around the device until that back panel decides to part ways with the rest of the gadget.
Step 3


– Give that small black button on the motherboard, just above the battery, a solid press and hold for five seconds. You’re doing great!
Step 4


– With two trusty plastic opening tools in hand, give a firm but gentle grip on the connector that links the battery to the motherboard and pull it out to disconnect. You’re doing great!
Step 5


– Loosen and remove the two 6.2 mm Phillips #1 screws located on the left and right sides of the battery. You’ve got this!
Step 6

– Gently lift the battery out of its cozy home in the casing.
Step 7


– Find the keyboard cable on the motherboard. Grab two trusty plastic opening tools and gently pry the gray tabs on either side of the connector outward. Once those tabs are out of the way, you can smoothly slide the cable off the motherboard like a pro.
Step 8


– Get your hands on a plastic opening tool, and let’s groove as you lift that white hinge up on the touchpad cable connector. Then, gently detach the cable from the motherboard.
Step 9


– Grab a couple of plastic opening tools and gently hug each side of the speaker cable connector. Give it a nice, easy pull to free the cable from the motherboard. You’ve got this!
Step 10


– Peel off the tape delicately embracing the connector for the display cable.
– With a pair of plastic opening tools, cradle each side of the connector and carefully detach the display cable from the motherboard.
Step 11


– Gently loosen the one happy 6.2 mm Phillips #1 screw from the lively wireless chip chilling on the left side of the energetic motherboard.
Step 12


– Get ready to be a pro at this! Time to remove those three 6.2 mm Phillips #1 screws that are holding the motherboard in place.
Step 13

– Head back to the wireless chip and give it a gentle tug to disconnect it from the motherboard’s connector. You’ve got this!
Step 14

– Gently lift the motherboard out of the laptop casing, and give yourself a pat on the back for a job well done!
Step 15


– Let’s kick things off by gently peeling away the touchpad cable that’s hanging out with the computer.
Step 16

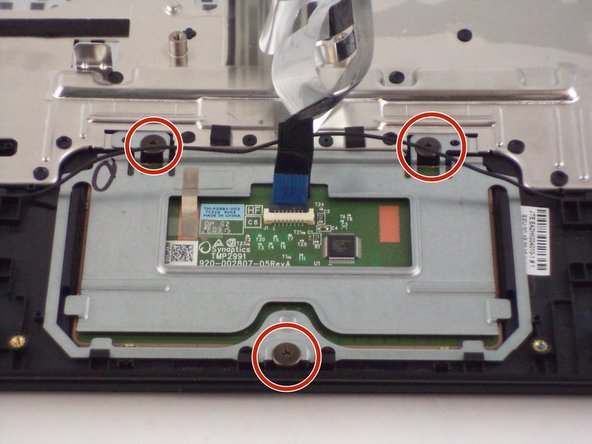
– Gently peel back that shiny silver tape to uncover two 6.2 mm Phillips #1 black screws waiting for your attention.
– Next, go ahead and remove the three 6.2 mm Phillips #1 black screws. You’re doing great!
Step 17


– After you’ve unscrewed everything, grab your trusty plastic opening tools to gently lift and slide out the touchpad. Just a heads up—watch out for the speaker wire that runs across it; we want to keep it in one piece while you work your magic!


