Steam Controller Valve Trigger Mount Replacement Guide
Duration: 45 minutes
Steps: 9 Steps
If you ever notice that your Steam Controller’s bumpers aren’t registering in-game, chances are the plastic mount that holds the trigger and rests over the physical button on the circuit board has snapped. This walkthrough will show you how to disassemble and swap out the faulty part with a 3D printed replacement.
Step 1

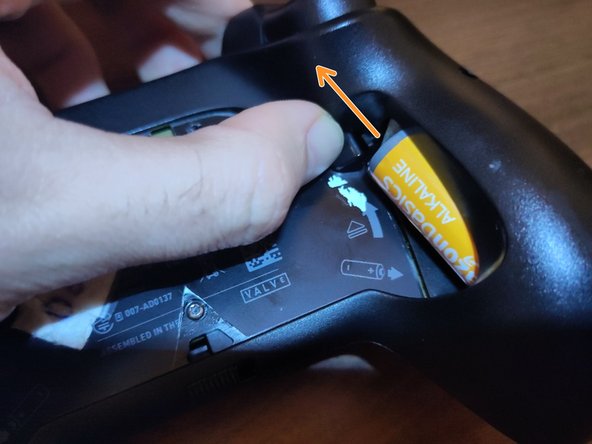
– Gently slide the lever on the bottom to the side to magically release the back cover.
– For extra fun, if the controller is powered by batteries, simply push up on the cool black levers near the battery to pop them out and bid them farewell.
Step 2

Hey there! When working on your device, you only need to loosen the top two screws. The sticker residue will keep them in place on the long shafts. The remaining screws can be removed easily and set aside for later. Keep up the good work!
– Grab a Torx T6 screwdriver and get ready to say bye-bye to those pesky screws hiding inside the back cover. Remove three of them from the inside and four around the handles.
– If it’s your first time popping open this controller, guess what? The screws are playing hide-and-seek under that sneaky sticker. You can either bid adieu to the sticker using some Goo-Gone or get a little adventurous and poke through it with your trusty screwdriver or a thin blade. Find those pre-drilled holes waiting to come out and play!
Step 3

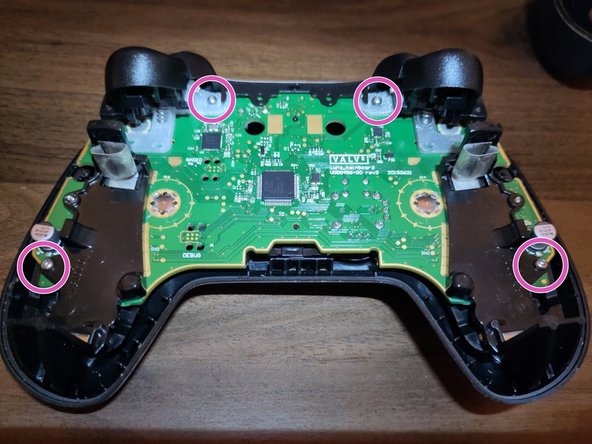
– Time to get that back cover off! Just a heads up, those sneaky battery release levers might be clinging to the back cover, so keep an eye on them or they might take a tumble.
– Grab your trusty Torx T6 screwdriver and let’s tackle those four screws—two are hanging out near the trigger mounts and the other two are lower down by the handles. You’ve got this!
– If the back chassis is being a bit stubborn, feel free to bring in a spudger or prying tool to help gently separate the two parts. No need to stress, just take it easy!
Step 4
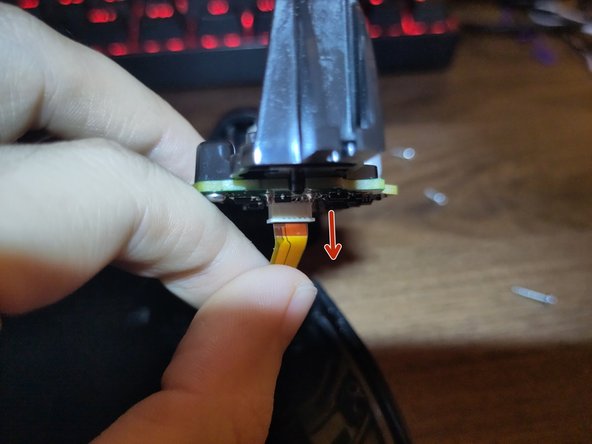

Hey there! Just a heads up: there are two delicate ribbon cables hanging out under the trackpad. Make sure to lift the board carefully to access them, and use some soft tweezers or your fingers to gently disconnect them. You’ve got this!
– Gently lift up the printed circuit board from the bottom with a smile.
Step 5

– Let’s flip over the printed circuit board and unscrew the two Torx T6 screws at the top corners that are holding the trigger mounts in place.
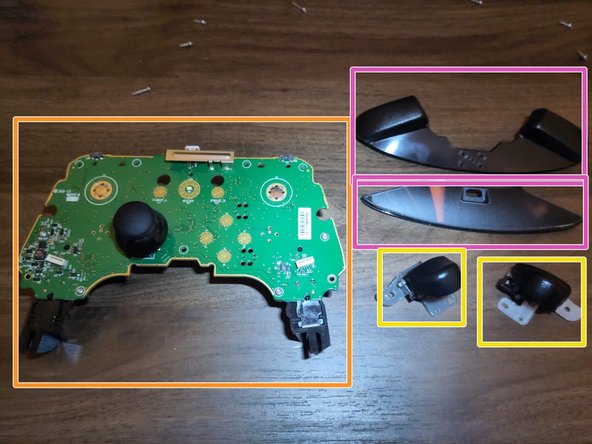
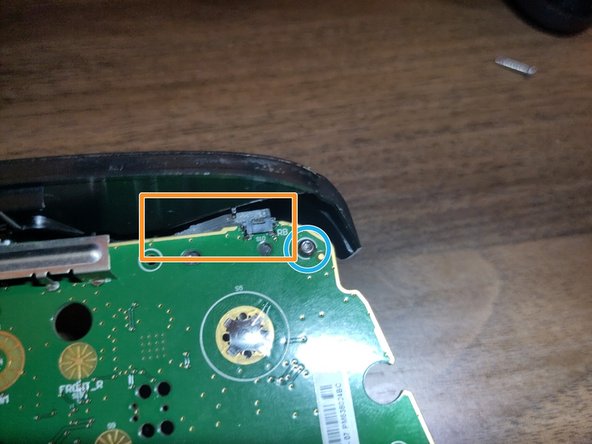
– After removing the screws, here’s what you should see:
– If you don’t spot a rectangular plastic piece sitting on the bumper button of the printed circuit board, it’s likely that your controller’s bumper is broken.
– Take a look at the printed circuit board, trigger mounts, and the top bar assembly that secures the micro USB charging pre-drilled hole and outside bumper buttons. These technically consist of two pieces, but they fit snugly together at four points in the middle.
Step 6
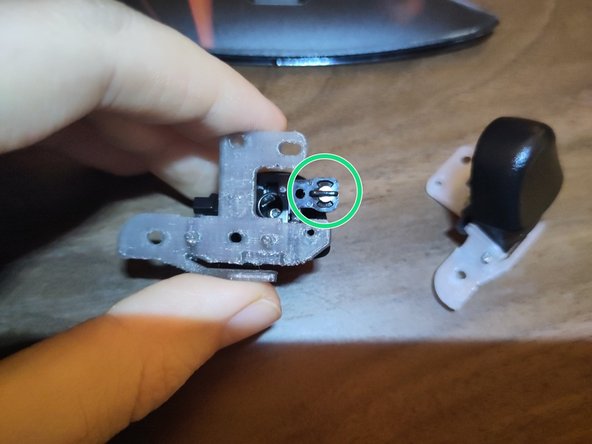

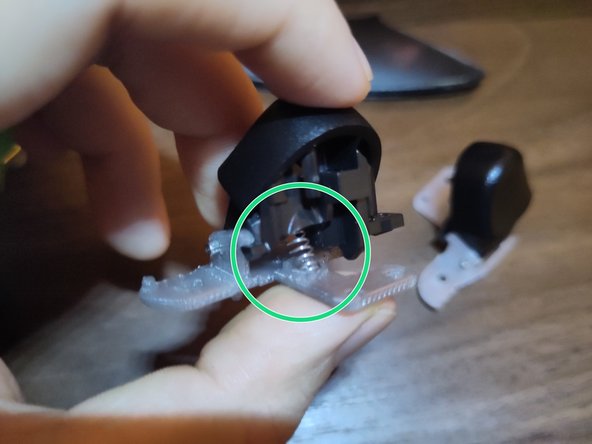
Take it easy when sliding the bar out! There’s a sneaky spring hiding beneath the trigger, so gently pull the trigger from above in a snug space to catch that little guy if it decides to pop out.
The magnet for the hall effect sensor on the board is nestled inside the trigger. If your trigger’s acting up after you reassemble, double-check that the magnet’s still in place.
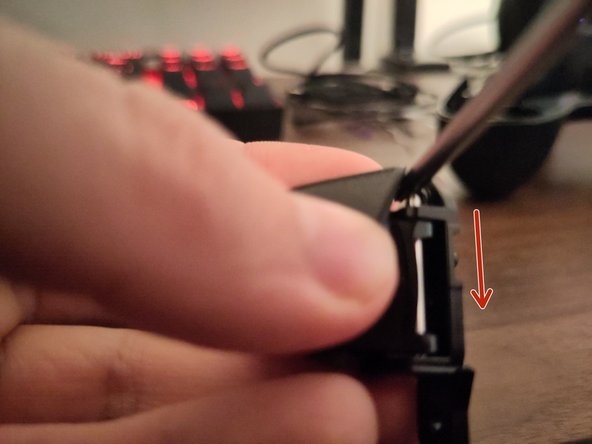
– Alright, let’s dive into the fun! The trigger mount assembly is like a dynamic duo: it consists of the trigger and its trusty sidekick, the ground plane, which also serves as the bumper button. Guess what? We’re going to give that ground plane a shiny new replacement!
– To kick things off, let’s remove the trigger mechanism. Grab a sturdy metal bar and slide it out from its cozy spot. Just pop that bar into the gap on the side, and with a little steady pressure, watch it glide right out to the other side. Easy peasy!
Step 7

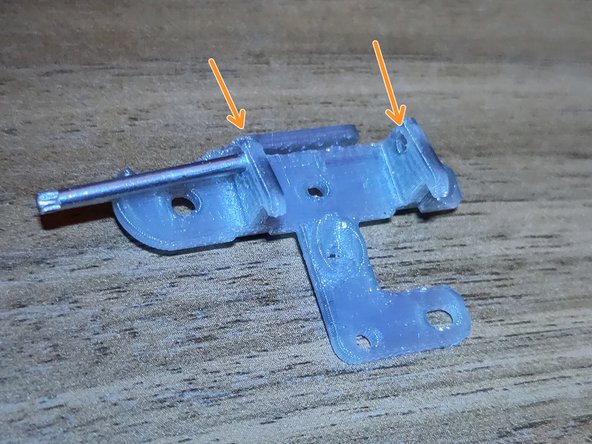
– Check out the disassembled trigger mount beside a cool 3D printed replacement ground plane, which is set to take on the roles of RB or LB for your controller.
– The metal bar from the trigger is going to glide smoothly across those two holes on your replacement part.
– If you find those drilled holes a bit snug or small, no worries! Just add a dash of lubricant grease inside those holes. The bar should slide effortlessly through the trigger mount and the two slots at the bottom of the plane.
– As you place the trigger between the trigger and plane, make sure the spring is nestled between the deep divet on the trigger and the larger half-hole at the top of the L on the ground plane.
– You’ll notice the rectangular flange hanging off the top of that 3D printed ground plane. The original piece is missing this little guy; it broke off, making it tricky to press the bumper button like usual.
– This flange will sit snugly between the actual button on the printed circuit board and the outer bumper button once you reassemble the controller.
Step 8

Here’s a look at the Steam Controller, now sporting its fresh new trigger mounts. Looking good, right?
– Pop those new mounts right onto the corners of the printed circuit board, and while it’s lying flat, grab a screw and tighten it down through the mount and into the board to keep that trigger assembly snug as a bug.
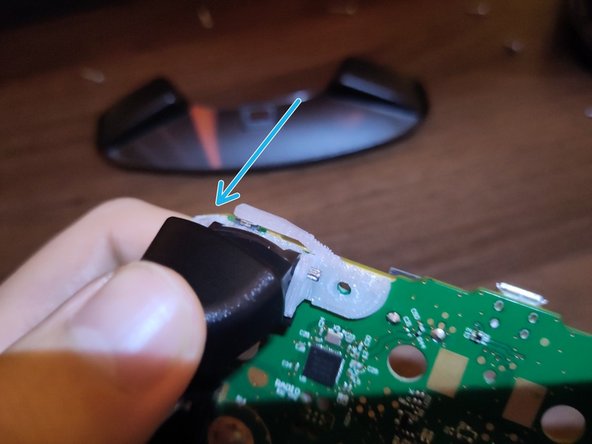
– Gently lay the top of the printed circuit board back onto the front of the controller, and make sure to carefully reattach those trackpad ribbon cables.
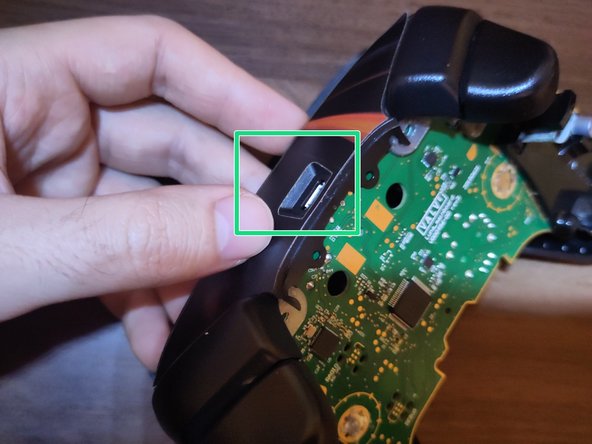
– Lift the top of the circuit board up and place the USB port cover over the printed circuit. Make sure it fits over the bumper levers of the trigger mounts and that the micro USB port is sitting nice and flush.
– Screw those four T6 screws back into the trigger mounts and the back of the PCB through the front chassis, and feel that satisfaction!
– Don’t forget to check that the button mesh and the release lever popper at the bottom are sitting pretty in place.
Step 9

– Alrighty, let’s get that back chassis on smoothly by sliding the release levers into the upper posts on the sides of the grip. Then, gently place the chassis flat and slide the controller right into its cozy spot.
– Don’t forget the tiny spring on the battery cover release lever at the bottom – it’s the key to keeping the battery cover secure when you put it back on.


