How to Replace PlayStation 4 Slim Optical Disc Drive DIY Guide
Duration: 45 minutes
Steps: 16 Steps
Heads up! It’s super important to handle your device with care during this repair. Keep things tidy and organized, so nothing gets lost in the shuffle. If you hit a snag or need a hand, don’t hesitate to schedule a repair!
Get ready to tackle the task of swapping out your Playstation 4 Slim’s disc drive! Just a quick heads up: If your shiny new disc drive didn’t come with its own flex cables, you’ll need to take a little trip down memory lane and switch over the cables from your original drive. You’ve got this!
Step 1


Peeling off that warranty sticker? No worries, it won’t void your warranty!
– First things first, find that little plastic warranty sticker hanging out near the three ports on the side of your console. It’s playing hide and seek!
– Once you’ve spotted it, gently peel it off using any spudger you have handy. It’s like unwrapping a present, but way cooler!
Step 2


– Get ready to unleash your inner repair hero! Twist that 5.0mm screw loose with a TR8 security Torx screwdriver, but remember…lefty loosey!
Step 3


Get ready to show some muscle! Give it a firm push to open up, and you’ll be greeted with a satisfyingly loud click when the bottom cover comes off.
– Flip your Playstation 4 Slim upside down, with the screw side you just removed facing you.
– Gently pry up on the two corners facing you with your fingers.
– Slide the bottom cover towards the back corners and lift up to remove it. If you need help, you can always schedule a repair.
Step 4


You might need to apply a bit of force to pop this open, and you’ll hear a pretty loud click when the top cover snaps off.
– Set your Playstation 4 Slim right side up with the PS logo on top and ‘SONY’ and ‘PS4’ facing you.
– Using your fingers, carefully pry up the two front corners.
– Slide the top cover towards the back corners, then lift up to remove it. If you need help, you can always schedule a repair.
Step 5


– Time to show those screws who’s boss – spin them out with a T8 screwdriver. Left screw – 31.0mm, right screw – 24.0mm. Use a little counter-clockwise magic!
– Say goodbye to the 3.0mm screw next. Grab your trusty Phillips #1 screwdriver and twist it out with a cool counter-clockwise move.
Tools Used

Step 6

– Unscrew those four 16mm Philips screws that are keeping the power supply snug as a bug!
Step 7


– Grab the metal sheet on top of the power supply and give it a gentle lift with your hands to remove it. You’ve got this!
Step 8


– Pop off the antenna from the top of the power supply and gently guide the wire with your fingers through the grooves under the metal panel. If you need help, you can always schedule a repair.
Step 9


– Gently turn the Playstation 4 Slim upside down, giving it a little love tap on the back.
– Using your trusty Phillips #1 screwdriver, carefully unscrew and take out the 4.0mm screw with a smooth counter-clockwise twist. You’ve got this!
Tools Used
Step 10


– Grab a plastic opening tool and gently slide it in between the power supply and the console. Give it a little wiggle to create some space—you’re doing great!
– Now, with a bit of finesse, lift the power supply and set it down on its back on the metal sheet. You’ve got this!
Step 11


– Give that power wire a good tug to unplug it—firmly grip with your fingers or tweezers and pull out!
– Time to evict the power supply—grab it and lift it up with your hands. You got this!
Step 12


– Alright, let’s tackle that 31.0mm screw first. Grab your trusty T8 screwdriver and give it a twist in the counter-clockwise direction to set it free.
– Next up, we’ve got a bunch of 5.0mm screws, 10 to be exact. Get your Phillips #1 screwdriver and show them who’s boss by turning them all counterclockwise.
Tools Used
Step 13
– If you see black plastic rivets instead of screws, grab some pliers and yank them out. They’re just hanging out and not needed.
Step 14


– Lift the metal plate by its edges and gently lift it up with your hands. If you need help, you can always schedule a repair.
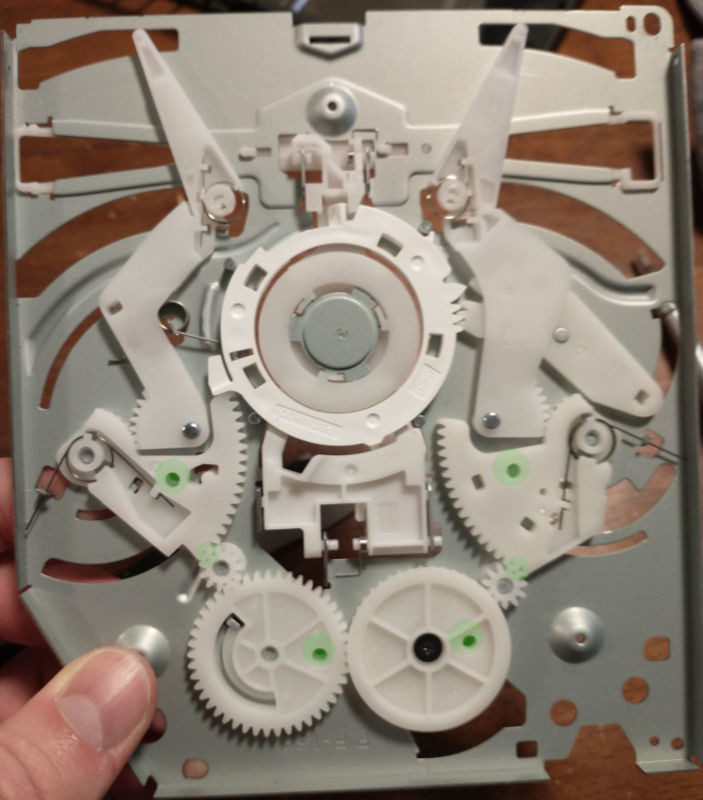
Step 15


– Get ready to rock and roll by unscrewing and removing those two 3.0mm screws using a PH000 screwdriver. Remember, it’s all about that smooth counter-clockwise motion!
Step 16


– Gently pinch the two black plastic ‘claws’ on either side of the disk drive and give it a little lift with your hand to remove it. You’re doing great!