How to Replace PlayStation 4 Slim Bottom Cover Tutorial
Duration: 45 minutes
Steps: 3 Steps
Heads up! Remember to handle those tiny screws and delicate parts with care. If things get tricky, don’t hesitate to schedule a repair with the pros!
Get ready to jazz up your Playstation 4 Slim by giving its plastic bottom cover a fresh new look with this easy-peasy removal or replacement guide. Let’s dive in and make your console stand out in style!
Step 1
Peeling off that warranty sticker? No worries! It won’t void your warranty. You’re still in the clear!
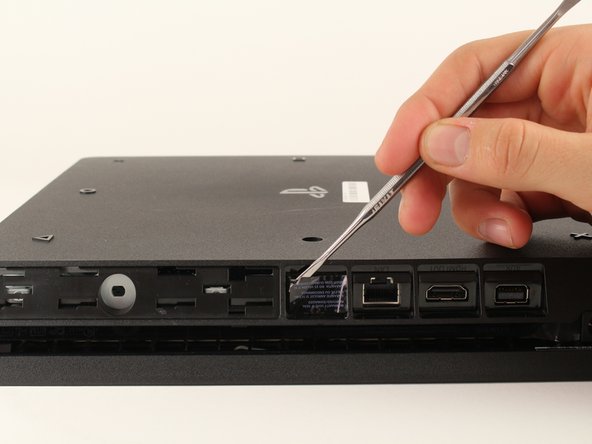
– Find that cute little plastic warranty sticker chilling next to the three ports on the side of your console.
– Show that warranty sticker who’s boss by gently peeling it off with any kind of spudger.
Step 2
– Grab that TR8 security Torx screwdriver and twist out that visible 5.0mm screw with a counter-clockwise spin. If you need help, you can always schedule a repair
Step 3
Opening this up might require a little muscle, and you’ll definitely hear a satisfying click when the bottom cover pops off.
– Now, let’s give your Playstation 4 Slim a new perspective by flipping it upside down, making sure the removed screw side is looking right at you.
– Get those fingers ready as we gently pry up on the two corners facing you.
– Time to unveil the magic underneath! Slide off the bottom cover towards the back corners and lift it up with a smile.


