Microsoft Surface 2 Front Facing and Rear Facing Camera Replacement
Duration: 45 minutes
Steps: 5 Steps
If the front or back cameras took a hit from a drop or are acting up for any other reason, you’ll need to remove them. When you do, remember to carefully lift the retaining flap, not the connection itself, to avoid any extra damage. Take it slow and steady!
Step 1


Be careful when handling the heat gun, keep a safe distance from your Microsoft Surface 2 to prevent any damage or warping.
Don’t touch the metal end of the heat gun, it gets super hot and can give you a nasty burn.
– Start by gently heating around the edges of the screen using a heat gun or the iOpener (this step takes a bit longer). Then, slide opening picks carefully underneath the screen and black edging, making sure to distribute them evenly on each side. With the gap created by the picks, slowly and steadily pry the screen away from the Microsoft Surface 2’s body using a plastic opening tool, working as evenly as possible to avoid damage.
Tools Used

Step 2


Once you lift the screen away from the body, you’ll spot a single ribbon cable attaching the screen to the motherboard.
Sometimes this ribbon cable is held down with a bit of adhesive on the motherboard.
– Grab your trusty plastic spudger and gently nudge the retaining clip away from the display cable—no wrestling moves needed.
– Ease the ribbon cable out of its socket on the motherboard with slow, steady hands. Take your time—no rush, just smooth moves.
Step 3

– Keep your screws close to your Magnetic Project Map, so they don’t play hide-and-seek with you.
– Unscrew the ten 3.45 mm T3 screws from the corners of the black plastic bezel. They’re the ones holding things together!
– Now, tackle the remaining seventeen 4.4 mm T5 screws around the bezel. You got this!
– Once all the screws are out, gently lift the bezel off the device. You’re almost there!
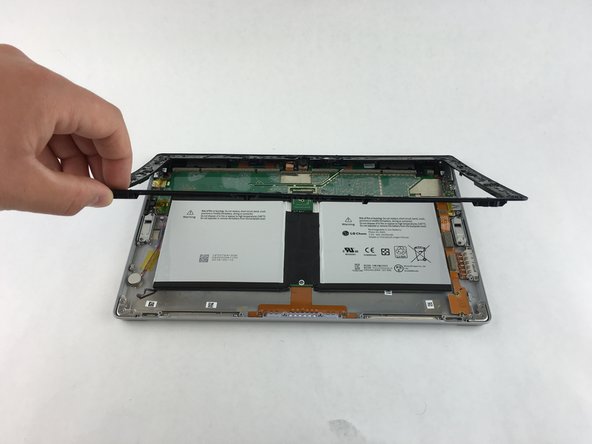
Step 4
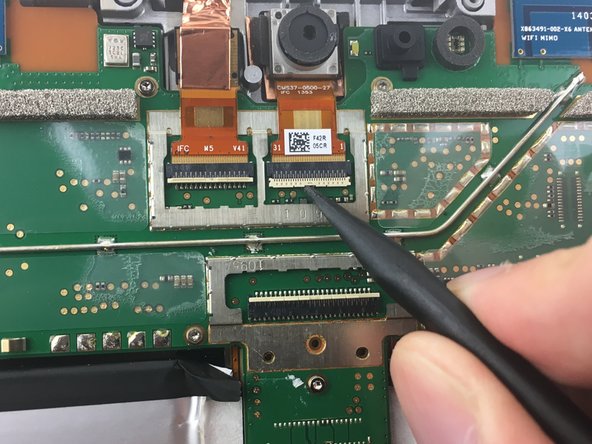

Be gentle here—you’re flipping up the tiny latch, not yanking on the connector!
Heads up: the retaining clip might be stuck to the motherboard with a bit of glue.
– Grab your spudger and gently nudge the retaining clip that’s keeping the camera ribbon cables in place. Give it a little lift, and you’re on your way!
– Next, take that spudger and use it to lift up the small retaining flap on the zero insertion force connector. A little flip, and you’re good to go!
Step 5
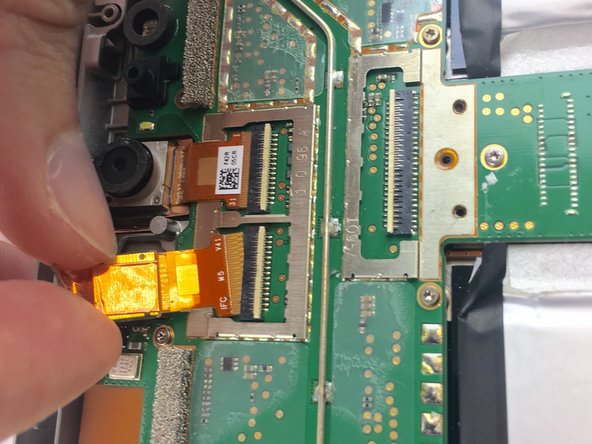

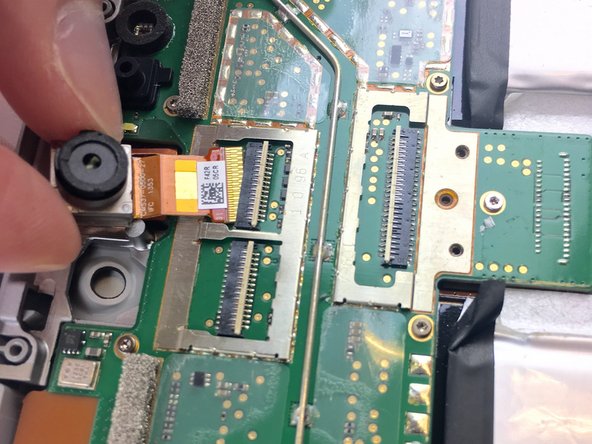
The ribbon cable should slide in or out smoothly—no wrestling matches needed!
– Gently peel away the copper clip securing the rear-facing camera—no need to rush, we’ve got this.
– Carefully lift the rear-facing or front-facing camera from its ZIF connector, and you’re out!