Samsung Galaxy S6 Screen Replacement Guide DIY Step-by-Step Tutorial
Duration: 45 minutes
Steps: 33 Steps
Heads up!
If the frame is looking a bit worse for wear or has taken a bend, it’s time to take action!
Time to give your Samsung Galaxy S6 a fresh look by replacing the display! Your new display assembly combines the AMOLED and digitizer panel, as they’re fused together. This step-by-step guide is perfect for tackling broken glass or unresponsive touchscreens. We’ll focus on swapping out the display while keeping the original frame, logic board, and battery in place. Note: Some replacement screens come with a new frame (a.k.a. chassis), which means you’ll need to transplant all your phone’s internals and install a new battery. Double-check you’ve got the right part before diving in. If your frame is bent or damaged, you gotta replace it to ensure a snug fit for the new screen and prevent damage from uneven pressure. This process involves removing the rear glass, which will destroy the adhesive holding it in place. Follow this guide to reinstall the rear glass. Keep in mind that separating the display from the frame usually destroys the display, so only proceed if you’re set on replacing it. If you need help, you can always schedule a repair.
Step 1
Beware, handling the SIM card tray with too much force may lead to some accidental damage. Be gentle and kind to avoid any mishaps! If you need help, you can always schedule a repair.
– Grab a paper clip or your trusty SIM eject tool and gently insert it into the little hole on the SIM card slot located on the power button side of your phone.
– Give it a gentle press to pop out the SIM card tray like a pro!
Step 2
– Pop out the SIM card tray from your phone – it’s like giving your device a little breath of fresh air!
Step 3
For carousel microwaves: Ensure that the plate spins without a hitch. If your iOpener gets a bit too cozy and gets stuck, it might just overheat and cause some drama.
It’s a great idea to give your microwave a quick clean before diving in! That way, you won’t have any pesky residue sticking to the iOpener. Trust us, your future self will thank you for it!
– Center the iOpener in the microwave like it’s the star of the show!
Tools Used
Step 4
Handle your iOpener with care—don’t let it get too hot or it might pop! Keep it under 100˚C (212˚F).
If it looks puffy, hands off!
If it’s still a little too toasty to touch in the middle, give it some time to cool down before rewarming. When properly heated, your iOpener should stay warm for about 10 minutes.
Depending on your microwave’s wattage, you might need to adjust the heating time a bit. The iOpener is ready to go when it feels just a tad too hot to handle.
– Get the iOpener nice and toasty for thirty seconds.
– Throughout the repair process, keep that iOpener warm by giving it a quick spin in the microwave for another thirty seconds whenever it starts to cool down.
Tools Used
Step 5
Careful there! The iOpener is going to be pretty toasty, so handle it with care. An oven mitt might just be your new best friend!
– Carefully take the iOpener out of the microwave, gripping one of the flat ends to steer clear of that hot center. You’ve got this!
Tools Used
Step 6
Watch out! The iOpener is going to be pretty toasty, so make sure to grab it only by the end tabs. Stay safe and happy repairing!
No microwave? No problem! Just pop your iOpener into some boiling water to warm it up.
– Fill a pot or pan with enough water to fully submerge an iOpener. Get that water nice and hot!
– Heat the water to a boil. Once it’s bubbling, turn off the heat and get ready for the magic.
– Drop that iOpener into the hot water for a cozy 2-3 minutes. Let it take a nice, warm bath.
– With some tongs, scoop out the now-toasty iOpener from the hot tub of water.
– Give that iOpener a good towel dry, make sure it’s nice and squeaky clean.
– Your iOpener is now all warmed up and ready for action! If it needs another warm-up, just repeat the hot water dip for 2-3 minutes.
Tools Used
Step 7
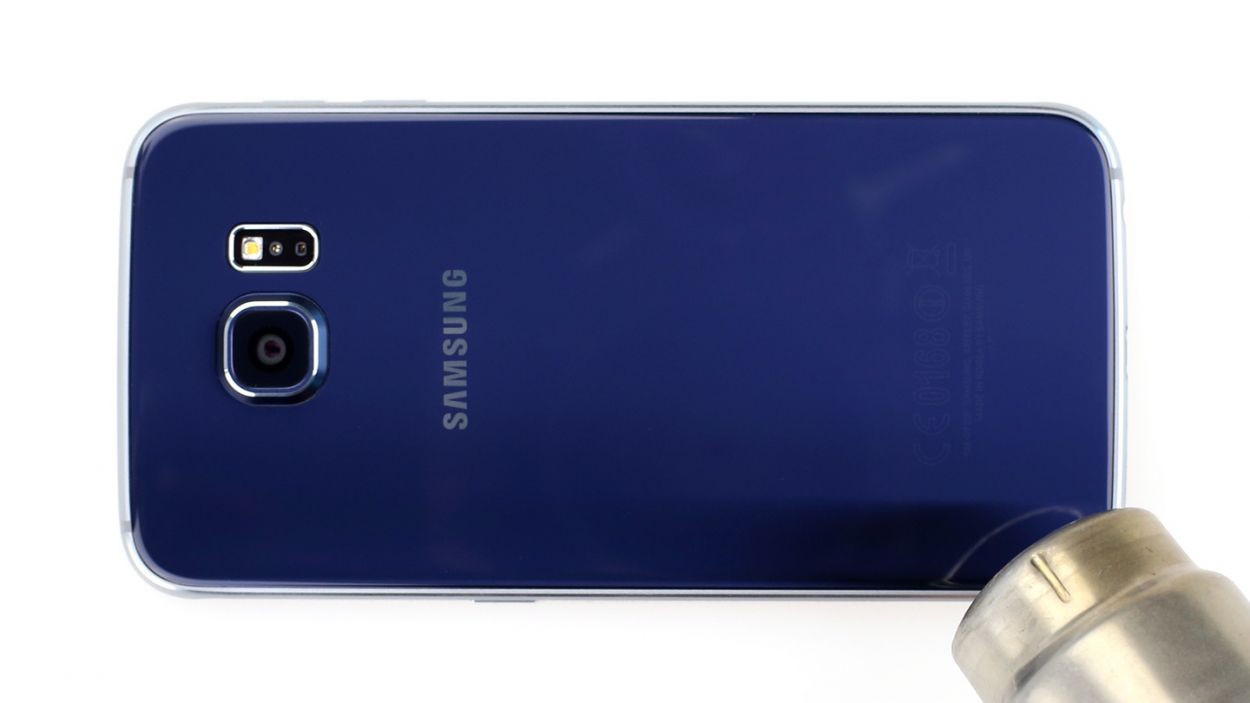
Hey there repair rockstar! If you’re feeling fancy, you can also use a hair dryer, heat gun, or hot plate, just make sure not to go overboard on the heat—our OLED display and internal battery can be a little sensitive to high temps. But hey, you got this!
Hey there! Just a heads-up – opening your phone might mess with its waterproofing, so make sure you’ve got some replacement adhesive at the ready. If not, just be extra careful around liquids when you put it back together!
Got shattered glass? No worries! Just slap some packing tape all over to keep it in one piece while you work your magic.
Don’t be shy with the iOpener! You might have to give it a few rounds of reheating and reapplying to really get that phone nice and toasty. And remember, follow the iOpener guide so you don’t accidentally turn up the heat too much!
– Get cozy with the iOpener and place it lovingly over the rear panel for a brief two-minute warm-up to gently loosen the adhesive around the edge of the glass.
– Encourage the iOpener to spread the warmth to the remaining section of the panel for another delightful two minutes.
Tools Used
Step 8
Why not add a little sparkle to this process? After your pick has made its grand entrance, feel free to add a dash of isopropyl alcohol into the mix. This magical potion will help loosen things up in no time!
– When the rear glass feels warm and cozy, grab a suction cup and place it near the bottom edge of that glass. You’re doing great!
– Gently pull on the suction cup to create a little opening underneath the rear glass, and slide in an opening pick to keep that gap going. Nice work!
Step 9
To keep things rolling smoothly, you might want to leave that pick in place while you grab a second one for the next step. It’s like a little buddy system—keeping the glue from making any new friends!
You can re-heat the rear glass if it starts to feel a bit cool. Keeping it warm helps the glue stay loose and ready for action!
– Gently glide the tool along the lower edge of your device to effortlessly cut through the adhesive holding the back glass in place.
Step 10
– Go ahead and repeat the heating and cutting steps for the other three sides of the phone.
– Keep an opening pick under each edge to stop the adhesive from sticking back. If you need help, you can always schedule a repair
Step 11
– Grab your opening pick and glide through any leftover adhesive like a pro.
– Gently take off the rear glass.
Step 12
– Ready to jazz up your phone with a fresh rear glass look? Let’s do it!
– If you’ve got the old rear glass or a new one without adhesive, no worries. We got your back. Get those tweezers out and delicately remove any lingering adhesive from your phone. Clean the sticky spots with super strong isopropyl alcohol and a lint-free cloth. Remember, swipe in one direction like a pro. Time to get that new rear glass in place! Peel off the adhesive backing, match up one side with the phone’s frame, and gently press the glass down. Voila! Your phone is looking good as new.
Tools Used
Step 14
Hey, champ! Make sure you’ve ejected the SIM card tray before tackling this step.
Remember, keep the opening pick away from the glass and display to avoid any oopsies!
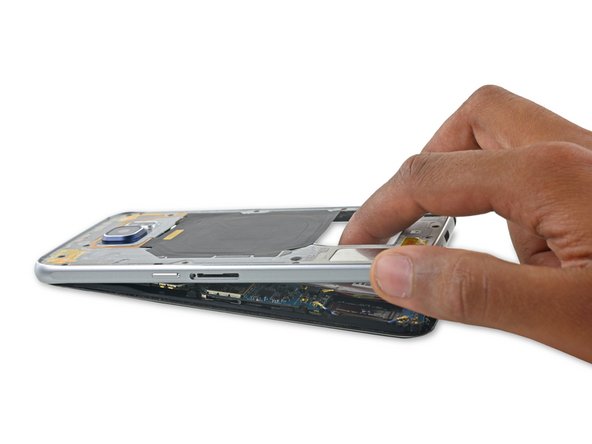
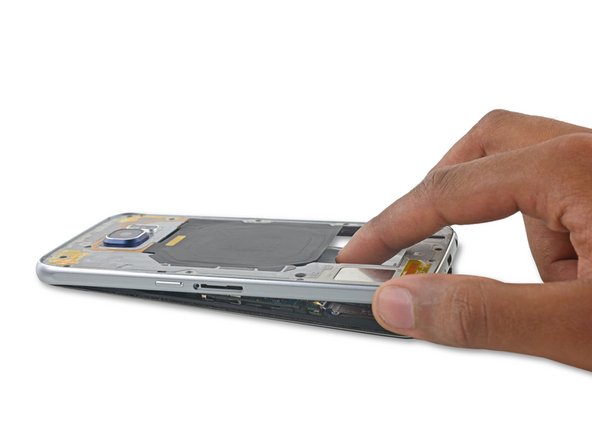
– Grab the edge of the midframe assembly like you’re about to reveal a secret.
– Gently lift the midframe assembly while giving the battery a little push down to help separate them. It’s like teamwork!
– If the midframe isn’t budging, consider warming things up with an iOpener along the display edges to loosen that adhesive. A little heat goes a long way!
– While you’re lifting the midframe, keep an eye out for the audio jack or charging port, so they don’t play hard to get.
– Once the midframe is partially free, run an opening pick around the edges to help the top of the midframe join the party.
– To keep the headphone jack safe and sound, take off the top of the midframe first, then gently push down to release it from the headphone jack’s embrace.
Tools Used
Step 15
– Gently lift the midframe assembly to detach it from the rest of your phone. You’re doing great!
Step 16
– Grab that trusty spudger and use its flat end to gently pry the battery connector free from its cozy spot on the motherboard. You’ve got this!
Tools Used
Step 17
– Grab your trusty spudger and gently use its pointed edge to unplug the Bluetooth and Wi-Fi antenna cable connectors from their cozy spots on the motherboard. You’ve got this!
Tools Used
Step 18
– Grab that spudger and use its flat end to gently disconnect the home button connector. You’ve got this!
Tools Used
Step 19
– Time to bust out your trusty spudger! Use the flat end to gently disconnect the display assembly cable from the motherboard.
Tools Used
Step 20
– Unplug the earpiece speaker assembly cable from the motherboard and give it a little wave goodbye!
Step 21
Hold up! Don’t yank the motherboard out just yet—it’s still hanging out with the daughterboard via a ribbon cable underneath. If you need help, you can always schedule a repair
While lifting the motherboard, you might need to nudge some ribbon cables aside. If it’s being stubborn, make sure it’s fully disconnected and not snagged on any cables. If you need help, you can always schedule a repair.
– Gently lift the camera side of the motherboard to free it from the display frame. You’ve got this!
Step 22
– Alrighty, time to bust out the trusty spudger! Gently disconnect that daughterboard ribbon cable connector from its socket under the motherboard. You got this!
Tools Used
Step 23
Looks like the phone’s been feeling a bit chilly! Don’t be shy, give it some warmth with the iOpener. Remember to keep things friendly and don’t overdo it with the heat—the last thing we want is a sweating smartphone. If you’re struggling, you can always schedule a repair with our awesome team.
– If your display glass is a shattered mess, cover it with tape to keep those pesky shards in check and make prying a breeze.
– Warm up the iOpener again.
– Place the iOpener over the S6 screen. After two minutes, move it to the other half of the display.
Tools Used
Step 24
If things go a bit sideways and the pick shows up through the glass, no worries! Just pull it out and give it another go.
– Slide the opening pick into the battery side edge of the phone, between the frame and display, at an upward angle.
Step 25
Don’t sweat it if the cutting gets tough—just give the iOpener a little extra warmth and another go. You’ve got this!
– Glide the pick along the display edge to loosen up that adhesive magic.
– Once you’ve cut through, park the pick on the side of the display so it doesn’t stick back to the frame.
– Pause before you reach the daughterboard to protect the sensitive capacitive button lurking under the display.
Tools Used
Step 26
– Glide that pick along the phone’s bottom edge, starting from the headphone jack and going just past the charging port.
– Keep the pick from going in more than 0.25 inches (~6mm) to avoid messing up the home button.
Step 27
Watch that ribbon cable like a hawk! It’s super delicate and can tear easily. If the pick isn’t sliding in smoothly or the cable starts to stretch, just give it some more heat. If you need help, you can always schedule a repair
In case you accidentally break one of the cool capacitive buttons or delicate ribbon cables, don’t stress!
You have the option to swap out the whole daughterboard assembly, which comes with brand new capacitive buttons all ready to go.
– Slip an opening pick about 0.5 inches (~12mm) under the bottom corner of the display, near the headphone jack.
– Keep the pick under the display to stop the button from sticking back to the display.
Step 28
Keep an eye on the button’s ribbon cable as you slide in the pick. The cable is fragile and can tear easily. If the pick is tricky to insert or the cable starts to stretch, apply more heat. If you need help, you can always schedule a repair.
– Grab an opening pick and slide it under the opposite bottom corner of the display, about 0.5 inches (~12mm) from the edge.
– Be sure to keep the pick in place to prevent any sticky situations with the button sticking back to the display.
Step 29
– Gently slide a trusty opening pick along the side of the phone that’s opposite the battery. This separates the adhesive hiding beneath.
– Once you’ve slyly snipped the adhesive, tuck the pick snugly into the side of the display. This ninja move keeps the display from sneakily sticking back to the frame.
Step 30
Ease the pick out a bit to steer clear of the earpiece speaker grille.
– Gently glide a pick along the top edge of the phone, making your way towards the vibrator. You’ve got this!
Step 31
– Grab your trusty opening pick and gently ease the battery side of the frame away from the display. Take your time, it’s all about finesse!
– If the display and frame are playing hard to get, don’t worry! Use that opening pick to slice through any stubborn adhesive. If you’re finding it a bit tricky, just reheat and give an iOpener another go. You’ve got this!
Tools Used
Step 32
– Carefully guide the display’s flex cable through its designated hole in the frame to completely detach the right edge of the display.
Step 33
– If you’re about to put in a fresh new display, make sure to bid farewell to the old adhesive remnants first. Be extra gentle as you rid the frame of any teeny glass bits.
– Once the glue and glass are history, cleanse the adhesion spots using 90% (or more) isopropyl alcohol and a fancy lint-free cloth or a coffee filter. Swipe in a single direction, no back-and-forth action!
– To lock in the snazzy new screen, grab a customizable double-sided tape sheet. Stick it onto the screen’s rear, then delicately thread the display cable through the frame. Align and firmly press the screen into position.


