Samsung Galaxy S21+ Charging Board Replacement Guide
Duration: 45 minutes
Steps: 25 Steps
Hey there, it looks like you’ve got the SM-G996B/DS model! Time to work some magic and get that device back in shape. Let’s rock this repair and have your device up and running in no time! Need a hand? Don’t worry, we’ve got your back. Feel free to schedule a repair with us if you need some extra expertise. Let’s do this!
Get ready to give your Samsung Galaxy S21 Plus a little makeover by replacing its charging board! This quick and easy guide works like a charm on the SM-G996B/DS (international) model. For other models, keep an eye out for that sneaky antenna cable hanging out in the midframe. Remember, to keep your device in top shape, make sure to swap out those adhesive seals during reassembly. This way, your device will stay water-resistant and function like a champ. Don’t forget to have replacement adhesive on hand for putting everything back together smoothly. Let’s do this!
Step 1

– Grab your trusty iOpener and place it on the back cover for at least three minutes. This will help melt away that stubborn adhesive lurking underneath, making your journey a whole lot smoother!
Tools Used

Step 2


– Get yourself a suction handle and attach it snugly to the lower edge of the back cover.
– Gently lift the back cover using the suction handle to create a small gap between the back cover and the frame.
– Take an opening pick and carefully insert it into the gap you created.
– Slide the opening pick towards the bottom left corner to separate the adhesive.
– Keep the opening pick in position to prevent the adhesive from sticking back.
Tools Used

Step 3


– Get another opening pick and place it carefully at the lower edge of your device.
– Gently move the opening pick towards the lower right corner to smoothly cut through the adhesive.
– Keep those opening picks right where they are to make sure the adhesive doesn’t seal up again.
Step 4


If the adhesive is putting up a fight and getting tough to slice through, it’s probably just a little too cool. Grab your iOpener and give it a warm hug for two to three minutes to get it back in the game.
– Hey there, time to bring out a third opening pick and gently place it at the lower right corner of your phone.
– Now, casually glide the opening pick along the right edge of your phone to effortlessly slice through the adhesive.
– Don’t forget to leave our trusty opening pick lounging in the top right corner to keep the adhesive from getting any funny ideas about resealing.
Tools Used
Step 5


When you’re getting close to the camera assembly, just slide in the tip of that opening pick (about 4-5 mm) gently. We want to keep that camera safe and sound, so no smudges or damage, please!
– Grab a fourth opening pick and gently slide it under the top right corner of your phone.
– Now, glide that pick along the top edge to cut through the adhesive like a pro.
– To keep things from sticking back together, leave the opening pick chilling in the top left corner.
Step 6


– Gently slide in a fifth opening pick under the bottom left corner.
– Now, casually glide the opening pick along the left edge of the back cover to flawlessly slice through the remaining adhesive.


Step 8


Hey there, just a friendly reminder—be super careful not to poke or twist that battery with your tool. A battery that’s been punctured or bent might leak some nasty stuff or even cause a little heat drama!
Watch out for the cable hiding under the charging coil. Take your time and ease up on that pick if it gets snagged on the cable. We don’t want any surprises!
– Slide an opening pick gently beneath the left bottom corner of the NFC antenna and charging coil assembly.
– With care, glide the opening pick along the bottom left side of the assembly to gently disengage it from the battery.
Step 9


– Gently slip an opening pick beneath the lower part of the NFC antenna and charging coil setup.
– Slide the opening pick carefully along the lower edge to detach it from the speaker.
Step 10


– Get your handy spudger ready and gently disconnect the charging coil. Just pry the connector straight up from its socket like a pro!
Tools Used


Step 12

– Grab your trusty Phillips screwdriver and carefully take out the five 3.9 mm-long screws that are holding the NFC antenna and charging coil assembly in place. You’ve got this!
Step 13


– Grab a pair of tweezers or use your cool fingers to gently remove the awesome NFC antenna and charging coil assembly.

Step 15

– Grab your trusty Phillips screwdriver and let’s tackle those six 3.9 mm-long screws like a pro to free up the lively loudspeaker assembly!
Step 16


– Slide an opening pick into the tiny gap at the top of the loudspeaker assembly, just next to the midframe—it’s like finding a secret passage!
– Once you’ve got that pick in there, give it a little wiggle to gently lift the loudspeaker assembly by angling it downward. You’re doing great!
Step 17


– Let’s kick things off by removing the loudspeaker assembly.
– As you put everything back together, make sure to add new adhesive in the necessary spots. Before that, give those areas a good cleaning with isopropyl alcohol (>90%).
Step 18

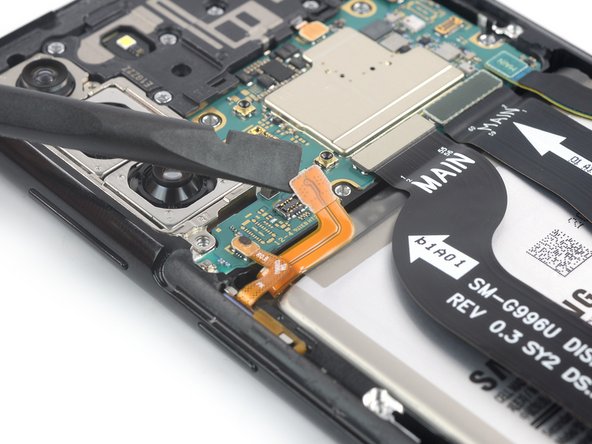
– Grab your trusty spudger and gently lift the main and interconnect flex cables off the motherboard by prying their upper connectors straight up from their sockets. You’ve got this!
Tools Used
Step 19
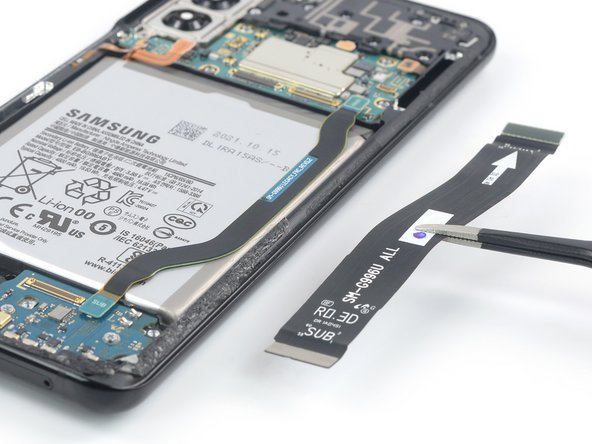

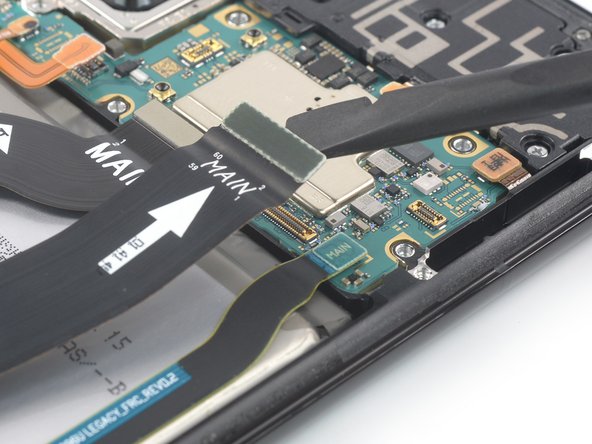
– Grab your trusty spudger and gently nudge the main flex cable away from the daughterboard by lifting its bottom connector straight up from the socket. Easy peasy!
– Now, with a touch of finesse, use your fingers or a pair of tweezers to delicately slide out the main flex cable. You’ve got this!
Tools Used
Step 20

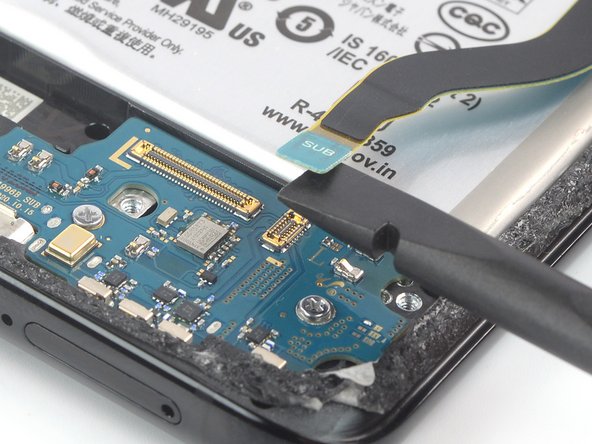

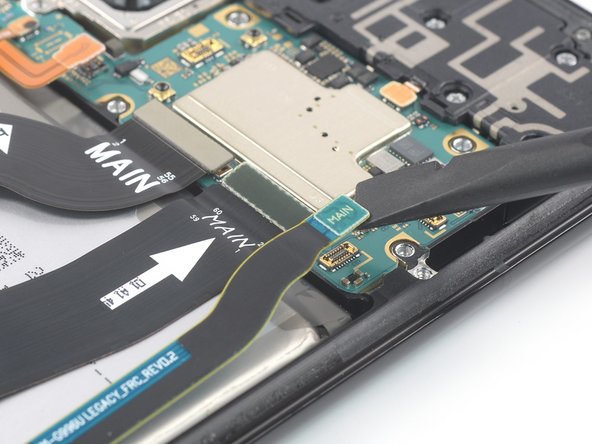
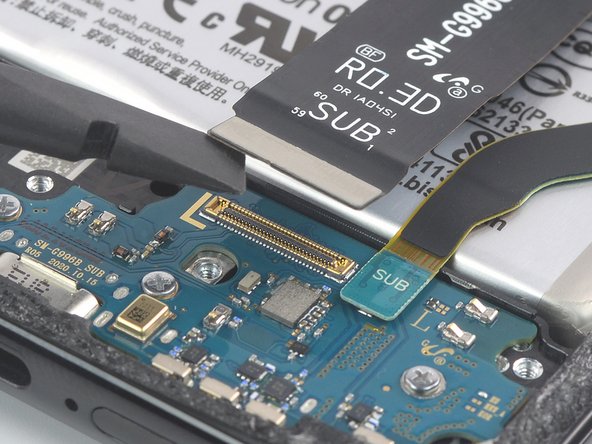
– Grab your trusty spudger and gently pry the interconnect flex cable off the daughterboard. Just lift that bottom connector straight up like you’re getting ready to party!
– Now, with a little finesse, either use your fingers or some tweezers to carefully nudge the interconnect flex cable away. You’ve got this!
Tools Used
Step 21
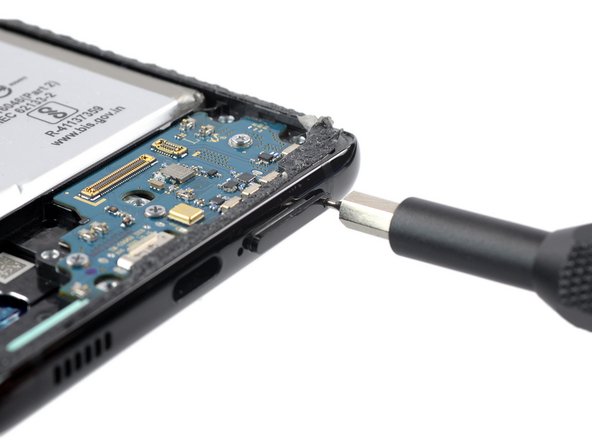
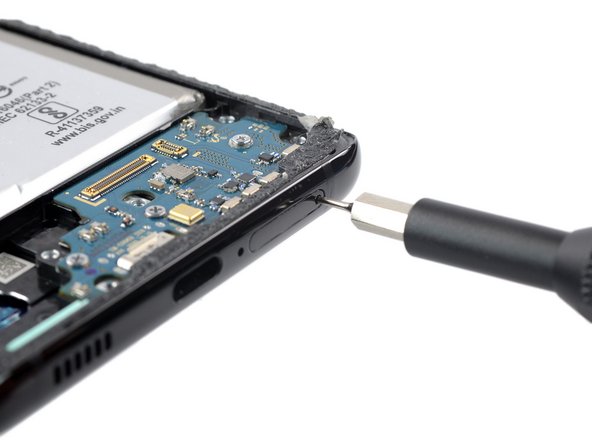

– Grab your trusty SIM card eject tool, a SIM eject bit, or even a straightened paper clip, and gently insert it into the tiny hole on the SIM tray at the bottom edge of your phone.
– Give it a little push right into that hole to pop out the SIM card tray like a pro!
Tools Used

Step 22


– Let’s start off by gently popping out the SIM card tray.
Step 23

– Grab your trusty Phillips screwdriver and unscrew those three 3.4 mm-long screws holding the charging board in place. You’ve got this!
Step 24
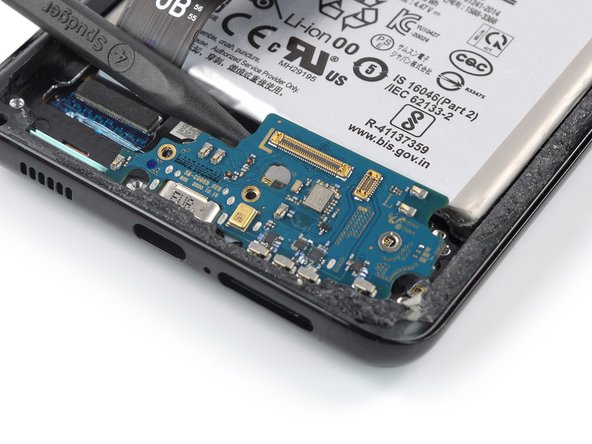

– Alright, pals! Let’s get our spudger ready and slide it under that left edge of the charging board, real close to the main flex cable connector. Now, using our spudger, it’s time to show some love to that charging board by gently lifting it up. If you need help, you can always schedule a repair!
Tools Used
Step 25


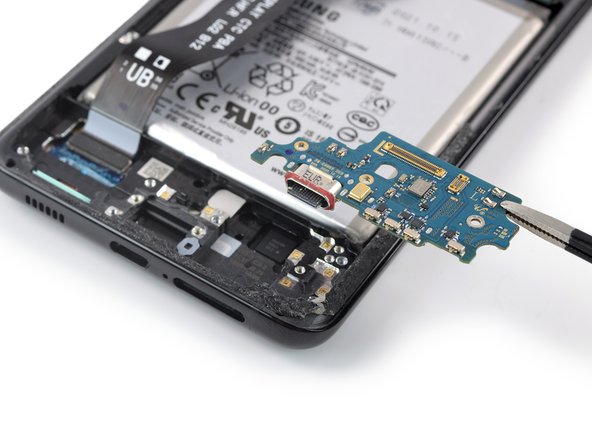
– Grab a pair of blunt tweezers or just use your fingers to gently lift out the charging board. Start by nudging the top edge up, and then smoothly slide that USB-C connector out of its cozy spot.
– When you’re putting everything back together, don’t forget to dab on some fresh adhesive where it’s needed after giving those surfaces a good clean with some isopropyl alcohol (>90%).


