Samsung Galaxy S21+ Battery Replacement Guide: Step-by-Step Tutorial
Duration: 45 minutes
Steps: 27 Steps
Hey friend, don’t forget to discharge your battery below 25% for safety’s sake before diving into your phone’s disassembling. If you need help, you can always schedule a repair!
Ready to give your Samsung Galaxy S21 Plus a fresh boost? This guide will walk you through swapping out that worn-out or lifeless battery! We’ll be focusing on the SM-G996B/DS (international) model, but if you have a different version, just keep in mind there might be an extra antenna cable lurking around the midframe. If your battery looks like a balloon, handle it with care! For your safety, let’s make sure to drain that battery below 25% before diving in. This way, we can steer clear of any unexpected thermal surprises during the repair. While you technically don’t have to disconnect the interconnect cables to get the battery out, we recommend it—it’ll make everything smoother when it’s time to reassemble. Just a heads up: if you skip replacing the adhesive seals during reassembly, your device might still work, but it could lose some water resistance. Don’t forget to grab some replacement adhesive to keep everything snug and secure when putting your device back together. If you need help, you can always schedule a repair.
Step 1

– Grab your trusty iOpener and warm it up a bit. Stick it on the back cover and let it chill there for at least three minutes. This will help loosen up the adhesive hiding underneath, making your job a whole lot easier!
Tools Used

Step 2


– Grab a suction handle and stick it to the bottom edge of the back cover, nice and close to the edge.
– Gently pull up on the suction handle to pop the back cover just a bit away from the frame.
– Slide an opening pick into that little gap you’ve made.
– Carefully glide the opening pick down to the bottom left corner to cut through the adhesive.
– Keep the opening pick in that spot to stop the adhesive from sealing back up.
Tools Used

Step 3


– Pop in a second opening pick at the bottom edge of your phone.
– Gently glide the opening pick over to the bottom right corner to cut through that pesky adhesive.
– Keep those opening picks in place to block the adhesive from sticking back together.
Step 4


If the adhesive is giving you a tough time to cut, chances are it’s just a bit cold. Pop your iOpener in for a quick warm-up session of two to three minutes.
– Alright, time to spice things up! Grab another opening pick and pop it in at the bottom right corner of your device.
– Gently glide that pick along the right edge to slice through the adhesive like a pro.
– Don’t forget to leave that pick hanging out in the top right corner so the adhesive doesn’t sneakily reseal itself.
Tools Used
Step 5


Hey there! Be super careful when slicing near the camera assembly, just insert a tiny tip of the opening pick to avoid damaging or smudging the camera. Need a hand? Don’t hesitate to schedule a repair with our team!
– Pop a fourth opening pick under the top right corner of your phone, just like tucking in a cozy blanket.
– Gently glide that opening pick along the top edge to cut through the adhesive like butter!
– Keep the opening pick snug in the top left corner to stop the adhesive from getting all clingy again.
Step 6


– Hey, let’s slide this satisfying pick under the corner and work our way along the left edge, like a pro! Lefty loosey, righty tighty, we’ve got this done lightning quick! 👍
Step 7


– Let’s kick things off by popping off that back cover!
– And when you’re putting it all back together, remember to take your time!
Step 8


Hey there, remember to handle the battery with care – we want to avoid any chemical leak or unexpected heat wave!
Keep an eye on the sneaky cable under the charging coil. Go slow and if the pick catches on it, give it a break.
– Slide an opening pick gently under the lower left corner of the NFC antenna and charging coil assembly. You’re on the right track!
– Now, with a little finesse, glide that pick along the bottom left edge of the assembly to free it from the battery. You’re doing great!
Step 9


– Get ready to work some magic by gently sliding an opening pick under the bottom end of the NFC antenna and charging coil assembly.
– Slide the opening pick along the bottom of the assembly with finesse, separating it from the loudspeaker.
Step 10


– Grab your trusty spudger and gently lift the charging coil connector straight up from its socket. You’ve got this!
Tools Used


Step 12

– Gear up with your 3.9 mm Phillips screwdriver and get ready to loosen those five tiny screws holding the NFC antenna and charging coil assembly in place. You’ve got this!
Step 13


– Get your handy pair of tweezers or just use your fingertips to gently detach the NFC antenna and charging coil assembly.

Step 15

– Grab your trusty Phillips screwdriver and get ready to tackle those six 3.9 mm-long screws holding the loudspeaker assembly in place. You’ve got this!
Step 16


– Slide an opening pick into the tiny gap at the top edge of the loudspeaker assembly and the midframe. No pressure, just a gentle nudge!
– Now, give that opening pick a little love by tilting it downwards to help pry up the loudspeaker assembly. It’s like giving your device a gentle lift!
Step 17


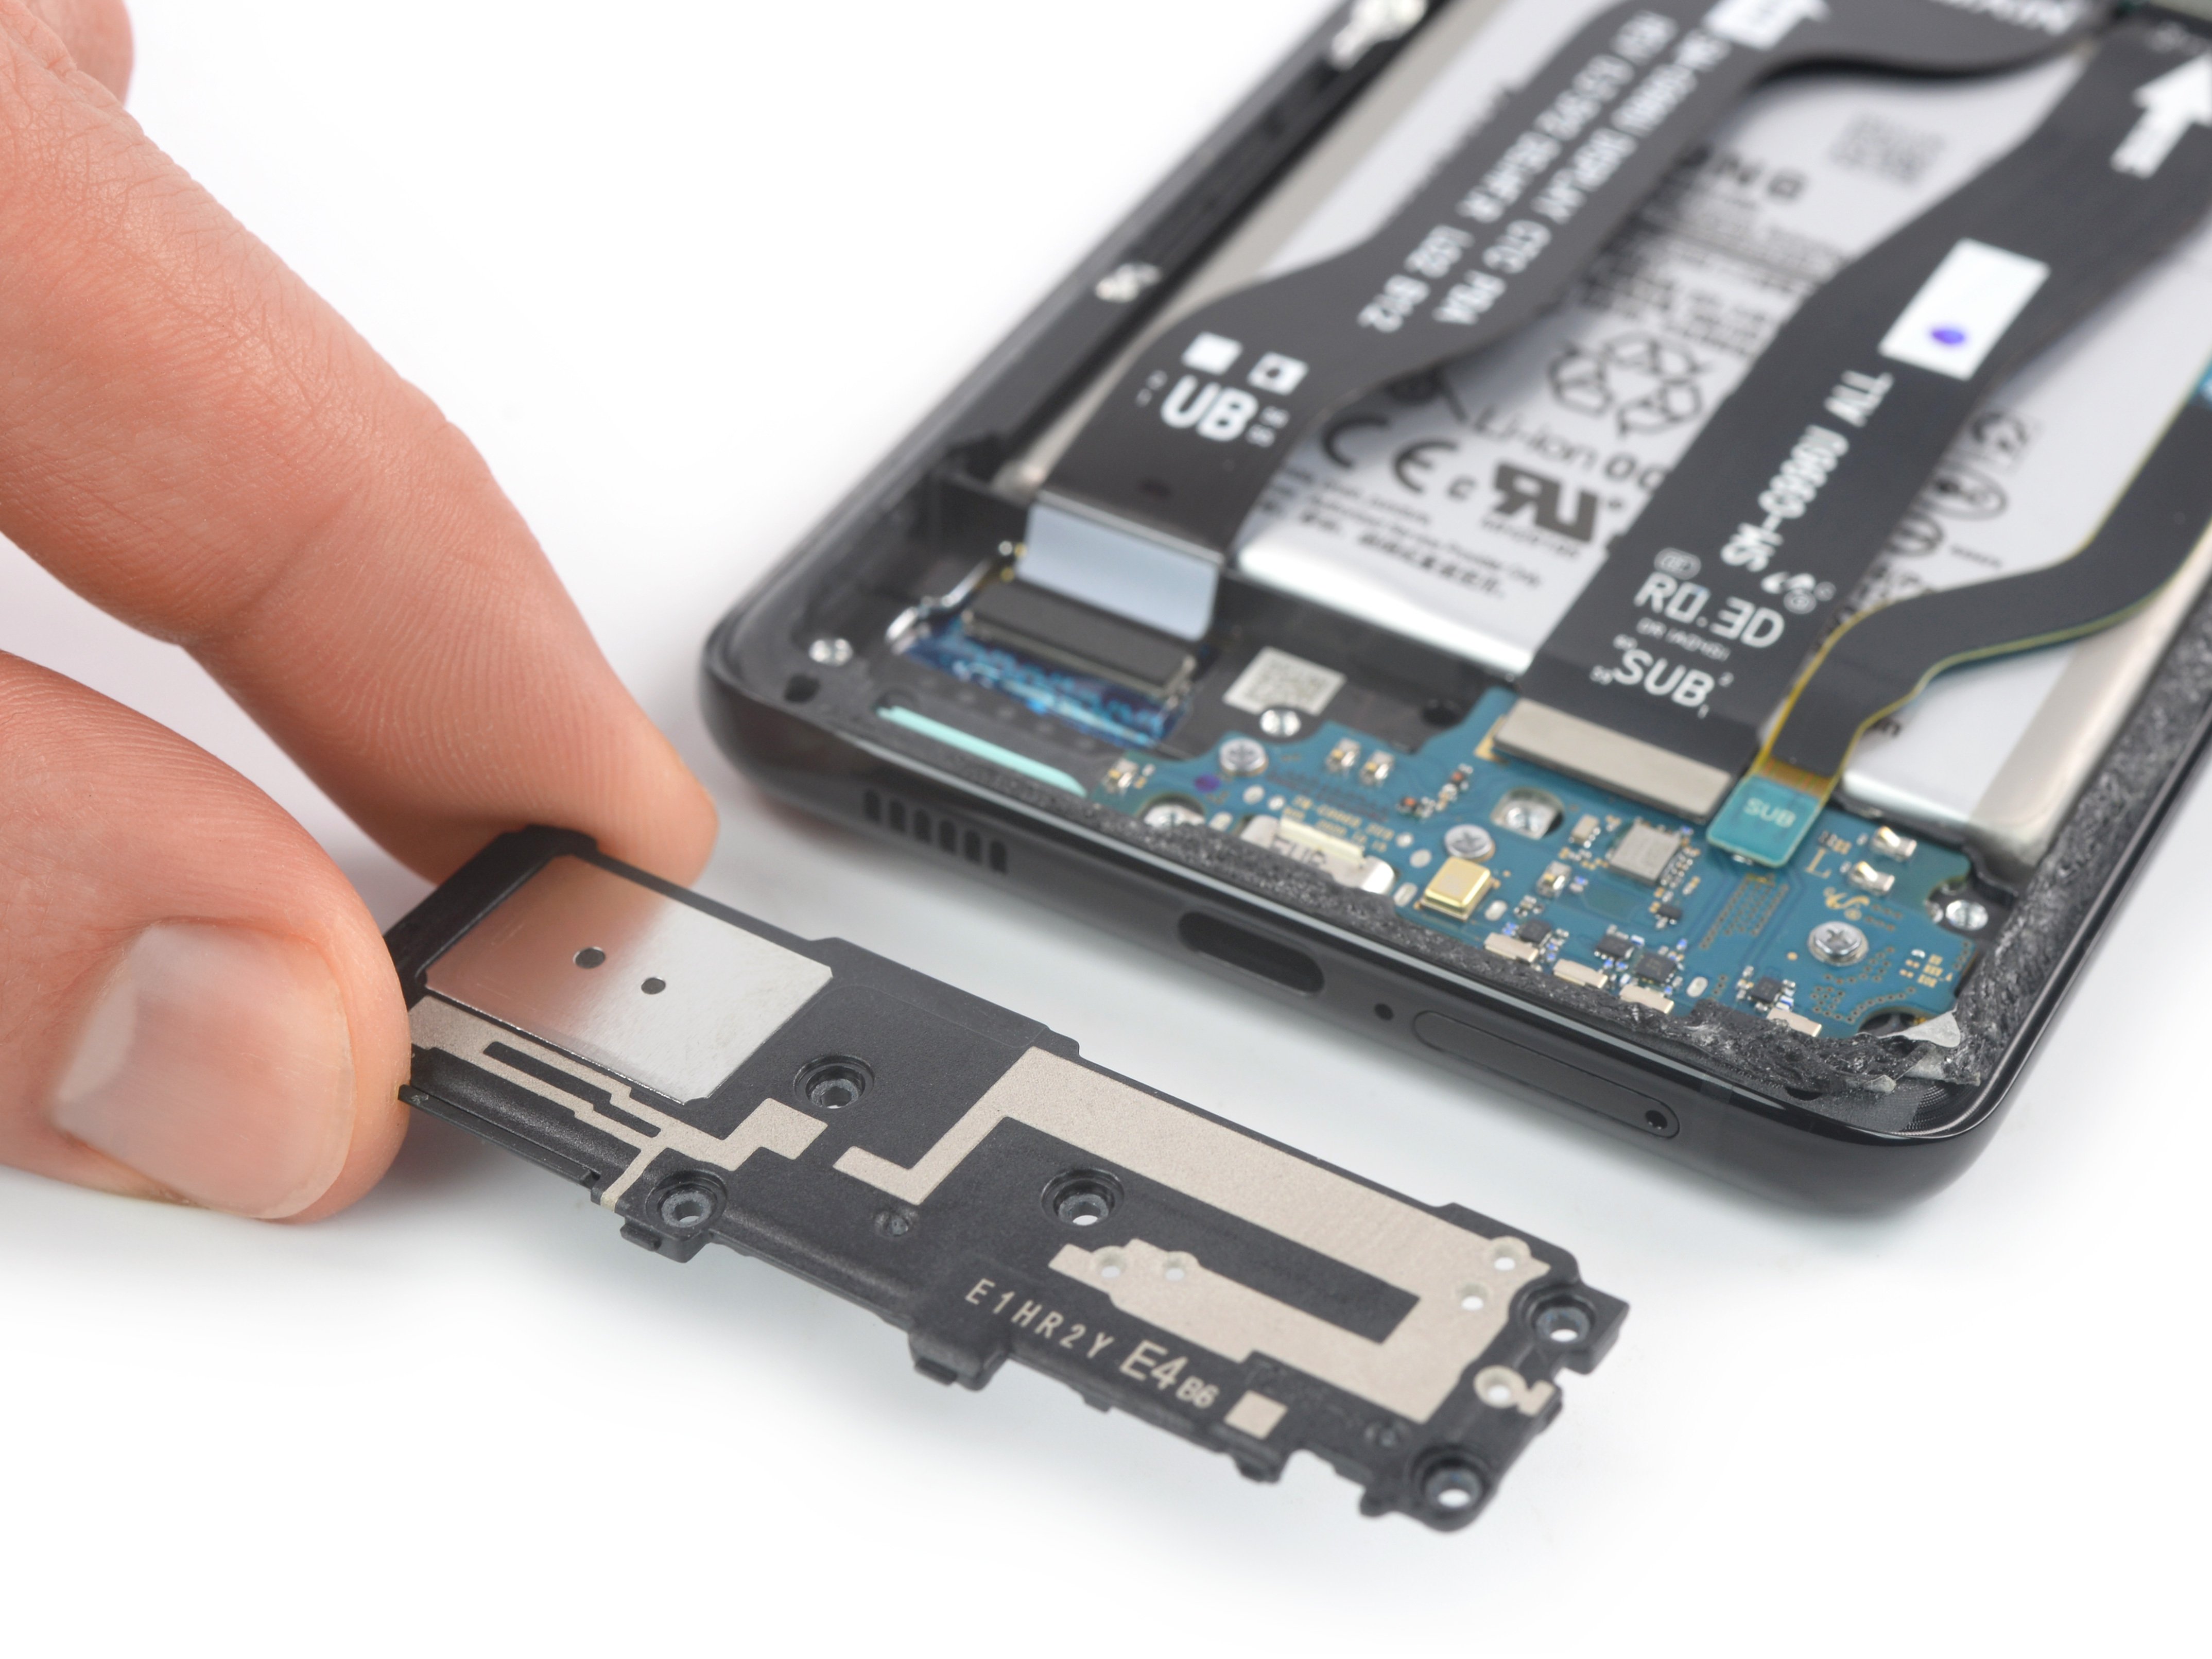
– Go ahead and carefully remove the loudspeaker assembly.
– Remember, when putting things back together, make sure to add some fresh adhesive where needed. And hey, don’t forget to clean those spots with isopropyl alcohol (>90%) first!
Step 18


– Time to work some magic with your trusty spudger! Gently disconnect the display flex cable by lifting the upper connector straight up from its socket.
Tools Used
Step 19

– Grab your trusty spudger and gently pry the upper connectors of the main and interconnect flex cables straight up from their sockets to disconnect them from the motherboard. You’re doing great!
Tools Used
Step 20


– Grab your trusty spudger and gently pry the bottom connector of the display flex cable straight up from its cozy socket. It’s like a little cable hug goodbye!
– Next up, use your fingers or a pair of tweezers to delicately lift the display flex cable out, treating it like the precious little component it is.
Tools Used
Step 21

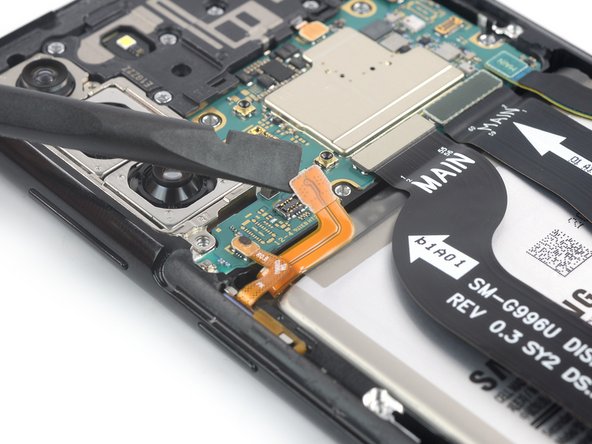
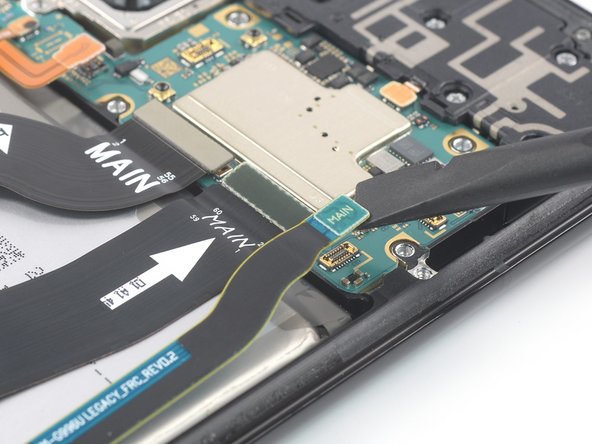
– Grab your trusty spudger and gently nudge the main flex cable away from the daughterboard by lifting its bottom connector straight up from the socket. Easy peasy!
– Now, using your fingers or a pair of tweezers, carefully wiggle and remove the main flex cable. You’ve got this!
Tools Used
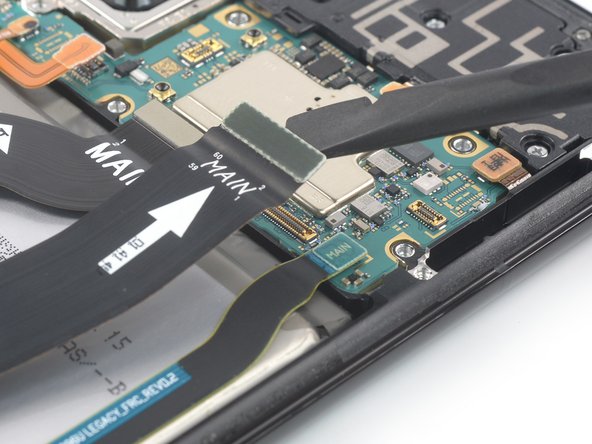
Step 22

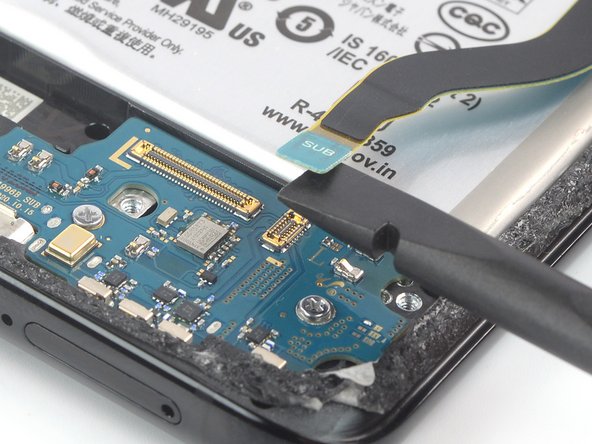

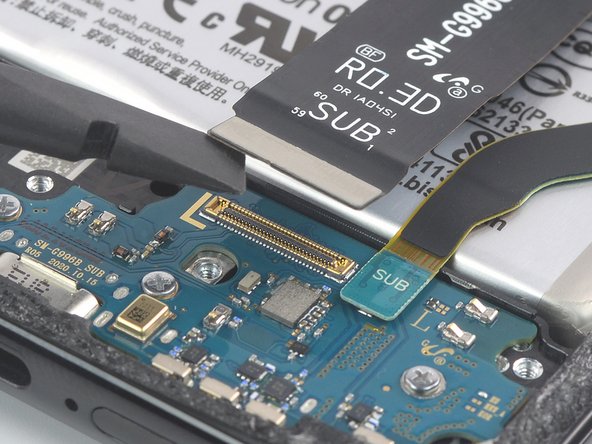
– Grab your trusty spudger and gently pop the interconnect flex cable off the daughterboard by lifting its bottom connector straight up from the socket. Easy peasy!
– Now, with a little finesse, use your fingers or some tweezers to carefully detach the interconnect flex cable. You’ve got this!
Tools Used
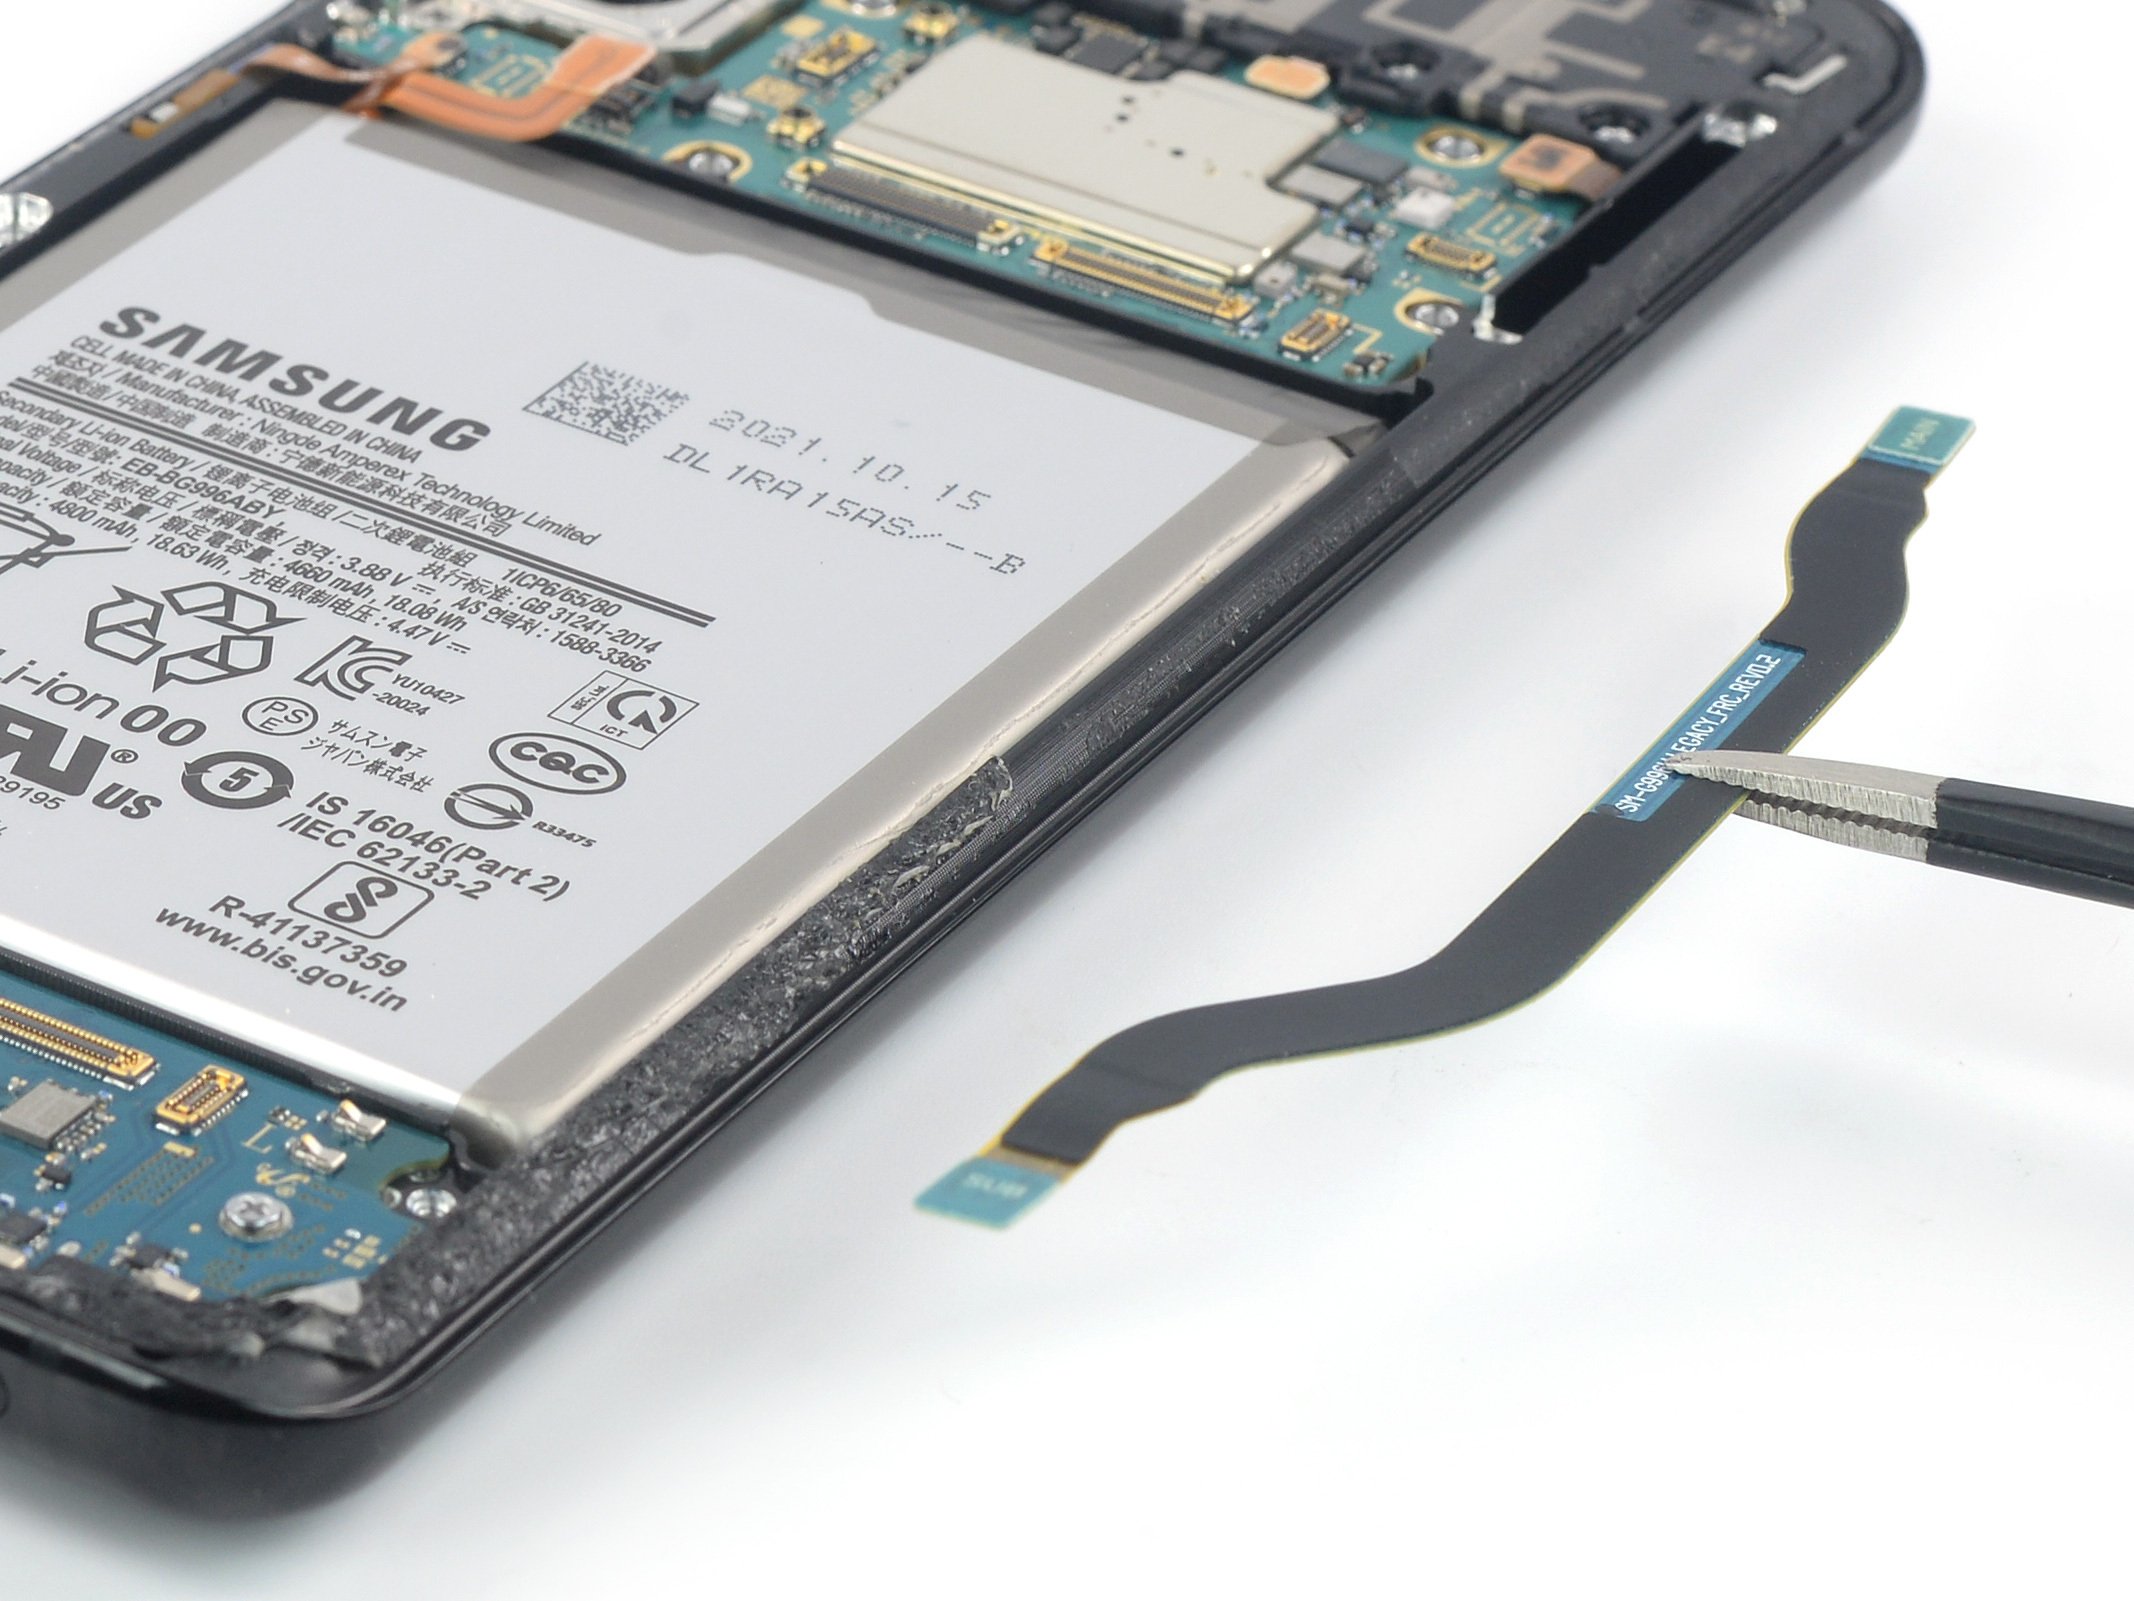
Step 23

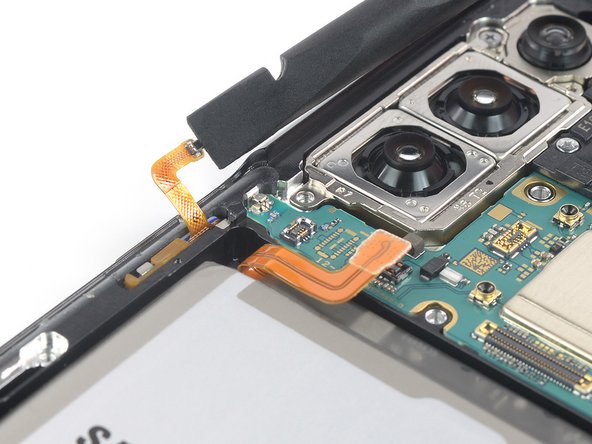

– Grab your trusty spudger and gently lift the power button flex cable by prying its connector straight up from the socket. Easy peasy!
– Now, carefully guide that flex cable to the side with your spudger to keep it safe and sound while you whip that battery out.
Tools Used
Step 24
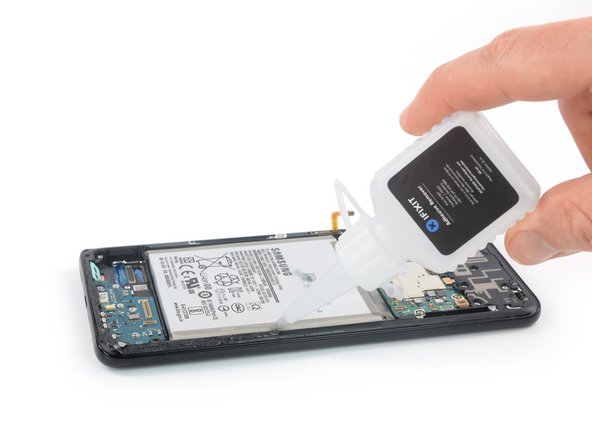


The battery adhesive on the Samsung Galaxy S21 Plus is quite the tough cookie! If high concentration isopropyl alcohol (over 90%) isn’t doing the trick for you, why not give a little heat a go? Grab an iOpener and let it chill on the screen for at least two minutes. This will help loosen up that pesky adhesive holding the battery in place. Remember, if you need help, you can always schedule a repair.
– Gently drizzle 1-2 drops of high-octane isopropyl alcohol (make sure it’s over 90% concentration) into the little gaps where the frame meets the left and right edges of the battery.
– Now, give the isopropyl alcohol a moment to work its magic! Let it soak into the battery adhesive for a good two to three minutes.
Tools Used
Step 25
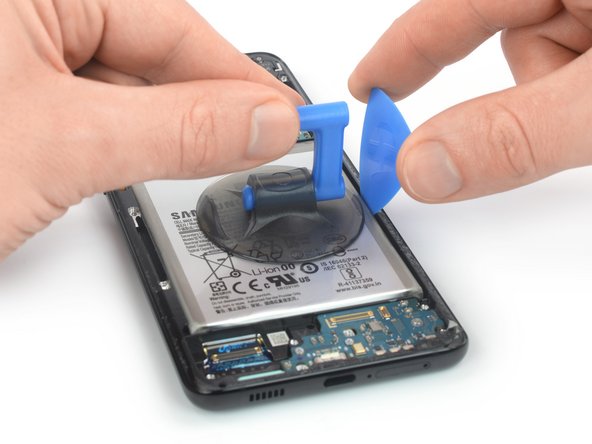

Alrighty then, let’s dive in! Grab your opening pick and slide it into the gap between the midframe and the battery. Make sure to choose a spot with a bit more room to work your magic! This will give you the upper hand and make this step a breeze.
– Get a hold of a suction handle and attach it securely to the battery, making sure it’s close to the edge.
– Gently slide an opening pick into the slender space between the battery’s edge and the frame.
– Twist the pick as you slide it in to let the long side slip into the gap smoothly.
Tools Used
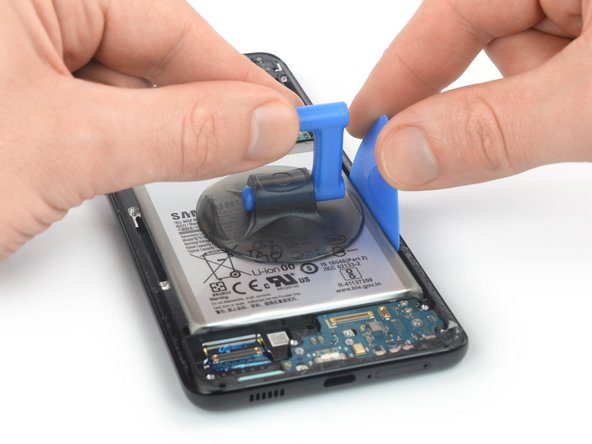
Step 26


Hey there! When removing the battery, just remember to be gentle. We don’t want any batteries getting bent out of shape or feeling punctured—it could lead to some not-so-great outcomes. If you’re having trouble getting it out, give it some more isopropyl alcohol love and try again. You got this!
– Gently tug on that suction handle with a steady grip, and while you’re at it, tilt that opening pick downward to help ease the battery up and out of its cozy spot.
Tools Used
Step 27


Hey there, don’t even think about reinstalling a battery that’s seen better days! It’s not just a safety hazard, it’s a major no-no. Let’s keep things cool and safe, alright?
– Gently pop out the battery, and don’t forget to peel away any stubborn adhesive that might be holding it down.
– If you’ve used isopropyl alcohol, hang tight for about ten minutes. This gives the alcohol time to vanish completely before you slide in that shiny new battery.
– As you put everything back together: