
Samsung Galaxy S21 5G vibration motor Replacement Guide: Step-by-Step DIY
Duration: 45 minutes
Steps: 38 Steps
To ensure a smooth disassembly process, it’s best to have your battery power at 25% or below. Stay safe and keep those energy levels low before diving into the repairs!
Ready to tackle the challenge of swapping out the vibration motor in your Samsung Galaxy S21? Awesome! Just a quick safety tip: make sure your battery is below 25% before diving in. This little step helps keep things cool and prevents any unexpected surprises if the battery gets a bit too adventurous during the repair. And if your battery is looking a bit swollen, be extra cautious. You’ll also want to grab some replacement adhesive to wrap things up nicely. If you need help, you can always schedule a repair.
Step 1

Make sure to give your phone a nice, cozy nap by turning it off completely before getting started.
– Warm up your iOpener and press it against the bottom edge of the back cover for a snug two minutes. Let’s get that cover ready to pop off!
Tools Used

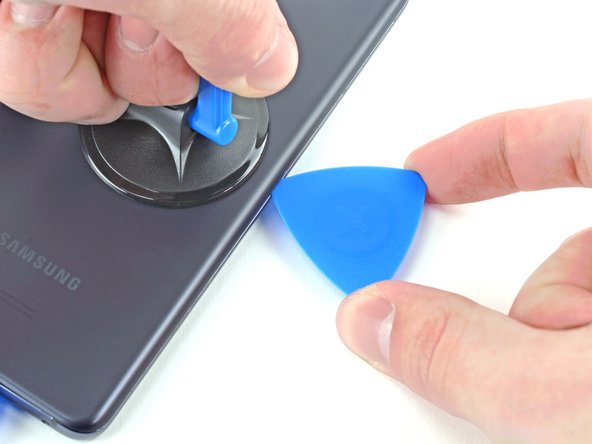
Step 2


– Get that suction cup ready! Place it on the back of the phone, aiming for the center of the bottom edge.
– Time to put those muscles to work! Pull up on the suction cup with a firm, steady grip to create some space between the back cover and the frame.
– Grab that opening pick and slide it into the gap you’ve just made like a pro!


Step 4

– Warm up a heated iOpener and gently press it against the left edge of the back cover for about two minutes. You’re doing great!
Tools Used
Step 5


– Get ready to rock this repair by placing a suction cup on the backside of the phone, aiming for the center of the left edge.
– With a strong and steady hand, pull up on the suction cup to create a sweet gap between the back cover and the frame.
– Now, it’s time to slide an opening pick into that gap like a pro!
Step 6


– Gently slide an opening pick along the left edge, making your way to the bottom left corner to slice through that adhesive.
– Keep the pick in place to stop the adhesive from sticking back together.
Step 7

– Heat up your iOpener and place it on the right edge of the back cover for two minutes. Let’s get that cover loosened up!
Tools Used
Step 8


– Grab a suction cup and place it on the back of your phone, aiming for that sweet spot near the center of the right edge.
– Give that suction cup a good pull with a steady hand to open up a little gap between the back cover and the frame.
– Now, slide in an opening pick to keep that gap nice and wide.
Step 9


– Gently glide an opening pick back and forth along the right edge of the back cover to smoothly slice through the adhesive.
– Keep the pick in place to make sure the adhesive stays put and doesn’t decide to stick again.
Step 10


Go ahead and work your magic on each corner, except for the top-left one, where the rear-facing camera likes to hang out.
– Twist the right-edge opening pick around the upper right corner of the device.
Step 11


– Alright, awesome! Let’s move that pick really close to the camera shell. Next up, don’t forget to slide that left-edge pick too!

Step 13


If the previous step didn’t quite do the trick, simply move on to the next one for a different approach; otherwise, feel free to skip ahead.
– Twist that back cover to the left until there’s a little space popping up between the camera shell and the frame. You’re doing great!
– Slide an opening pick right into that gap you just created!
Step 14


Handle this method with care, as there’s a chance you might crack the plastic back cover.
– Gently nudge those two picks toward the camera shell so they snugly fit under the corners of the back cover next to the camera shell.
– Sway the picks back and forth across the bridge between the back cover and the camera shell until you open up a space between the camera shell and the frame.
Step 15


– Gently slide a nifty opening pick between the camera shell and the frame to skillfully cut through the adhesive.
Step 16


Watch out for that sneaky plate on the back cover around your phone’s flash! It’s known to play hide-and-seek and can get your pick stuck if you’re not careful.
– Make sure to snip through the extra adhesive located to the right of the camera. You’ve got this!
Step 17


– Align the opening pick’s tip with your phone’s flash
– Gently insert the pick while keeping the flash’s plate in mind.
– Carefully cut the adhesive to the right of the camera.


Step 19

As you tackle this repair, be sure to keep an eye on each screw and return it to its original spot. It’s like a little puzzle, and you want to make sure all the pieces fit just right!
– Grab your trusty Phillips screwdriver and gently unscrew those five 4 mm-long screws that are holding the motherboard bracket snugly to the frame. Let’s get that bracket off with ease!
Step 20


Hang tight and don’t yank that bracket off just yet; it’s still cozy with the wireless charging coil.
– Grab a pair of tweezers, put on your repair hero cape, and gently lift and unclip the motherboard bracket from its cozy spot in the frame. You’ve got this!
Tools Used

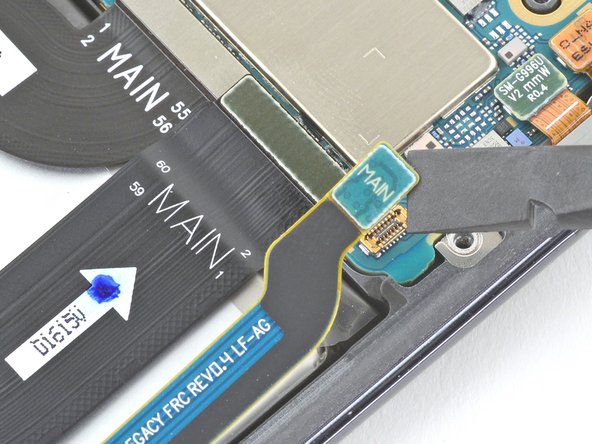
Step 21


– Grab your tweezers or fingers to gently hold the motherboard bracket aside, then use a spudger to nudge up that battery press connector like you’re taking the lid off a jar of pickles!
– When it’s time to put those press connectors back together, just line them up properly and give one side a gentle press until you hear that satisfying click! Then do the same for the other side—just remember, avoid pressing down in the middle. If you get it off-kilter, you might bend the pins, and nobody wants that headache. If you need help, you can always schedule a repair.

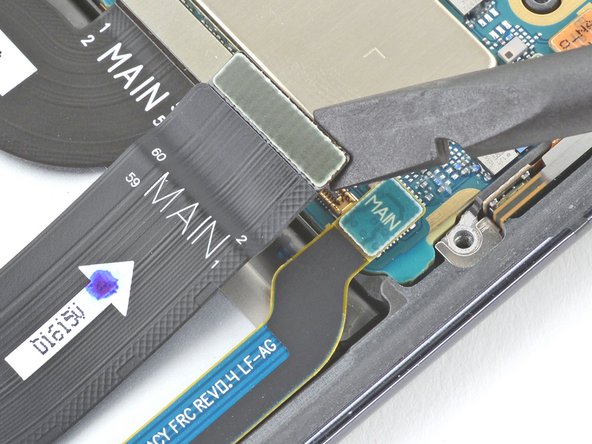
Step 22


– While keeping the motherboard bracket out of the way, grab your trusty spudger and gently pry up to disconnect the wireless charging coil’s press connector. You’ve got this!
Tools Used
Step 23


The wireless charging coil is attached to the phone with a gentle touch of adhesive, keeping it snug and secure!
– Gently coax the wireless charging coil off your phone using your fingers—think of it as giving it a little love tap!
– When putting everything back together, start by securing the motherboard bracket screws to keep the charging coil in line. Once that’s locked in, give the rest of the coil a firm press to stick it down nice and snug.
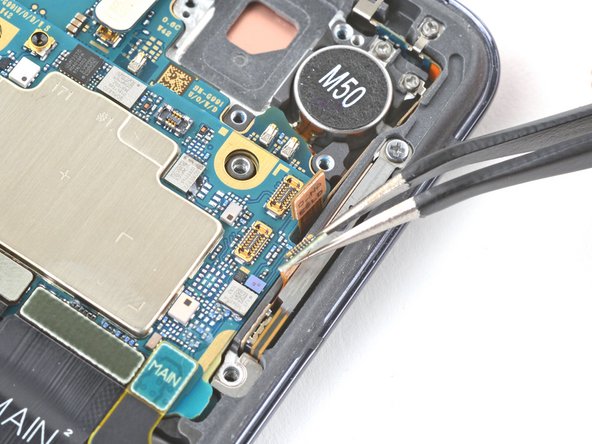
Step 24

– Gently slide the pointed edge of a spudger underneath the earpiece speaker cable’s press connector and give it a little lift to disconnect it. You’ve got this!
Tools Used
Step 25

– Grab your trusty Phillips screwdriver and get ready for some fun! You’ll want to carefully unscrew the seven 4 mm screws holding the earpiece speaker snug against the motherboard. You’ve got this!
Step 26


– Get your spudger ready to rock and roll by gently pushing it into the cozy gap between the right-most edge of the earpiece speaker and the phone.
– Let the spudger do its thing as you skillfully pry up and release those pesky clips that are holding the earpiece speaker hostage.
– Time to say goodbye to the earpiece speaker using your trusty tweezers or your own nimble fingers. Show it the exit door with a gentle tug, and it’s off to a new adventure.
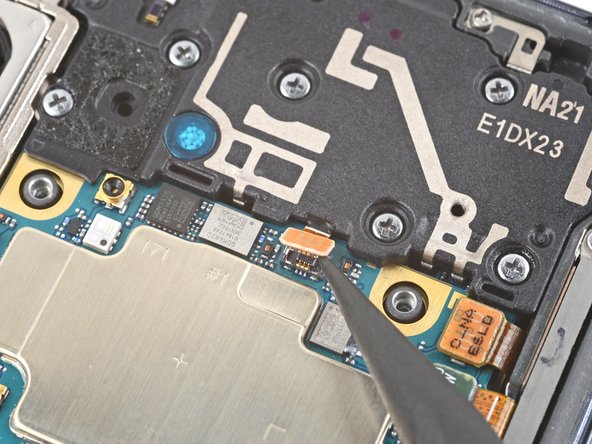
Step 27


– Grab your trusty spudger and gently nudge up that front camera’s press connector to disconnect it like a pro!
Tools Used


Step 30


– Alrighty, friends! Time to disconnect that power button cable’s press connector. Just use the pointy end of your spudger to give it a little nudge, like you’re waving hello to a friendly neighbor. Oh, and if you need help, you can always schedule a repair.
Tools Used


Step 33

Handle those cables with care! Avoid bending or folding them too much while moving them around—nobody wants to see a cable tear, right?
– Get ready to rock and roll! Grab a spudger or just use your awesome fingers to gently move that power button cable away from the phone.
– Now, it’s time to show off your skills on the dance floor of repair. Repeat the same groovy moves for the left-edge 5G antenna cable.
Tools Used
Step 34


Be gentle with those cables! Avoid folding or bending them sharply as it can lead to tears. Keep it smooth, and they’ll thank you later!
– Grab your trusty tweezers or just use your fingers to gently coax the orange 5G antenna cable away from the phone. It’s like giving it a little wave goodbye!
– Now, do the same smooth move for the green 5G antenna cable. You got this!
Tools Used
Step 35

– Grab your trusty Phillips screwdriver and get ready to tackle those 4 mm screws that are holding the camera bracket and motherboard snugly to the frame. You’ve got this!
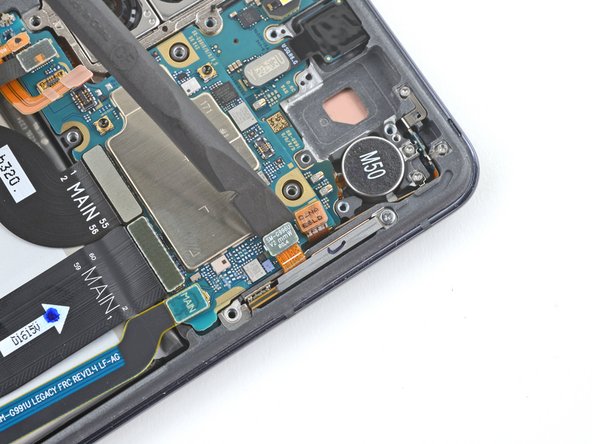
Step 36
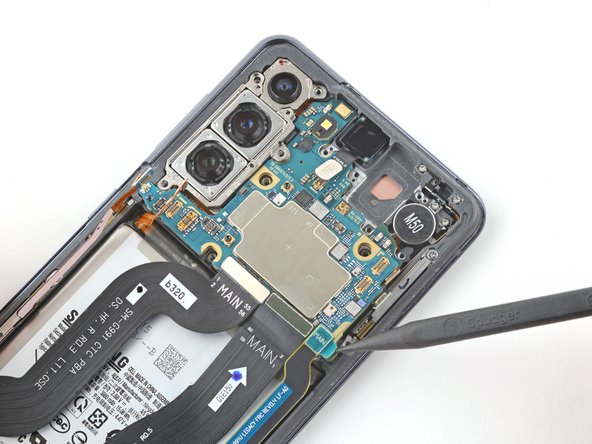
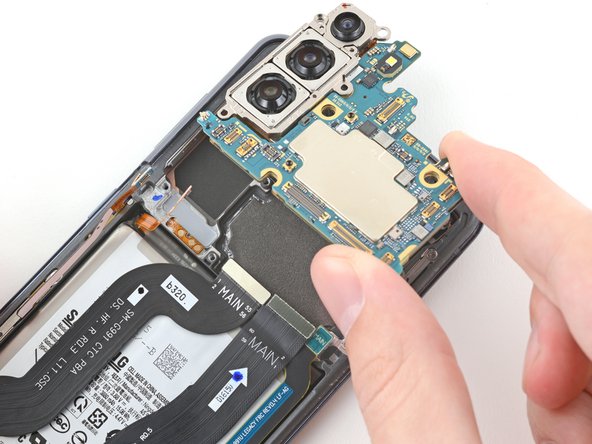

– Slide a spudger slyly between the bottom-right edge of the motherboard assembly and the frame.
– Gently pry up with the spudger to free the clips that are snugly holding the motherboard assembly.
– With a flick of the wrist, use your nimble fingers to whisk away the motherboard assembly.
Tools Used
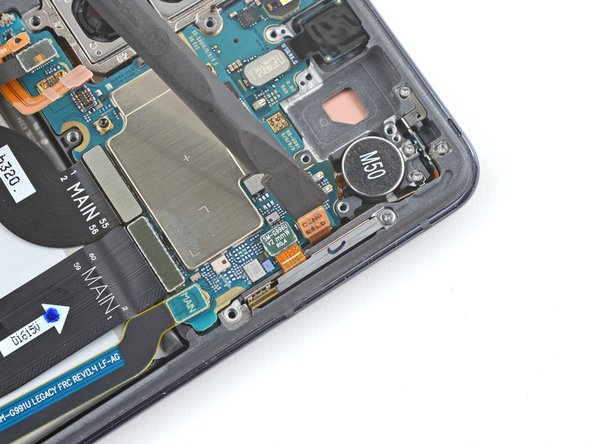
Step 37

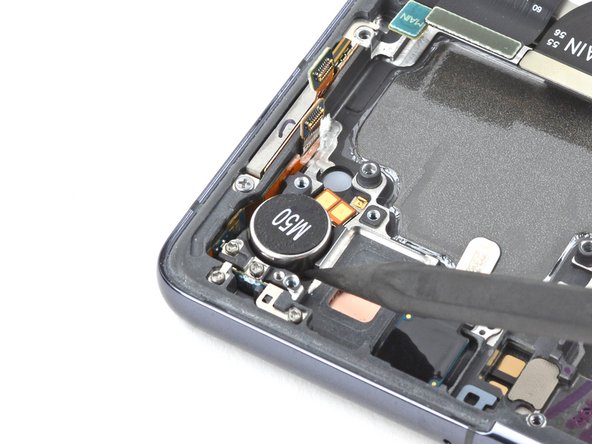
The little motor under there is glued to the case to keep it in place!
– Drop a few splashes of strong isopropyl alcohol (over 90% concentration) into the little gaps around the edges of the vibration motor.
– Give that isopropyl alcohol a moment to work its magic and let it soak into the adhesive for at least a minute or two.
Step 38
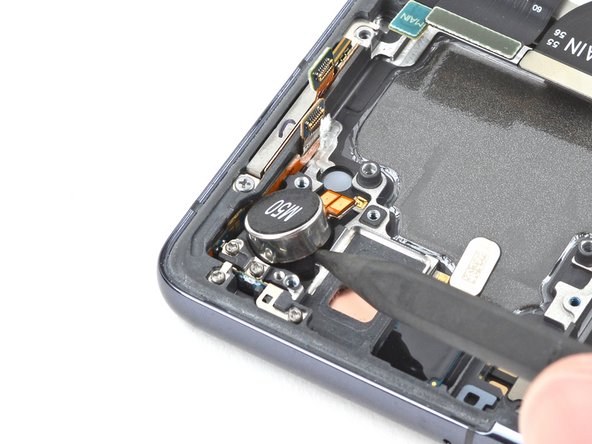

– Gently wedge the spudger’s tip into the crack between the vibration motor and the frame.
– Carefully lift with the spudger to detach the vibration motor.
– Using tweezers or your fingers, smoothly take out the vibration motor.
– If any alcohol is still lingering, grab a lint-free cloth to wipe it away or let it air dry before popping in the new vibration motor.


