Samsung Galaxy S21 5G Rear Camera Replacement Guide – DIY Tutorial
Duration: 45 minutes
Steps: 38 Steps
For your own good, make sure to drain that battery below 25% before diving into your phone disassembly adventure!
Follow this cool guide to swap out or upgrade the rear camera on your Samsung Galaxy S21. The rear camera consists of two rad modular parts: the ultra-wide camera and the wide-telephoto camera. You have the power to switch up either part or both using this guide. Keep it safe by bringing the battery level below 25% before taking apart your phone. This reduces the chance of a not-so-chill thermal situation if the battery gets harmed by mistake during the repair. And if your battery is looking a bit puffed up, take the right precautions. To nail this repair, make sure you grab some replacement adhesive. Get ready to snap those pics again in no time! If you need help, you can always schedule a repair.
Step 1
Make sure your phone is completely powered down before diving in.
– Warm up an iOpener and press it against the bottom edge of the back cover for a solid two minutes. You’re doing great!
Tools Used
Step 2
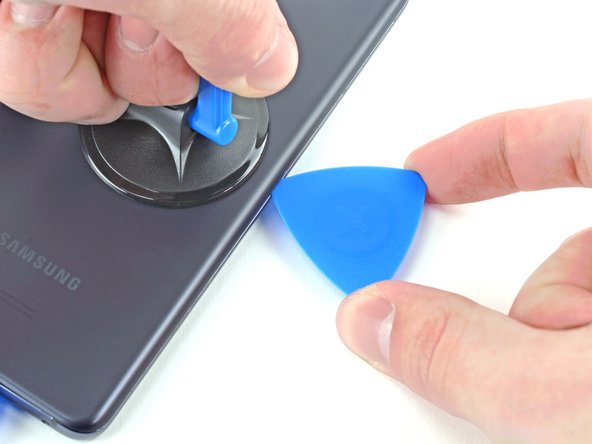
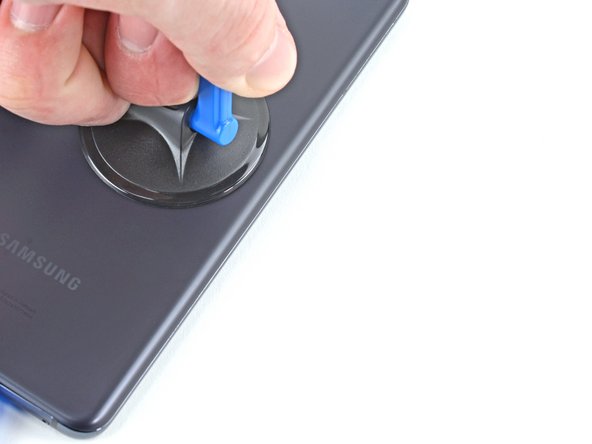
– Get ready to rock this repair by placing a suction cup right in the middle of the back of your device.
– Channel your inner superhero strength and gently lift up on the suction cup to create some wiggle room between the back cover and the frame.
– Slide in an opening pick like a pro into the gap you’ve just created.
Step 4
– Heat up that iOpener and give the back cover’s left edge a cozy two-minute spa treatment.
Tools Used
Step 5
– Stick a suction cup on the back of your device right in the middle of the left edge.
– Pull up on the suction cup with some solid, even pressure to create a gap between the back cover and the frame.
– Slide in an opening pick into that gap.
Step 6
– Gently slide an opening pick down the left edge, making your way to the bottom left corner to break that adhesive seal.
– Keep that pick in place to ensure the adhesive doesn’t try to pull a fast one and reseal itself.
Step 7
– Warm up a trusty iOpener and press it against the right edge of the back cover for a cool two minutes.
Tools Used
Step 8
– Grab a suction cup and stick it on the back of your phone, aiming for the center of the right edge. You’re doing great!
– Now, pull up on that suction cup with a firm and steady hand. We want to make a little gap between the back cover and the frame—let’s create some space!
– Once you’ve got that gap, slide in an opening pick. You got this!
Step 9
– Gently glide that opening pick back and forth along the right edge of the back cover to slice through the adhesive. You’re doing great!
– Once you’ve made the cut, keep the pick in place to stop the adhesive from making a comeback.
Step 10
To unleash your inner repair hero, tackle every corner like a pro… except the top-left, where the rear-facing camera likes to hang out. Use your repair powers wisely!
– Give that right-edge opening pick a little twirl around the top-right corner of your phone.
Step 11
– Alrighty, techies! Let’s groove on this phone dance on the right side. You’ve got this! Pull out your magic opening pick and slide it close to that proud camera shell. Once you’ve got that in place, let’s shimmy our way to the left edge and do the same smooth move there. If those daring steps seem a tad tricky, remember – you can always be a pro and schedule a repair if needed!
Step 12
– Warm up your trusty iOpener and gently apply it to the camera shell for a cozy two-minute snuggle session.
Tools Used
Step 13
If the previous method didn’t do the trick, just hop to the next step for another option. If it did work, feel free to skip right ahead.
– Twist the back cover anticlockwise to make a space between the camera shell and the frame.
– Gently slide an opening pick into the gap.
Step 14
Handle this method with care, as there’s a chance you could end up cracking that plastic back cover.
– Carefully slide those two picks toward the camera shell, tucking them gently under the corners of the back cover near the camera shell. You’re doing great!
– Now, wiggle those picks back and forth along the seam between the back cover and the camera shell until you create a little gap. You’ve got this!
Step 15
– Wiggle an opening pick gently between the camera shell and the frame to gracefully separate the adhesive.
Step 16
Be careful of the plate on the back cover with the phone’s flash – the pick might get caught!
– Just a heads up, there’s some bonus adhesive waiting for you on the right side of the camera that you’ll want to delicately slice through.
Step 17
– Lining up is key here, folks! Take that opening pick and guide it right to your phone’s flash – like a little dance partner.
– If you’re feeling slow, that’s cool, just take it easy and make sure you’re avoiding the flash’s plate at all costs.
– Camera’s to the right? More like camera’s slicing to the right! Have fun with this step and remember, no rush!
Step 18
– Time to give that back cover an extended vacation! Remove it with care.
– Ready for the reassembly dance? Let’s bust out those moves during reassembly:
Step 19
During this repair adventure, remember to keep an eye on each screw and return it to its original home. Let’s keep things organized and breezy!
– Grab your trusty Phillips screwdriver and take out those five 4 mm-long screws that are holding the motherboard bracket snugly in place. You’ve got this!
Step 20
Hold tight, my friend! Don’t unclip that bracket just yet – it’s still chilling with the wireless charging hero!
– Grab a pair of tweezers and with a confident flick, gently lift up and unclip the motherboard bracket from its cozy spot in the frame.
Tools Used
Step 21
– Grab those tweezers or use your fingers to gently hold the motherboard bracket out of the way. Now, with your trusty spudger, pry up that battery press connector like a pro!
– When it’s time to re-attach those press connectors, take your time. Align it carefully and press down on one side until you hear that satisfying click. Then, do the same for the other side—just avoid pressing down in the middle. If it gets misaligned, those pins could bend, and that’s a no-no. Keep it smooth and easy!
Step 22
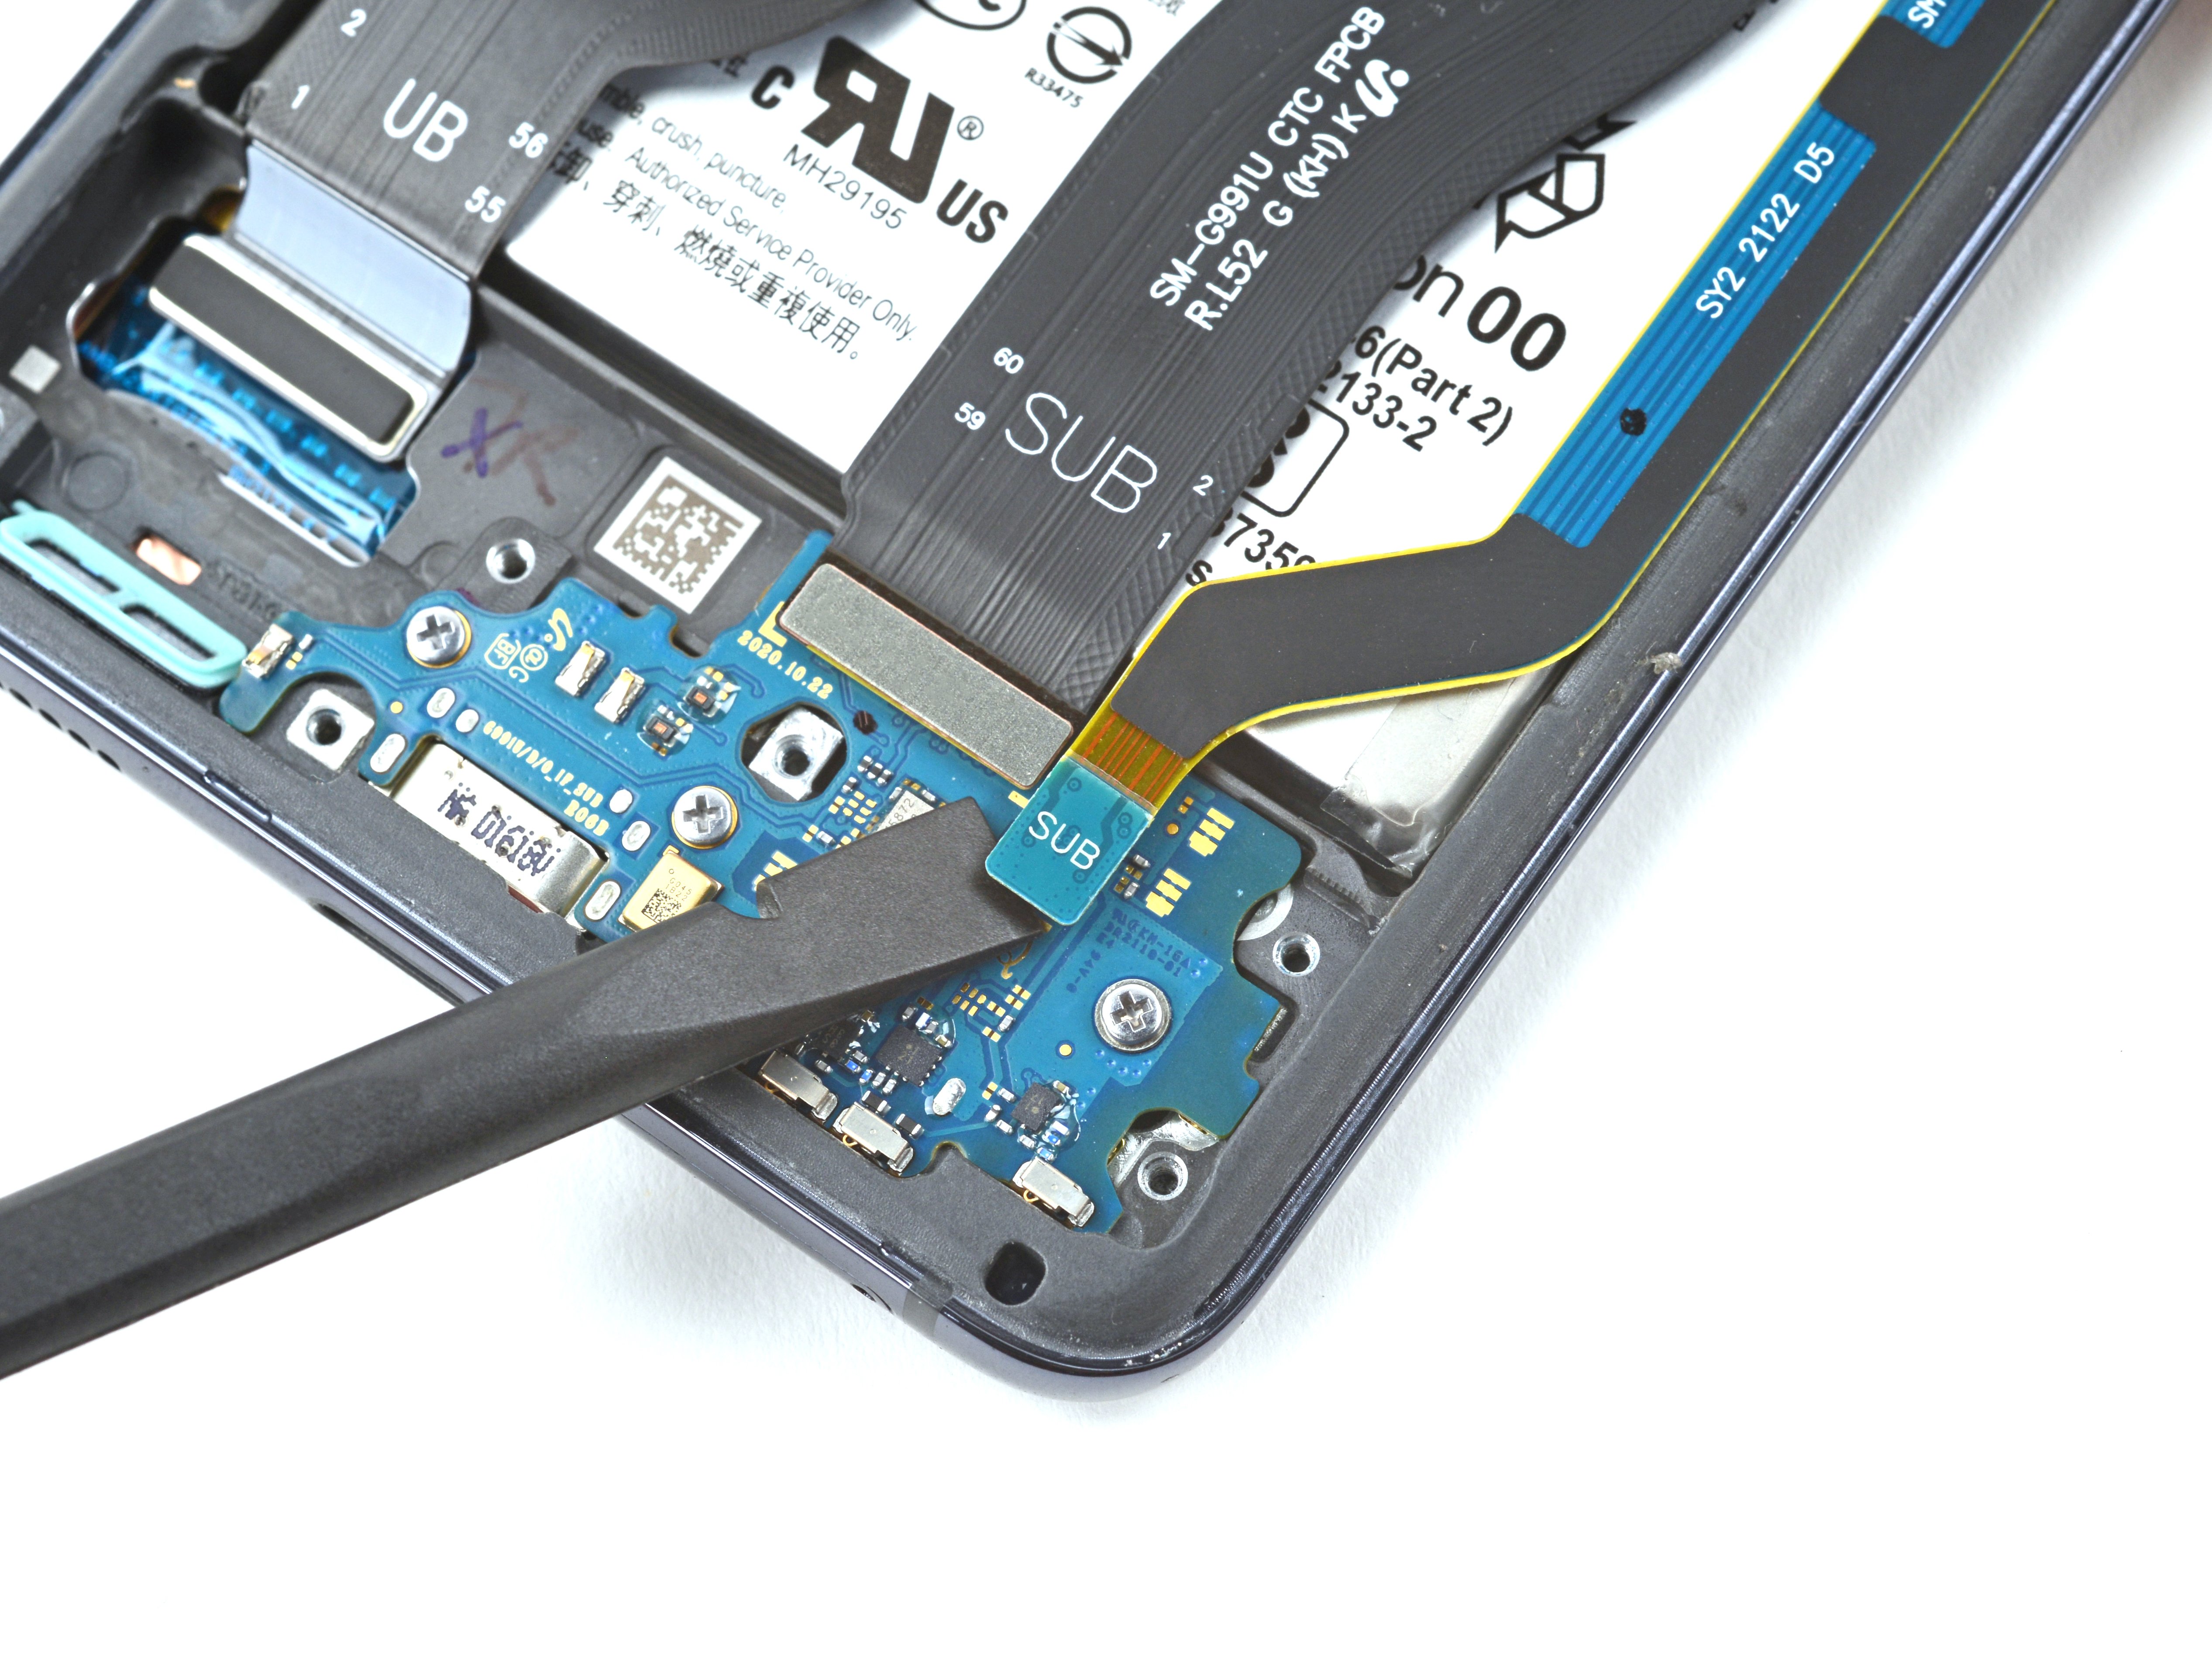
– While you keep the motherboard bracket safely out of the way, grab your trusty spudger and gently lift up to disconnect the wireless charging coil’s press connector. You’ve got this!
Tools Used
Step 23
The wireless charging coil is held in place with a bit of light adhesive magic.
– Peel off the wireless charging coil with care using your fingertips.
– When putting everything back together, start by securing the screws on the motherboard bracket for proper alignment of the charging coil. Then, push down firmly on the rest of the coil to make sure it sticks in place.
Step 24
– Are you ready to rock ‘n’ roll? Pry up and disconnect that earpiece speaker cable’s little buddy, the press connector! If you need help, you can always schedule a repair
Tools Used
Step 25
– Grab your trusty Phillips screwdriver and let’s tackle those seven 4 mm screws holding the earpiece speaker snug to the motherboard. You’ve got this!
Step 26
– Let’s get that earpiece speaker outta there! Carefully insert the tip of your spudger tool into the little space between the right edge of the speaker and the phone.
– Now, gently pry up using the spudger to release those clips holding the speaker in place. Think of it like giving the speaker a little hug goodbye!
– Use your trusty tweezers or fingers to remove the speaker. See? Piece of cake!
Step 27
– Get ready to show some love to your device! Use the flat end of a spudger to gently pry up and disconnect the front camera’s press connector.
Tools Used
Step 30
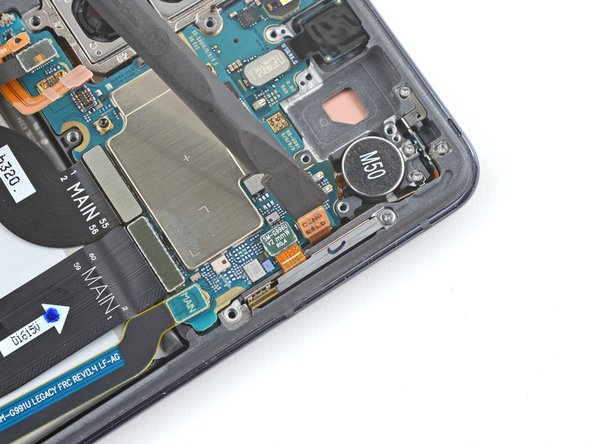
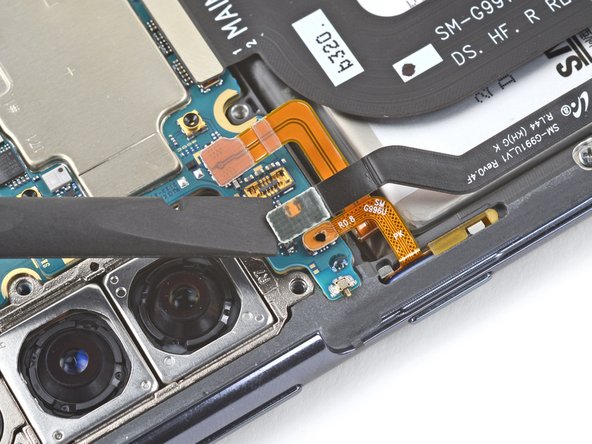
– Gently use the tip of a spudger to lift and unplug the power button cable’s connector. You’ve got this!
Tools Used
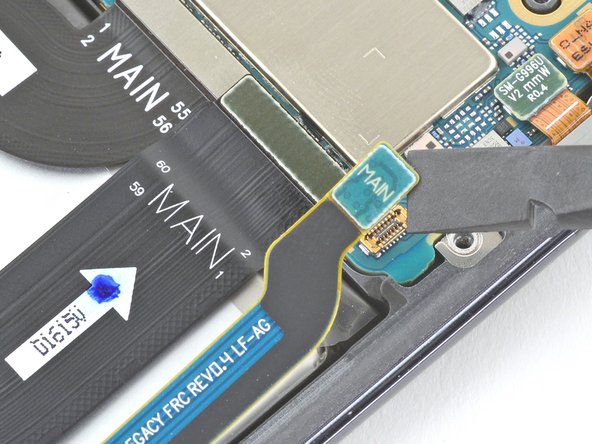
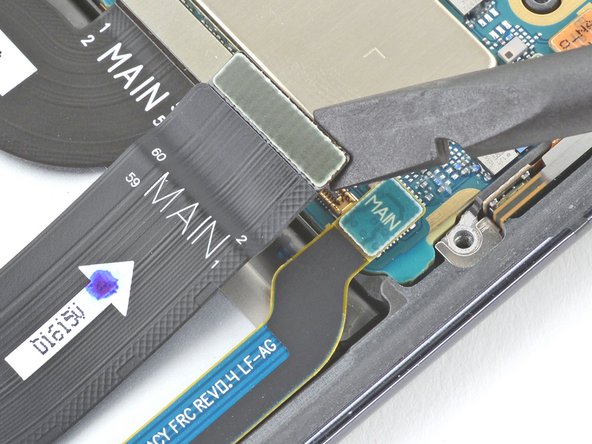
Step 33
Be gentle with those cables! Keep them straight and avoid any sharp bends while you’re moving them around, or they might just get a little tear in their fabric.
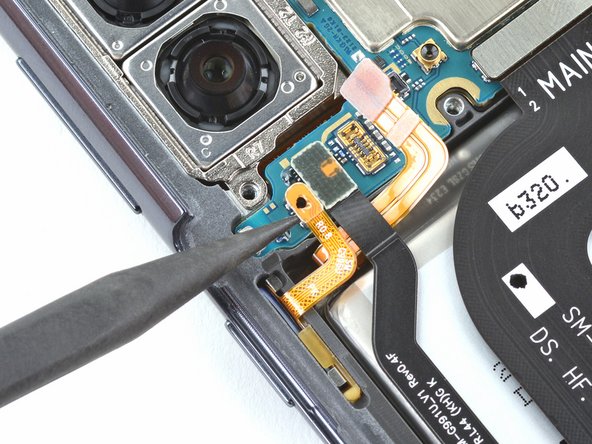
– Grab a spudger or simply use your fingers to gently nudge that power button cable away from your phone. You’ve got this!
– Now, let’s give some love to the left-edge 5G antenna cable and do the same. Keep it friendly!
Tools Used
Step 34
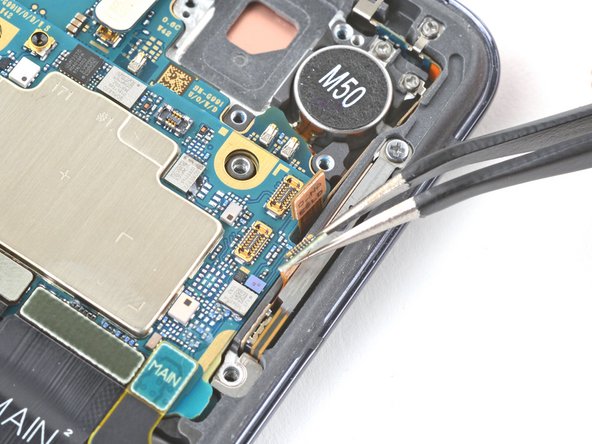
Handle those cables with care—no sharp bends or folds, or you might just end up with some cable casualties!
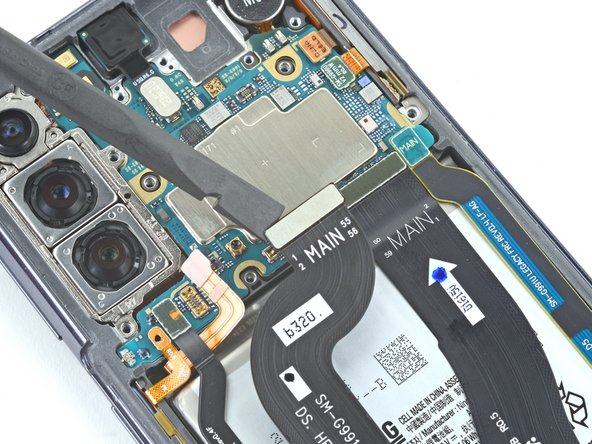
– Grab your trusty tweezers or just your fingers, and gently coax that orange 5G antenna cable away from the phone. You’ve got this!
– Now, give some love to the green 5G antenna cable and do the same. Easy peasy!
Tools Used
Step 35
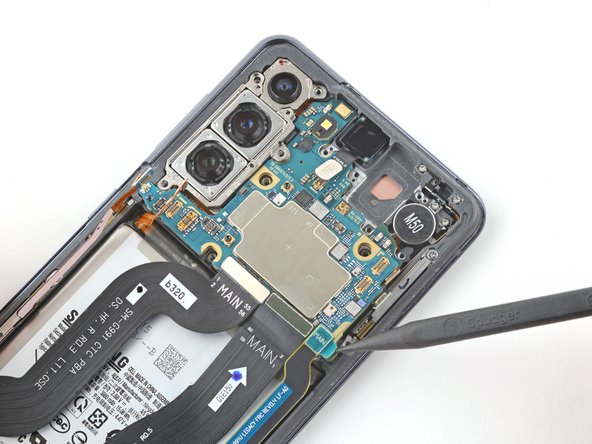
– Grab your trusty Phillips screwdriver and remove the 4 mm screw that’s holding together the camera bracket and the motherboard to the frame.
Step 36
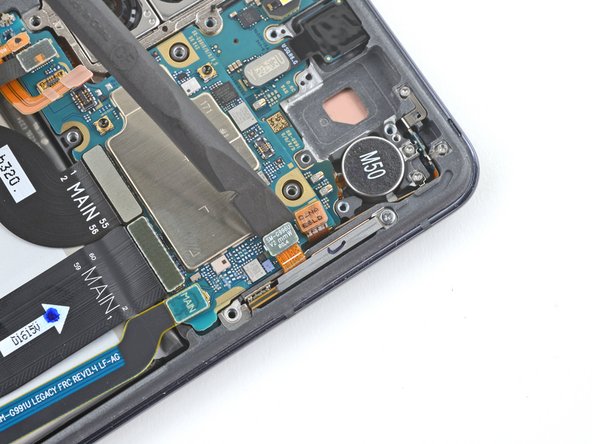
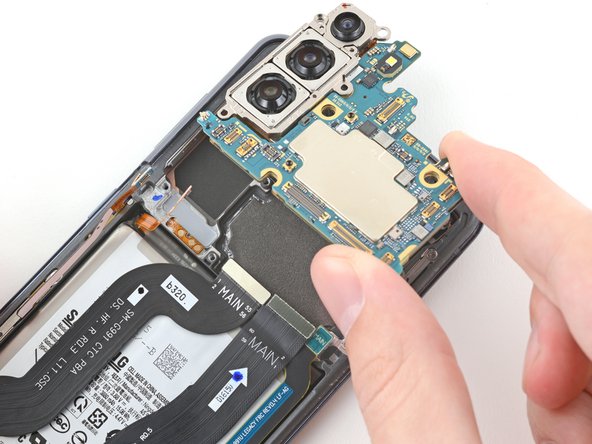
– Alrighty folks, here’s the deal! First, pop open that little guy, the spudger, and slide it in between the bottom-right edge of your motherboard assembly and the frame – easy peasy! Next, give it a little tweak with that spudger – that’ll release those pesky clips that are holding onto your motherboard assembly. Last but not least, using your trusty fingers, give the motherboard assembly a little wave, and it should come right out! If you need help, you can always schedule a repair!
Tools Used
Step 37
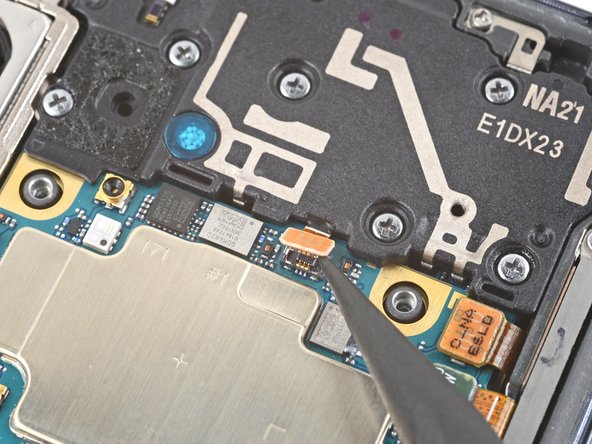
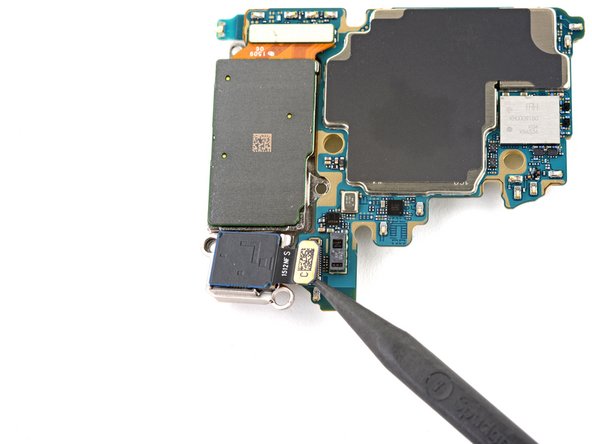
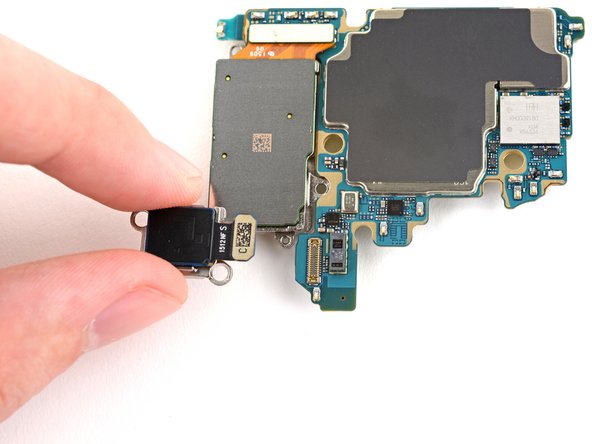
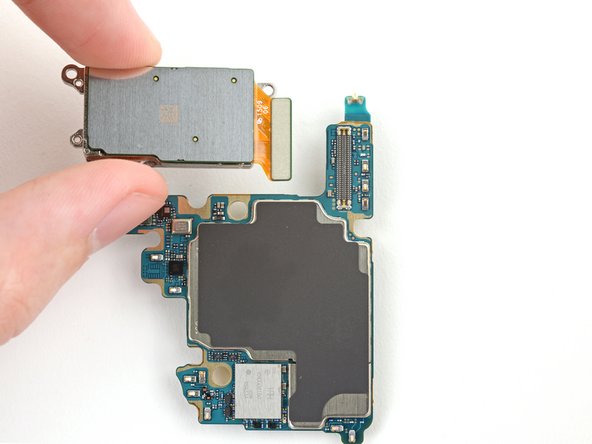
– Gently use the spudger’s pointy side to lift and disconnect the ultra wide camera’s press connector from the motherboard. You’ve got this!
– With a steady hand, use tweezers or your fingers to carefully take out the ultra wide camera. It’s like playing a game of surgery!
Step 38
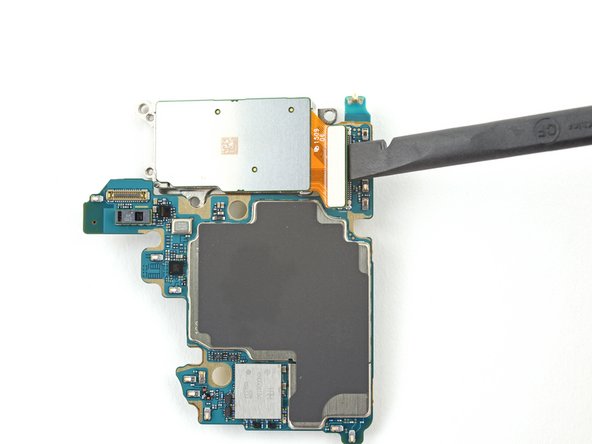
– Grab the flat end of a spudger to gently free and detach the wide and telephoto camera’s press connector from the motherboard.
– Feel free to use tweezers or your nimble fingers to carefully take out the wide and telephoto camera.


