Samsung Galaxy S21 Battery Replacement
Duration: 45 minutes
Steps: 36 Steps
Make sure to have some fun and bring your battery level under 25% before diving into phone disassembly.
Get ready to tackle your Samsung Galaxy S21 battery like a pro! Before you dive in, make sure to drain that battery to below 25%. It’s a smart move to avoid any unexpected surprises that could arise if the battery gets a little too excited during the repair. If you notice your battery is looking a bit puffy, handle it with care! While it’s technically possible to swap out the battery without disconnecting the interconnect cables, we recommend doing so for a smoother experience. It’ll make removing and putting the battery back in a breeze. Oh, and don’t forget to grab some replacement adhesive to seal the deal on your repair. If you need help, you can always schedule a repair.
Step 1

Make sure to power down your phone completely before diving in.
– Warm up an iOpener and place it on the bottom edge of the back cover for a solid two minutes.
Tools Used

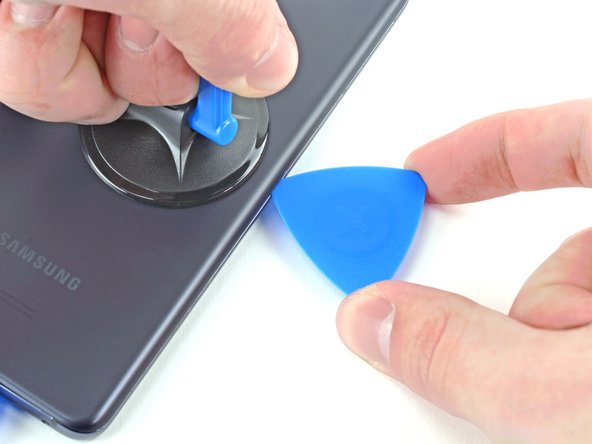
Step 2


– Stick a nifty suction cup onto the back of the phone, right in the middle at the bottom.
– Gently tug on the cup with a firm, constant pull to create a slight separation between the back panel and the frame.
– Slide in a cool opening pick into the gap.
Step 3


– Glide the pick back and forth across the bottom like a pro to smoothly separate the adhesive.
– Keep the pick in place to make sure the adhesive won’t stick back together.
Step 4

– Get your heated iOpener ready to jazz up the back cover’s left edge for a cool two minutes.
Tools Used
Step 5


– Grab a suction cup and give the back of the phone some love right in the middle of the left side.
– Show that back cover who’s boss by pulling up on the suction cup with some serious strength. You got this!
– Gently slide an opening pick into the gap like a pro.
Step 6


– Gently glide an opening pick along the left edge towards the bottom left corner to snip through the adhesive.
– Keep the pick in place to stave off the adhesive from sealing back up.
Step 7

– Warm up a heated iOpener and gently place it on the right edge of the back cover for two minutes. Let’s get that cover nice and toasty!
Tools Used
Step 8


– Alrighty! Grab that bad boy suction cup and pop it right on the back of your phone, near the center on the right edge. Now, gimme some muscle, and yank that cup up to create yourself a gap for our pick! Kapeesh?
Step 9


– Gently glide an opening pick back and forth along the right edge of the back cover to slice through that adhesive like a pro.
– Keep the pick in place to stop the adhesive from sealing back up on you.
Step 10


Feel free to tackle each corner with confidence, just steer clear of the top-left where the rear-facing camera hangs out.
– Twirl the right-side opening pick around the upper-right corner of the device.
Step 11


– Gently slide that top pick in as close to the camera shell as you can get—like you’re giving it a friendly high five!
– Now, give the left-edge pick the same loving attention. You’ve got this!
Step 12

– Warm up your iOpener and press it gently against the camera shell for a solid two minutes. Let’s get that thing ready for some TLC!
Tools Used
Step 13


If the previous attempt didn’t cut it, simply move on to the next step for an alternative. If things clicked, you can skip to the one after. Keep on truckin’!
– Give that back cover a little twist to the left until you see a small gap between the camera shell and the frame. You’re doing great!
– Now, slide an opening pick into that gap you’ve created. Keep it steady!
Step 14


Hey there, just a heads up – take it easy with this method to avoid any unexpected cracks on the plastic back cover!
– Go ahead and gently glide those two picks towards the camera shell so they cozy up beneath the corners of the back cover that are right next to the camera shell.
– Now, give those picks a little dance along the pathway between the back cover and the camera shell until you’ve created a nifty gap between the camera shell and the frame.
Step 15


Be prepared for a bit of a wrestling match with the adhesive holding the frame to the camera shell—it’s a stubborn one! You might find yourself heating it up a few times to make it cooperate.
– Slip an opening pick between the camera shell and the frame to break the adhesive seal.
Step 16


Watch out for that sneaky plate on the back cover around the phone’s flash – it’s a little trap for your pick!
– Hey there! Time to get groovy with your repair skills. Slice through the extra adhesive hanging out to the right of the camera.
Step 17


– Let’s get started by aligning the opening pick’s tip with your phone’s flash.
– Gently insert the pick, being careful to steer clear of the flash’s plate.
– Next, let’s carefully cut the adhesive to the right of the camera.
Step 18


– Time to jazz things up! Remove the snazzy back cover with a smile.
– During reassembly: Let’s bring this party back together!
Step 19

As you dive into this repair adventure, remember to keep a close eye on every screw! Each one has its special spot, so let’s make sure they find their way back home just like they started.
– Whoa, let’s spark some #fixerupper magic real quick! Time to remove the 5 tiny 4mm-long screws holding the motherboard bracket in place! Don’t forget to take it slow and easy, not to rush the mommy of all circuitry underbelly. Phew, that was intense! If you need help, you can always schedule a repair!
Step 20


Hold your horses! Don’t yank that bracket off just yet; it’s still cozy with the wireless charging coil.
– Grab a trusty pair of tweezers and give that motherboard bracket a gentle lift to unclip it from the frame. You’ve got this!
Step 21


– Grab your trusty tweezers or fingers, and gently hold the motherboard bracket aside. Now, take your spudger and carefully pry up that battery press connector like a pro!
– To put those press connectors back in action, start by aligning one side and give it a gentle press until it clicks! Repeat on the other side, but remember—no pressing in the middle. A misaligned connector can bend those pins, and we definitely don’t want that kind of trouble. If you run into any issues, just schedule a repair for some expert help!
Tools Used

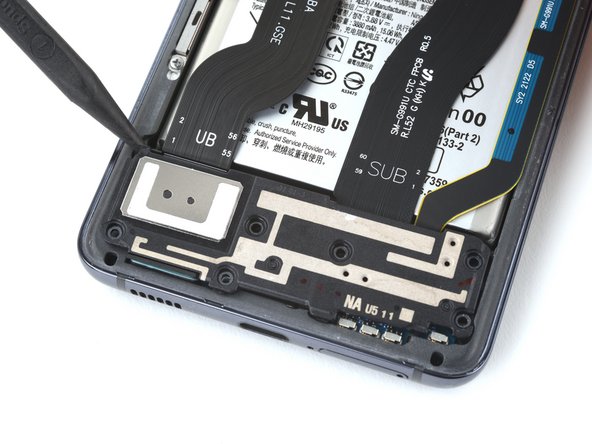
Step 22


– While keeping the motherboard bracket safely out of the way, grab your trusty spudger and gently pry up to disconnect the wireless charging coil’s press connector. You’ve got this!
Tools Used
Step 23


To give your device a boost, gently fine-tune the placement of the wireless charging coil using the light adhesive provided.
– Gently coax the wireless charging coil away from the phone using your fingers—think of it as giving it a little hug goodbye!
– When you’re putting everything back together, start by securing the motherboard bracket screws. This will help get the charging coil nicely lined up. Once it’s in position, give the rest of the coil a firm press to make sure it sticks well.
Step 24

– Grab your trusty Phillips screwdriver and loosen up those six 4 mm screws that are holding the loudspeaker snugly to the frame. You’ve got this!
Step 25


– Gently slide the point of your spudger into the notch located in the top-left corner of the loudspeaker and give it a little pry to pop those clips loose. You’re doing great!
– Now, go ahead and lift that loudspeaker right out.
Tools Used
Step 26


– Grab your trusty spudger and gently wiggle the flat end underneath the primary interconnect cable’s press connector to pop it loose. You’ve got this!
Tools Used
Step 27

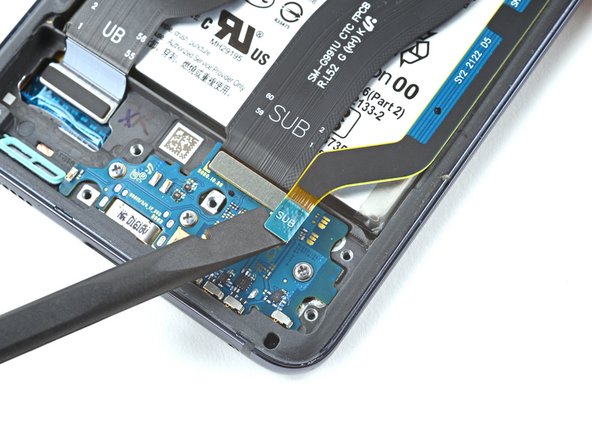
– Grab your trusty spudger and use its flat end to gently lift and disconnect the press connector for the secondary interconnect cable. Easy peasy!
Tools Used
Step 28

– Hey there! Let’s have a funky time prying up those secondary and primary interconnect cables. Use your spudger’s flat end to give ’em a little nudge, like you’re playing air guitar! Go for both cables, one after the other, and bam! You’ll be rockin’ your repair. If you need help, you can always schedule a repair!
Tools Used
Step 29

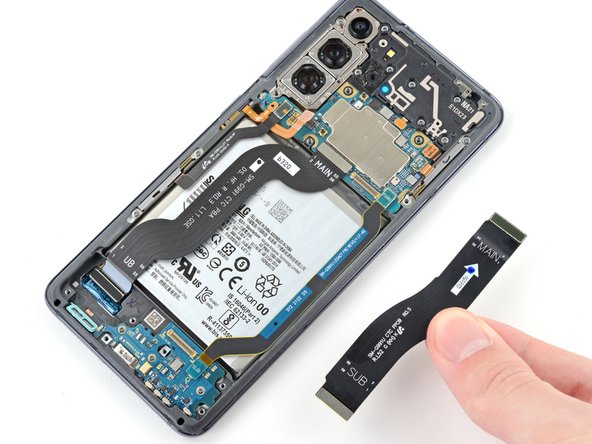
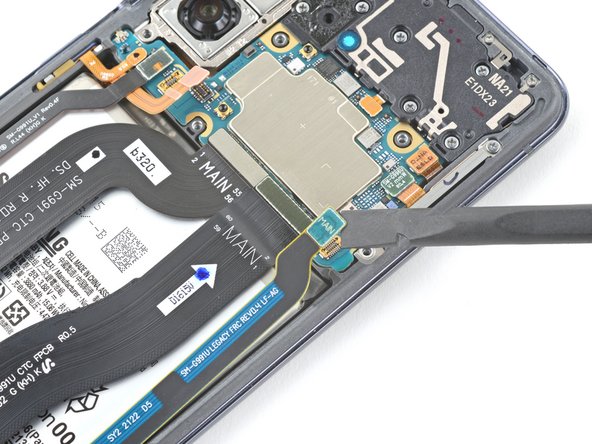
– Grab those tweezers or just use your fingers to gently detach the primary and secondary interconnect cables. You’ve got this!
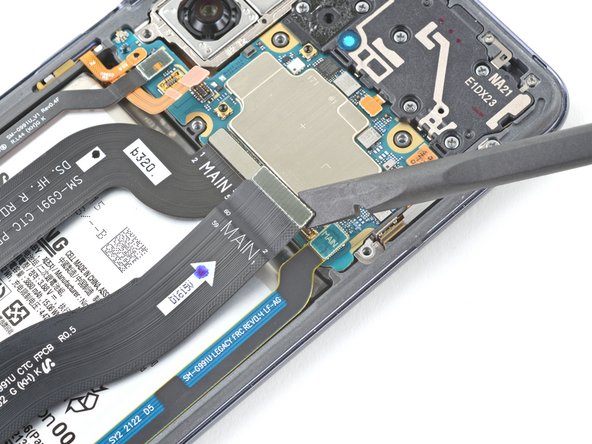
Step 30

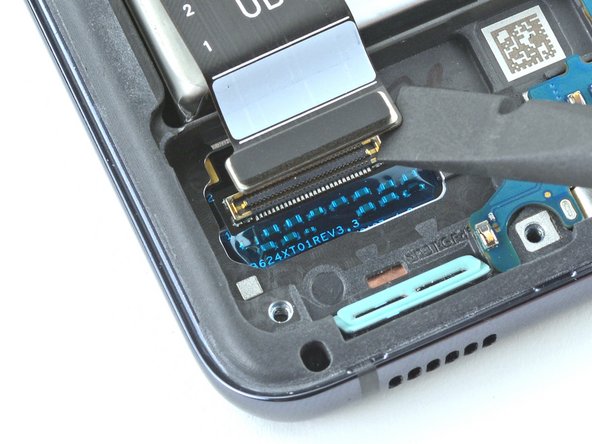
– Grab your trusty spudger and gently wiggle it to lift up the display cable’s bottom press connector. You’ve got this!
Tools Used
Step 31


– Grab your trusty spudger and gently pry up to disconnect the display cable’s top press connector. You’ve got this!
Tools Used
Step 32

– Grab your trusty tweezers or just use your fingers to gently lift off that display cable. You’ve got this!
Step 33


Remember, we’re on a mission to save your device, not make a mess! Be gentle with that battery – no punctures, no bends. We don’t want any surprises or sudden heatwaves. If the battery is being stubborn, a little splash of isopropyl alcohol might just give it the nudge it needs. Keep at it, you’ve got this!
– Drop a couple of drops (1-2, to be precise) of high concentration (over 90%) isopropyl alcohol around the edges of the battery. It’s like giving it a little spa treatment!
Step 34
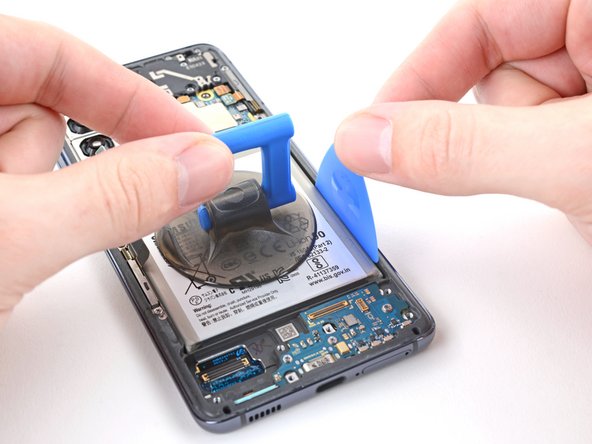
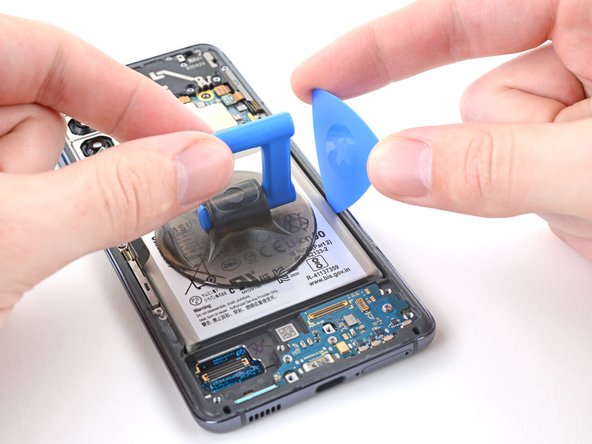

– Grab a suction cup and attach it to the battery, aiming for the center of the right edge.
– Get an opening pick and slide it into the gap with the most room between the frame and the battery.
– Twist the opening pick as you insert the long edge into the gap.
Step 35
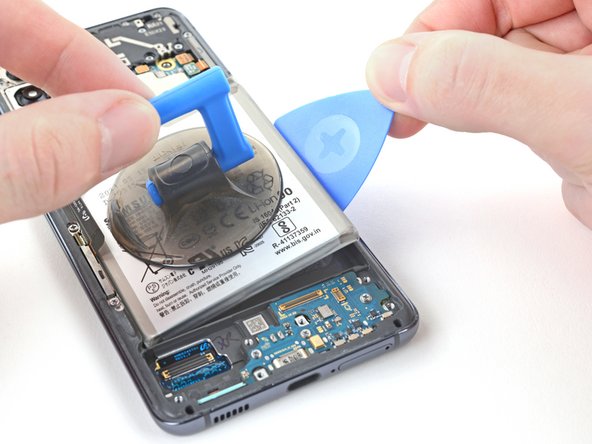

– Give that suction cup a sturdy tug and use the opening pick to gently lift the battery away from the frame. You’re doing great!
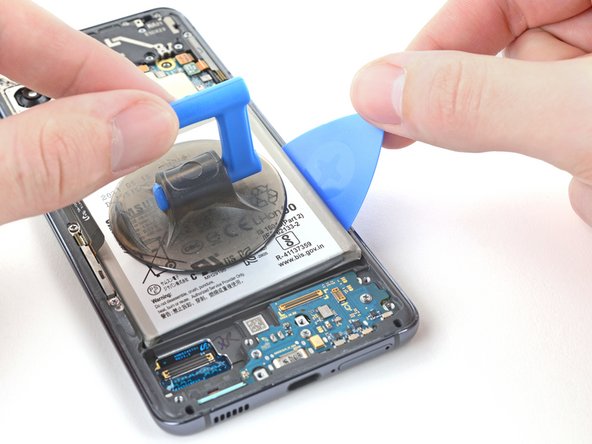
Step 36
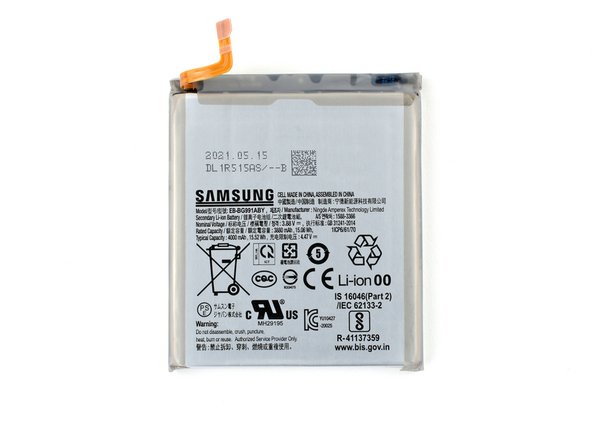


Hey there! It’s best to steer clear of reinstalling a battery that’s damaged or misshapen. Trust us, it’s a safety no-no! Keep it safe and sound.
– Let’s kick things off by gently taking out the battery! Be sure to peel away any stubborn adhesive that might still be hanging on.
– If you’ve used isopropyl alcohol, hang tight for about ten minutes! This little waiting game will let the alcohol evaporate completely before you pop in the new battery.
– Now, as we get everything back together:


