How to Replace Samsung Galaxy S20 Ultra Front Facing Camera Module Guide
Duration: 45 minutes
Steps: 26 Steps
Hey there! Just a friendly reminder to take your time and double-check your work. If you run into any bumps along the way, don’t hesitate to reach out for help. You can always schedule a repair if you need a hand!
Get ready to tackle the replacement of the front-facing camera module on your Galaxy S20 Ultra! Just a heads-up, removing the camera module can be a bit tricky and there’s a chance it could end up in pieces. If you’re hoping to reuse it, proceed with caution and pay attention to all the warnings. Don’t forget, you’ll need some replacement adhesive to wrap up this repair with success!
Step 1

First things first, make sure to unplug your phone and power it down before diving in.
– Warm up an iOpener and place it on the bottom edge of the back cover for a cozy two minutes.
Tools Used

Step 2


– Grab a suction cup and place it on the back of your phone, aiming for the center near the bottom edge.
– Give that suction cup a good, steady pull to open up a little gap between the back cover and the frame.
– Now, slide the tip of an opening pick into that gap you’ve just created.
Step 3


– Gently glide that pick back and forth along the bottom edge to neatly cut through the adhesive like a pro.
– Keep your trusty opening pick snug in the seam to stop the adhesive from making a comeback.
Step 4

– Warm up a heated iOpener and gently press it against the left edge of the back cover for a cozy two minutes.
Tools Used
Step 5


Since we’re working with some snug fits, you might need to give it a few tries. But don’t worry, you’ve got this!
– Grab a suction cup and stick it to the back of your phone, aiming for the center of the left edge. You’re doing great!
– Give that suction cup a solid pull with consistent force to open up a little gap between the back cover and the frame. Keep it steady!
– Now, slide the tip of an opening pick into that gap you just created. You’re on the right track!
Step 6


– Once your trusty pick is nestled under the edge of the glass, give it a little tilt downward and slide it in further to completely detach the back cover’s sticky embrace.
Step 7


– Gently slide the pick down towards the bottom edge of your phone to break free the back cover’s sticky grip.
– Keep your pick tucked under the left edge of the glass near the bottom of the device to stop that adhesive from making a comeback.
Step 8


– Slide another pick right under the center of the left edge of the back cover.
– Gently glide the pick up towards the top of the device to break free the back cover’s adhesive.
– Keep your pick tucked under the left edge of the glass near the top to stop that adhesive from getting cozy again.
Step 9

– Warm up your trusty iOpener and give it a cozy spot on the right edge of the back cover for a solid two minutes. You’ve got this!
Tools Used
Step 10


– Grab a suction cup and stick it to the back of your phone, aiming for the center of the right edge.
– Give that suction cup a good, steady pull to open up a little gap between the back cover and the frame.
– Slide the tip of an opening pick into that gap you’ve created.
Step 11


– Gently slide the pick down towards the bottom edge of the phone to loosen up the back cover’s adhesive.
– Keep the pick snug under the right edge of the glass near the bottom of your device to make sure the adhesive doesn’t stick back together.
Step 12


– Slide another pick under the center of the right edge of the back cover, just like tucking in a cozy blanket.
– Gently glide the pick towards the top of the device to break free the back cover’s adhesive, as if you’re unwrapping a present!
Step 13

– Warm up that iOpener and give it a cozy two-minute hug to the top edge of the back cover!
Tools Used
Step 14


Hey there! Just a heads up – the glass near the corners of the back cover has a tendency to be a bit delicate. Take it easy during this part to keep your back cover in tip-top shape.
– Gently glide that pick from the right edge of your device and around the top right corner like you’re painting a masterpiece.
– Keep slicing along the top edge until the back cover adhesive is completely separated. You got this!
Step 15


– Gently lift the back cover, taking your time. Use those handy opening picks to cut through any stubborn adhesive that might be holding on.
– Carefully remove the back cover and set it aside.
– When putting everything back together:
Step 16


– Grab your trusty spudger and gently lift up to disconnect that wireless charging coil connector. You’ve got this!
Tools Used

Step 17


– Get your trusty pair of tweezers ready and gently peel the wireless charging coil away from your device.
– Bid farewell to the wireless charging coil as you remove it from its place.
– When it’s time to put everything back together, start by reconnecting the wireless charging coil connector to ensure a perfect fit. Then, press down the rest of the coil firmly to secure it in place.
Tools Used

Step 18

– Grab a Phillips #00 screwdriver and get ready to bid farewell to those five 3.9 mm-long screws holding the motherboard bracket in place! It’s time for them to take a little vacation from their screwy duties.
Tools Used

Step 19

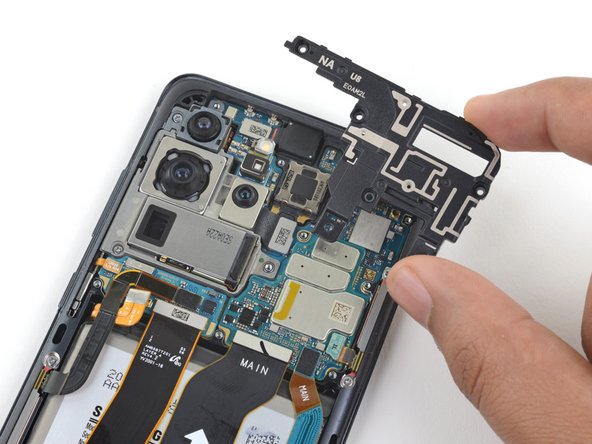
– Grab a pair of tweezers and gently release the motherboard bracket with a smile on your face. It’s like a little puzzle waiting to be solved!
Tools Used


Step 21

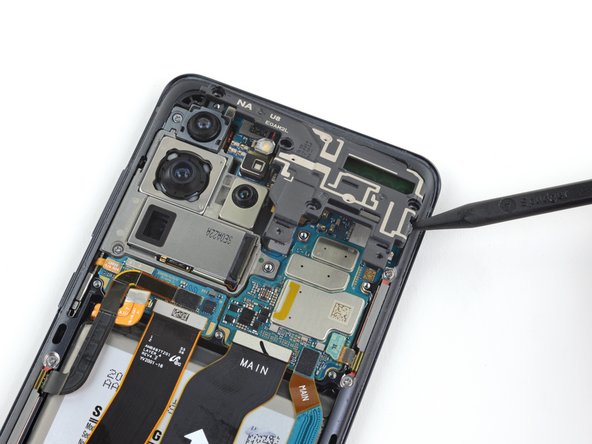
– Grab your trusty Phillips #00 screwdriver and let’s get to work! Carefully unscrew those four 3.9 mm-long screws holding the upper midframe in place. You’ve got this!
Tools Used

Step 23

– Gently lift and detach the front-facing camera flex cable from the motherboard.
– To reconnect, simply line up the press connectors, gently press one side until it clicks, then do the same on the other side. Avoid pushing down the center to prevent any mishaps. If the connector seems off, take it slow to avoid any bent pins and damage.


Step 25


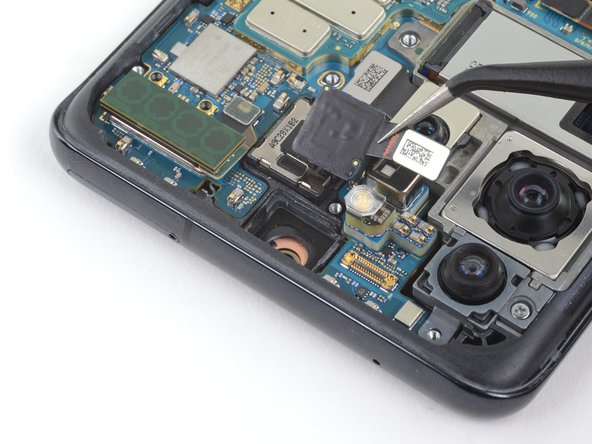
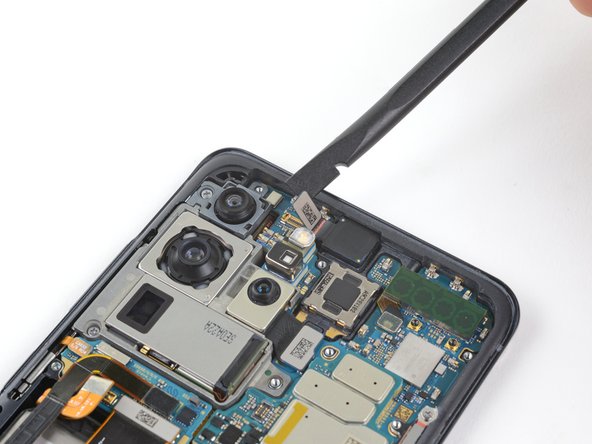
– Grab your trusty spudger and gently pry up the bottom edge of the front-facing camera module—like a pro!
– Carefully lift out the front-facing camera module and set it aside.
– You might just be able to reuse that sticky adhesive when you put it back together. But if it’s looking a bit tired, no worries! You can swap it out with a handy pre-cut adhesive sheet.
Tools Used
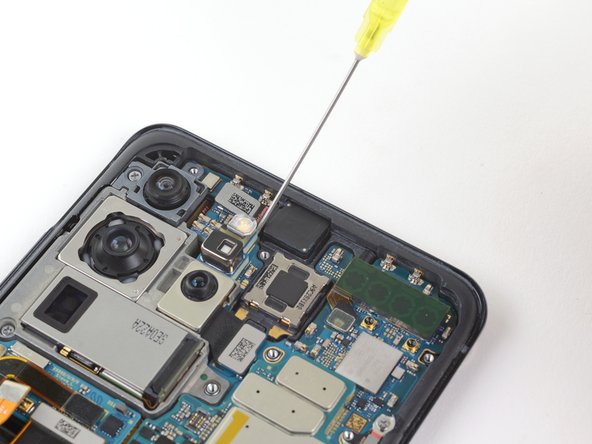
Step 26
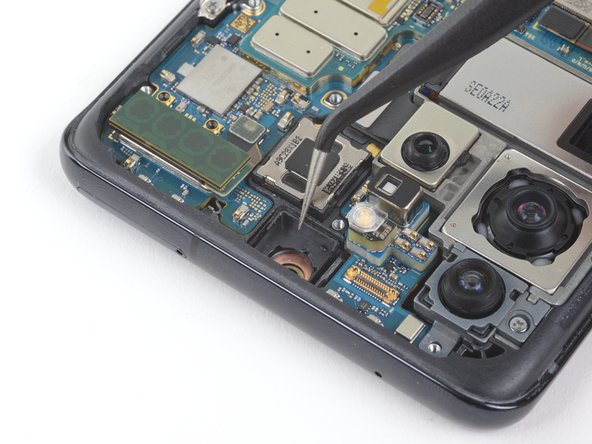


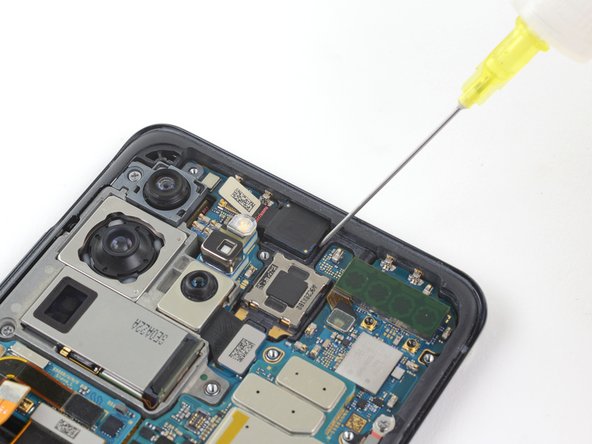
– To make things easier, gently apply a few drops of super strong (over 90%) isopropyl alcohol along the sides of the casing. This will help loosen the sticky stuff holding it in place.
– With the finesse of a ninja, use tweezers to carefully take off the plastic casing around the camera.
Tools Used


