Samsung Galaxy S20 Ultra Battery Replacement Guide: DIY Step-by-Step
Duration: 45 minutes
Steps: 31 Steps
Got a swollen battery? No worries! Just remember to handle it with care and keep your phone away from heat. Safety first, right?
Before you dive in, make sure to drain that battery down to below 25%. It’s a smart move for your safety!
So, it’s time to give your Samsung Galaxy S20 Ultra a little TLC by swapping out that tired old battery! The battery is kind of stuck in there with some sticky stuff, but don’t worry, we’ve got just the trick – some super strong isopropyl alcohol. If your battery is feeling a bit bloated, better play it safe and keep things cool – no heating your phone, okay? And remember, before you dive in, let your battery chill below 25% to avoid any fiery surprises. Oh, and don’t forget to have some replacement adhesive on hand to wrap up this little battery swap dance. Happy fixing, you got this!
Step 1

Make sure to unplug your phone and power it down before diving in. Safety first, right?
– Warm up an iOpener and place it on the bottom edge of the back cover for a cozy two minutes.
Tools Used

Step 2


– Grab a suction cup and stick it right on the back of your phone, aiming for the center of the bottom edge.
– Give that suction cup a good, strong pull to open up a little gap between the back cover and the frame.
– Now, gently slide the tip of an opening pick into that gap you’ve just created.
Step 3


– Gently glide the pick back and forth along the bottom edge to cut through that sticky adhesive like a pro.
– Keep your opening pick snugly in the seam to stop the adhesive from sealing up again.
Step 4

– Give that left edge of the back cover a warm hug with a heated iOpener for two minutes. It’s like a cozy spa day for your device!
Tools Used
Step 5


Don’t worry if it takes a few tries – it’s all part of the fun!
– Grab a suction cup and stick it on the back of your phone, aiming for the center of the left edge.
– Give that suction cup a good, steady pull to open up a little gap between the back cover and the frame.
– Slide the tip of an opening pick into that gap you’ve just created.
Step 6


– Once the pick is snugly under the edge of the glass, give it a little tilt downwards and slide it in a bit more to completely break free the back cover’s adhesive. You’ve got this!
Step 7


– Gently glide your pick down toward the bottom edge of the phone to break the back cover’s adhesive seal.
– Keep that pick snugly tucked under the left edge of the glass down by the bottom—this will stop the adhesive from making a comeback!
Step 8


– Pop in another pick right under the center of the left edge of the back cover.
– Gently wiggle the pick towards the top of the device to loosen the adhesive on the back cover.
– Keep your pick snug under the left edge of the glass near the top of the device to prevent the adhesive from sticking again.
Step 9

– Warm up a heated iOpener and gently press it against the right edge of the back cover for a cozy two minutes.
Tools Used
Step 10


– Grab your trusty suction cup and place it on the back of the phone, aiming for the center of the right edge. You’re doing great!
– With a firm grip, pull on that suction cup! We want to create a little gap between the back cover and the frame. Keep it steady!
– Now, it’s time to slide the tip of your opening pick into that gap you’ve just created. You’re on the right track!
Step 11


– Gently slide the pick towards the bottom edge of the phone to gracefully separate the back cover’s adhesive.
– Keep your pick snug under the right edge of the glass near the bottom of the device to ensure the adhesive won’t play any tricks by resealing.
Step 12


– Time to groove! Slip in another pick right under the center of the right edge of the back cover.
– Gently slide the pick towards the top of the device, letting that adhesive on the back cover dance its way off.
Step 13

– Warm up the top edge of the back cover with a heated iOpener for a cozy two minutes.
Tools Used
Step 14


The glass around the corners of the back cover has a little curve and can be a bit fragile. Take it easy during this step to keep your back cover safe and sound.
– Gently glide the pick from the right side of your device and dance it around that top right corner.
– Keep sliding along the top edge until the back cover’s adhesive starts to give way completely.
Step 15


– Gently peel off the back cover like you’re unveiling a surprise! If there’s any stubborn adhesive left, don’t hesitate to use those trusty opening picks to help you out.
– Say goodbye to the back cover—it’s time for a little separation!
– As you put everything back together, remember to take your time!
Step 16


– Grab your trusty spudger and gently wiggle it to lift and unplug that wireless charging coil connector. You’ve got this!
Tools Used

Step 17


– Grab a trusty pair of tweezers and gently coax the wireless charging coil off your device – it’s like a little dance, but with tools!
– Now that you’re in the groove, go ahead and remove that wireless charging coil completely.
– As you put everything back together, make sure to reconnect the wireless charging coil connector first. This way, it’ll fit right into place. Then, give the rest of the coil a good press to make sure it sticks around!
Tools Used

Step 18

– Grab your trusty Phillips #00 screwdriver and get ready for action! It’s time to unscrew those five 3.9 mm-long screws that are holding the motherboard bracket in place. Let’s do this!
Tools Used

Step 19

– Time to bust out those tweezers and gracefully remove the motherboard bracket like a pro.
Tools Used


Step 21

– Grab your trusty Phillips #00 screwdriver and get ready to tackle those five 3.9 mm-long screws holding the loudspeaker and lower midframe in place. You’ve got this!
Tools Used


Step 23
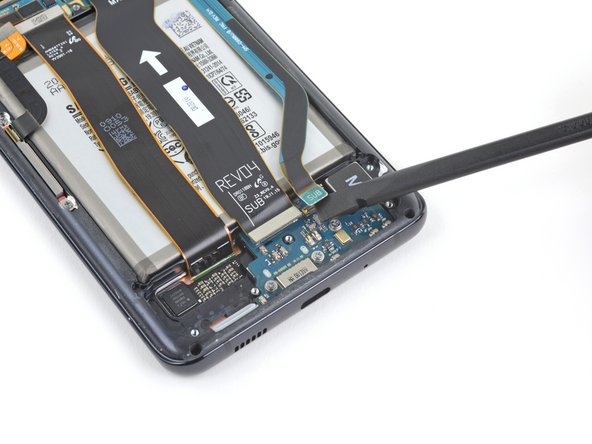

– Grab your trusty spudger and gently pry up those main and auxiliary flex cables from the daughterboard at the bottom of your device. Easy does it!
– Now, when you’re putting those connectors back in, take a moment to align them just right. Press down on one side until you hear that satisfying click, then do the same for the other side. Remember, no need to push in the middle! If things get a little wobbly, you might bend those pins, and that could lead to some serious trouble. If you need help, you can always schedule a repair.
Tools Used
Step 24


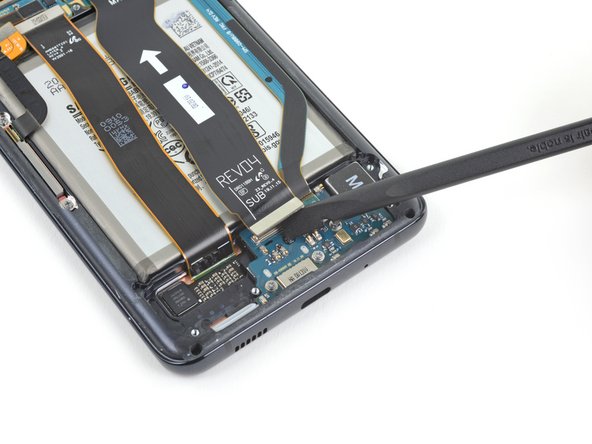
– Grab your trusty spudger and gently wiggle it to lift and disconnect the main and auxiliary flex cables from the motherboard. You’ve got this!
Tools Used
Step 25
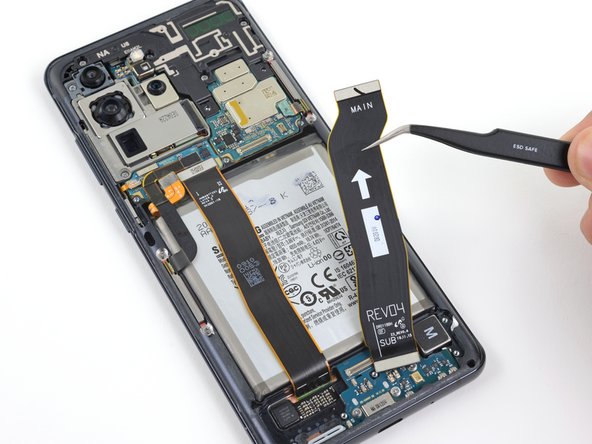
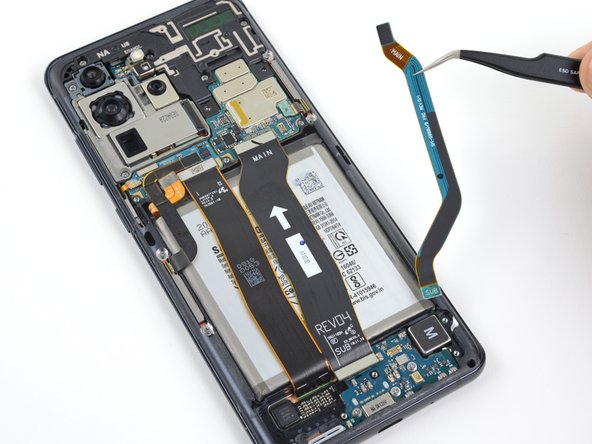

– Carefully lift and detach the main and auxiliary flex cables with a gentle touch.
Step 26

– Gently lift and unplug the left 5G antenna cable from the motherboard. Remember, a little finesse goes a long way!
Step 27


– Gently lift and disconnect the main display flex cable from the motherboard. You’ve got this!
Step 28


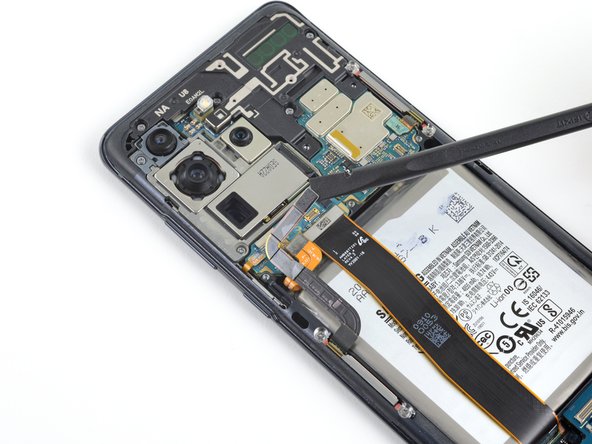
– Carefully lift and twist the display and the left 5G antenna flex cables to clear a path for the motherboard and battery.


Step 30


Step 31

Batteries can be sensationally temperamental. So when one flies the coup, it’s not the best time to test fate. It’s time to bring in the pros! Just click this link to get your device up and running again in no time!
– First things first, let’s get that battery out of there! Remove it with care.
– Next, it’s time to say goodbye to any leftover battery adhesive. Gently peel or scrape it away, then give the battery well a good scrub with isopropyl alcohol and a lint-free cloth to make it nice and clean.
– If you’ve used that isopropyl alcohol magic, hang tight for about ten minutes to let it evaporate completely before popping in the new battery.
– When you’re putting everything back together, and your shiny new battery doesn’t have any adhesive pre-applied, no worries! Just add some adhesive to the well, then press that new battery in firmly. You’re doing great!