DIY Samsung Galaxy S10e Front Camera Replacement Guide
Duration: 45 minutes
Steps: 22 Steps
Hey there! Just a friendly reminder: be super careful while you’re getting into this repair. We want you to stay safe and keep your device in top shape. If things get tricky, don’t hesitate to schedule a repair with us. We’ve got your back!
Ready to swap out the front-facing camera on your Samsung Galaxy S10e? Let’s do this! Follow these steps to carefully remove and replace your camera module. If you need help, you can always schedule a repair.
Step 1

Popping your phone’s seal is a bummer, but worry not! Have your adhesive ready, or play it safe and keep that liquid love away. Good vibes only, folks!
– First things first, let’s power down your phone completely before diving into this repair adventure. Safety first, right?
– Next up, grab your trusty iOpener and warm up that back of the phone along the right edge for about two minutes. This little trick will make the adhesive a lot friendlier and easier to work with when you tackle the back cover.
Tools Used

Step 2


The adhesive is arranged as shown in the first image, illustrating the inside of the cover once removed. If you need help, you can always schedule a repair
– In the next steps, we’re going to slice through the adhesive that’s holding that back cover in place. Let’s get to it!
Step 3


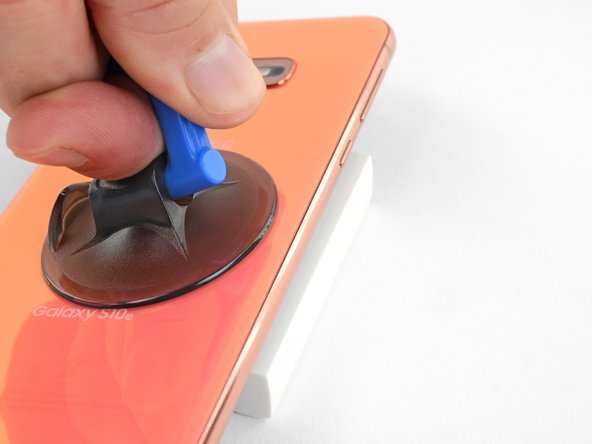
– Attach a suction cup to the back cover, aiming for that heated edge right under the Bixby button where the adhesive is at its weakest. You’ve got this!
Step 4

Be gentle with that rear glass! Applying too much pressure or using metal tools to pry can lead to a shatter party. Let’s keep it intact, shall we?
– Prop up the heated edge of your phone on something around 0.5 inches (13 mm) thick. This nifty angle makes it a breeze to slide in that opening tool.
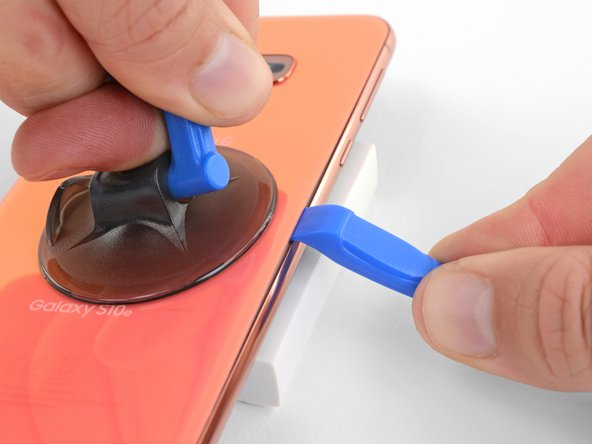
– With your suction cup, gently lift the right edge of the back cover to create a little gap between it and the frame.
– Now, slide the edge of your opening tool into that gap you just made. You’re on the right track!
Step 5


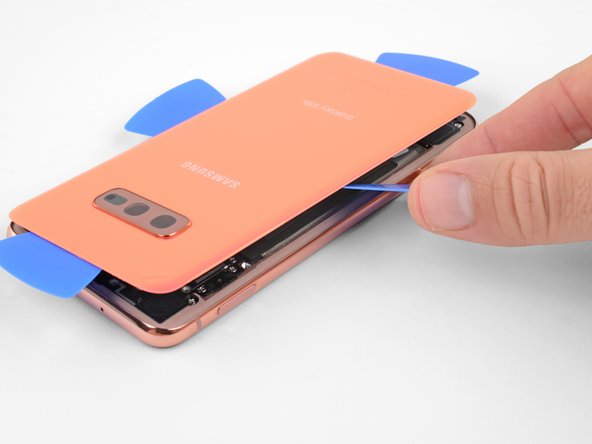
– Gently glide your trusty opening tool along the right edge of your phone, slicing through the sticky stuff that holds the back cover in place. You’ve got this!
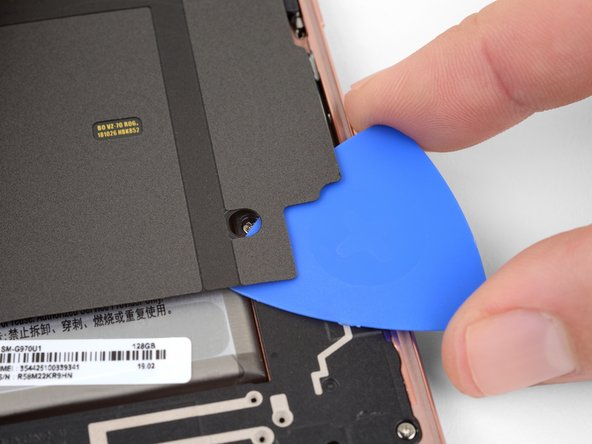
Step 6


– Slide an opening pick next to the tool and leave it there to keep that glue from making a comeback.
Step 7

– Give that top edge of your phone a warm hug for two minutes with a heated iOpener. It’s like a spa day, but for your tech!
Tools Used
Step 8


– Gently slide an opening pick into the top right corner of your phone, and let it glide around the corner and along the top edge like it’s on a little adventure.
– Keep that opening pick snugly in place to stop the adhesive from trying to make new friends!
Step 9

– Heat up that trusty iOpener and give the left edge of your phone a warm hug for a solid two minutes.
Tools Used
Step 10


– Let’s get cracking by gently placing a fresh opening pick near the upper left corner and smoothly gliding it down the left side of your device.
– Keep that opening pick snug on the left side so those sticky adhesives don’t have a chance to stick together again.
Step 11

– Warm up that trusty iOpener and give it a cozy spot on the bottom edge of your phone for a solid two minutes. You’ve got this!
Tools Used
Step 12


– Time for a little phone party trick! Grab an opening pick and get ready to slide it along the bottom edge of your phone to gently separate the adhesive. Let’s get this show on the road!
Step 13


– Grab those trusty opening picks and gently coax the back cover loose, taking it nice and slow.
– Once you’ve got it pried open, go ahead and lift off the back cover.
Step 14

If you feel like it, go ahead and put the back cover back on without worrying about the adhesive. Just make sure to get rid of any big adhesive chunks that could make the cover sit unevenly. Once it’s back on, give it a little heat and press down firmly to make sure it’s secure. While it may not be waterproof, the extra adhesive left behind is usually strong enough to do the job.
– Let’s get that back cover back in place and stick it down with new adhesive. Follow along, and if you need help, you can always schedule a repair.
Step 15

– Get ready to tackle those eight 3.9 mm Phillips screws that are holding the upper midframe snugly in place on your phone. It’s time to show them who’s boss!
Step 16

– Slip an opening pick under the bottom right corner of the upper midframe to loosen the adhesive bonding it to the lower midframe.


Step 18

– Time to give your phone a little lift! Grab the midframe by its plastic section and gently remove it from the phone.
– When it’s time to put things back together, start by sliding the top edge of the assembly into the frame of the phone. Then, with a touch of finesse, press down on the rest of the assembly until it snaps securely into place.
Step 19


– Grab the flat end of a spudger and gently pop the battery connector up and out of its socket. If you need help, you can always schedule a repair.
Tools Used
Step 20

Sure thing! Be super gentle when unplugging those tiny buddies around the socket. Remember, you’ve got this! If you need help, you can always schedule a repair!
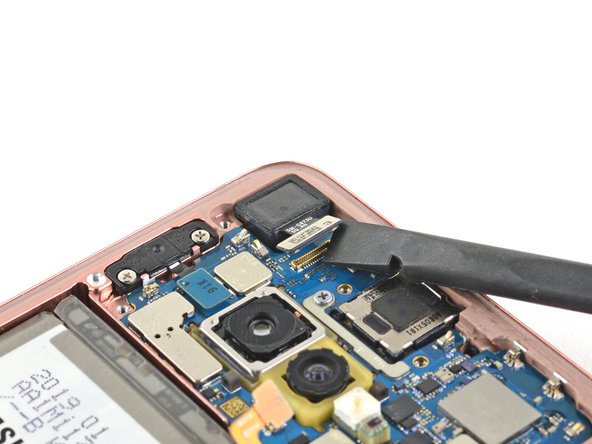
– Grab your trusty spudger and gently lift up the front facing camera connector, disconnecting it from its cozy home in the motherboard socket. Easy peasy!
Tools Used

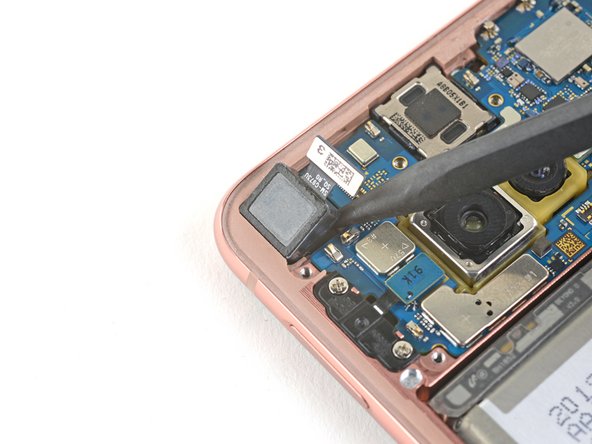
Step 22

– First, let’s get that front-facing camera out of the way – time to say goodbye! Remember, you’re doing great!
– Now, take a good look at your new replacement part and compare it to the original. You might need to transfer any leftover components or peel off those pesky adhesive backings from the new part before you can install it. You’ve got this!