Samsung Galaxy S9 Motherboard Replacement Tutorial: Step-by-Step Guide
Duration: 45 minutes
Steps: 16 Steps
Hey there! Just a friendly reminder to take your time and be careful while working on your device. If you run into any bumps along the way, don’t hesitate to reach out for help. You can always schedule a repair if you need a hand!
Think of the motherboard as your phone’s brain. If your phone’s experiencing major issues, a motherboard replacement might be on the menu. Before diving in, it’s wise to visit our troubleshooting page to pinpoint your problems. Heads up—replacing the motherboard means your device will lose its waterproof superpowers. If your phone might take a dip soon, you’ll need to swap the waterproof seal. If you need help, you can always schedule a repair.
Step 1
The adhesive on your Samsung Galaxy S9 is like a bodybuilder’s grip—super strong! If your iOpener isn’t cutting it, try a hair dryer, heat gun, or hot plate. But be careful—too much heat can damage the AMOLED display and internal battery. If you need help, you can always schedule a repair.
– Hey there, before we dive in, let’s power down your phone.
– Grab a heated iOpener and apply it to a long edge of the phone to gently loosen the adhesive beneath the rear glass. Let the iOpener work its magic for a solid two minutes.
Tools Used
Step 2
The adhesive inside the back cover is arranged just like you see in the picture.
– Get ready to tackle that back cover! In the next steps, we’ll be carefully cutting through the adhesive that’s holding it in place.
– You’ll want to slice through the adhesive in the highlighted areas:
Step 3
If the back glass of the device appears a bit shattered, and your trusty suction cup is not cooperating, don’t fret. You can try gently coaxing it up using some sturdy tape. Alternatively, you can show some love to your suction cup by bonding it in place with a dab of superglue. Let it set, and voila, you’re good to go!
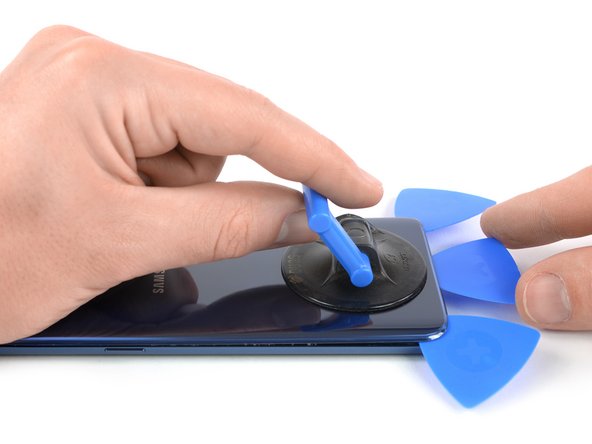
– Give that back cover a little love by pressing a suction cup onto it.
– Gently lift the bottom edge of the back cover with your suction cup, creating a cozy little gap between the cover and the frame.
– Slide in an opening pick into the gap you just made and glide it down to the bottom right corner.
– Now, it’s time for a second opening pick—slide it over to the bottom left corner.
– Pop in a third opening pick to keep the adhesive from getting all clingy while you finish the removal process.
Step 4
– Just use the tip of the opening pick and glide it from the bottom left corner up along the side to the top.
– Swing the pick around the top corner and keep it there so the adhesive doesn’t stick back.
Step 5
Hold your horses! Don’t fully open the phone just yet; that delicate fingerprint sensor cable is still holding the back cover snugly to the motherboard.
– Start by sliding that trusty opening pick from the bottom right corner up along the side to the top. You’re doing great!
– Now, gently slide the pick around the corner and slice through the last bit of adhesive at the top of your phone. Almost there!
Step 6
– Gently lift the edge of the rear glass near the volume button, taking care not to rush it.
– Grab a spudger and use its edge to carefully pry up and disconnect the fingerprint sensor flex cable—easy does it!
Tools Used
Step 7
– Get that rear glass out of there!
– When you’re putting things back together, check out this guide to swap out the adhesive and pop that rear glass back on.
– If you’re thinking about switching up your rear glass, consult this guide to move the rear camera bezel along with the fingerprint sensor.
Step 8
– Have a blast removing 15 teeny-tiny 4mm screws with a super cool #000 Phillips screwdriver! If you need help, you can always schedule a repair.
Step 9
– Time to take out the NFC coil assembly. If you need help, you can always schedule a repair.
Step 11
– Take off the speaker cover/antenna assembly and let’s get this party started!
Step 12
– Gently pop the battery connection open with a spudger. If you need help, you can always schedule a repair.
Tools Used
Step 15
– Pop out that SIM card! Grab a SIM card remover or a straightened paper clip and give that release lever a gentle push.


