Apple Watch Series 2 Force Touch Gasket Replacement
Duration: 45 minutes
Steps: 21 Steps
Follow this guide to swap out the Force Touch gasket in your Apple Watch Series 2. We’ll walk through the process while keeping the display connected—perfect if you’re just replacing the gasket and don’t want to disconnect everything. If your display is coming off or you’re swapping it out altogether, check out this guide and put the gasket back in after you’ve removed the display. Got a working Force Touch but need fresh adhesive to reseal things? Just follow the adhesive replacement guide instead. Need a hand? You can always schedule a repair.
Step 1


If your touchscreen is acting up and keeps you from turning off your watch normally, don't worry—there's an easy workaround to power it down. Just follow this step, and you'll get it sorted without breaking a sweat.
- Before diving into the fun of repairs, make sure to unplug your watch from its charger and power it down. Let's get started on this journey together!
Step 2

If the screen starts to cool down and gets stubborn, just reheat the iOpener or shift it to a new spot. Keeping things warm makes prying off the screen way easier.
- Get your trusty iOpener (or if you're feeling crafty, a hair dryer or heat gun will do the trick) and warm up the front of the watch until it’s a tad too hot to handle.
- Keep that iOpener cozy on the watch for at least a minute so the screen gets nice and toasty, making it easier to loosen the adhesive that's keeping it snug in the case.
Tools Used

Step 3


Keep your hands safe—keep those fingers well away from the knife! When in doubt, rock a sturdy glove (think leather or gardening style) on your free hand.
Go easy with the pressure—too much muscle might send the blade for a joyride, and we definitely don’t want any surprise cuts or a busted watch.
Pop on some eye protection. If the knife or glass snaps, it can fling bits around, and your eyes deserve a front-row seat, not a hit!
Since the space between the screen and watch body is super slim, you’ll want a sharp blade to get in there. Check out the following tips before you dive in.
You can attach or remove the watch band—whatever makes it easier for you to handle things comfortably as you work.
Step 4


Keep that knife on a short leash—only poke it in about 1/16th of an inch (~2 mm). A little restraint goes a long way in keeping your device happy!
- Slide the edge of a curved blade into the slim gap between the display and the outer shell. Begin at the shorter side of the display, right near the digital crown.
- Give it a firm press straight down into that gap.
- Once you're in there, gently tilt the blade to nudge the display open just a bit.
Step 5


Don’t try to fully open or detach the display yet.
- Once you’ve made a small gap with the curved blade, swap it out for the thinner edge of your opening tool and slide it right into the gap.
- Press the opening tool in, using your thumb as a lever to gently lift the display a little more. Slow and steady wins the race!
Step 6


Hey there! When you're getting ready to lift that display, be gentle to keep the Force Touch gasket intact. If it happens to split or you separate the layers, you'll need to swap out the Force Touch gasket too.
And remember, don't go deeper than 1/16th of an inch (~2 mm) with that opening pick—keep it light and easy!
Salvation Repair screen and battery kits come with a new Force Touch gasket, so don’t sweat it if yours gets a little beat up along the way.
- Let's get this repair started! Begin by carefully inserting an opening pick under the display to loosen the Force Touch gasket - it's like a little wake-up call for your device.
- Now, gently slide the pick around the display to break the adhesive bond between the Force Touch gasket and the display. Take your time, and remember, patience is key!
Step 7


To keep those display cables happy, hold off on opening the display all the way just yet.
- Gently lift the display to about a 45° angle and grab your trusty tweezers to peel away the adhesive that’s sticking the display to the Force Touch gasket.
- Carefully maneuver the adhesive around and behind the display cables to completely free it up.
Tools Used

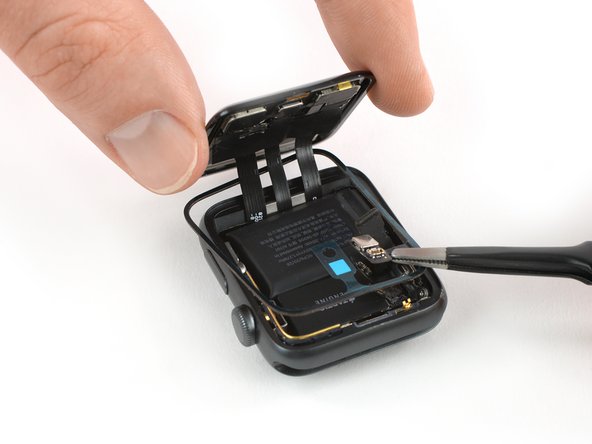
Step 8
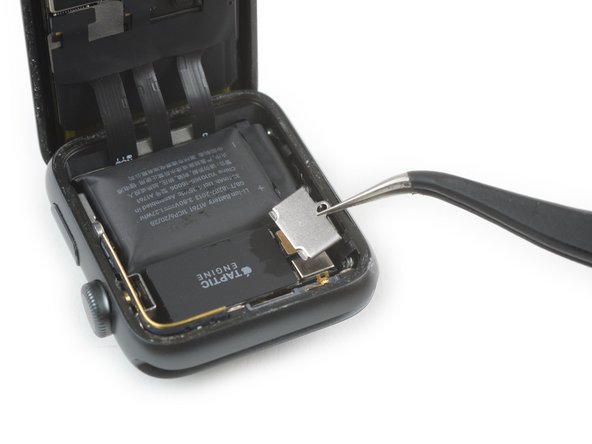

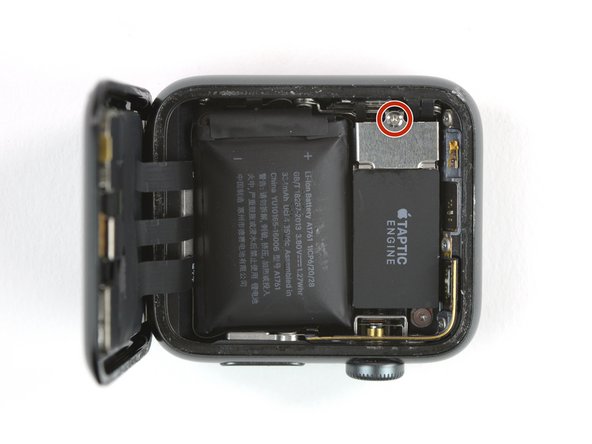
- Grab your Y000 driver and spin out the Tri-point screw holding down the metal cover over the battery connector.
- Lift off the cover and set it aside.
Step 9


- Pop the battery’s connector straight up with the edge of your trusty pry tool—think of it as unhooking a tiny seatbelt.
- Then, give that connector a gentle bend upward so it stays clear and can’t sneak back in for an accidental power hug.
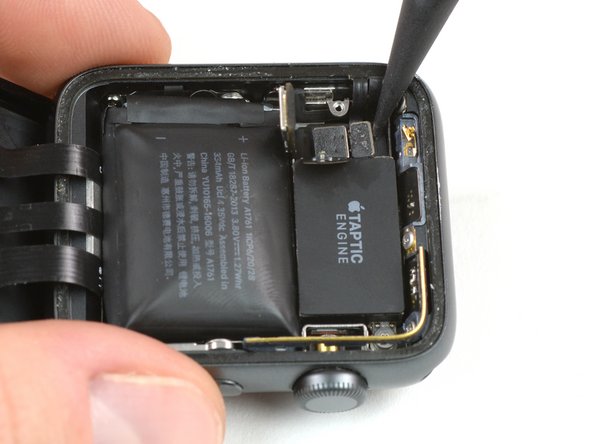
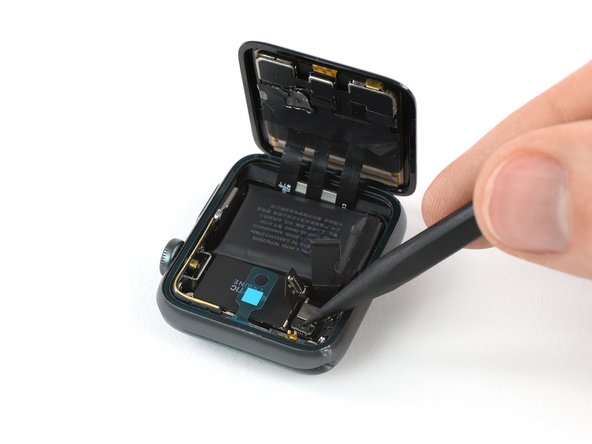
Step 10


The connector you're about to unplug is actually connected to the motherboard. Beneath that connector, you'll find the socket resting on the Force Touch gasket itself.
- Grab your trusty pry tool and gently ease the Force Touch gasket away by prying it straight up from the outer edge. You've got this!
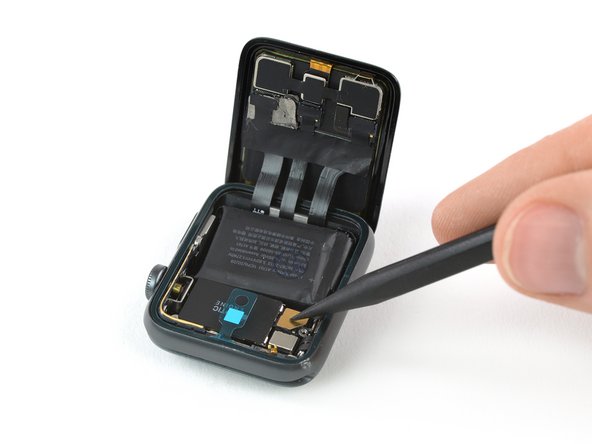
Step 11
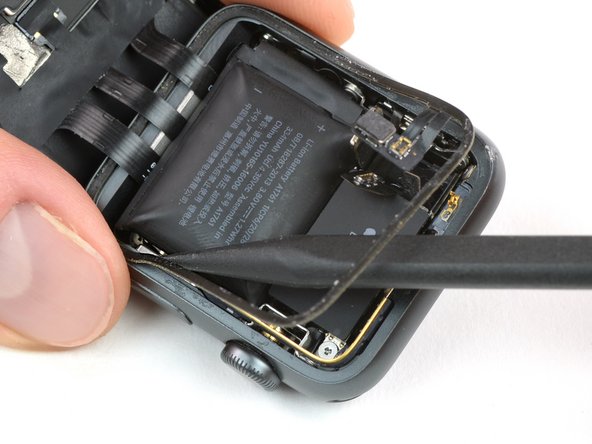


- Gently pop up the connector plate for the Force Touch gasket.
- Take your tweezers or a pry tool and slide it under the gasket to loosen the adhesive underneath.
- Work your way around the watch, freeing the adhesive everywhere except by the display cables—those little guys are easy to tear, so steer clear of that side.
Tools Used
Step 12
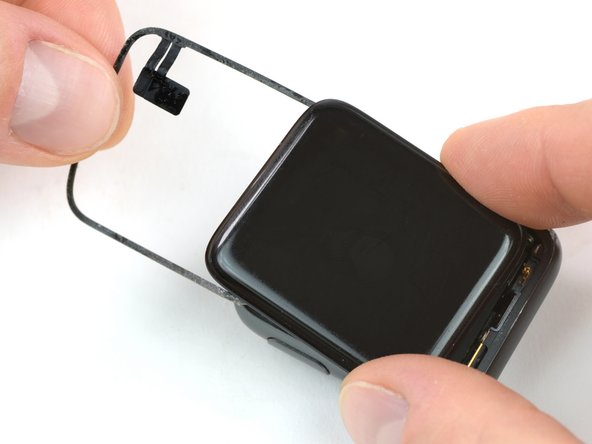


- Gently wiggle that Force Touch gasket around the display like it's a cozy sweater!
- Now, tilt the display nearly shut so you can gracefully peel off the Force Touch gasket from the last stubborn edge.
- Wave goodbye to the Force Touch gasket—it's time to let it go!
- If your display is already on holiday because you’re swapping it out, it might be best to leave the new one disconnected for the moment. You can reconnect it after tackling the Force Touch gasket (that's just five steps away).
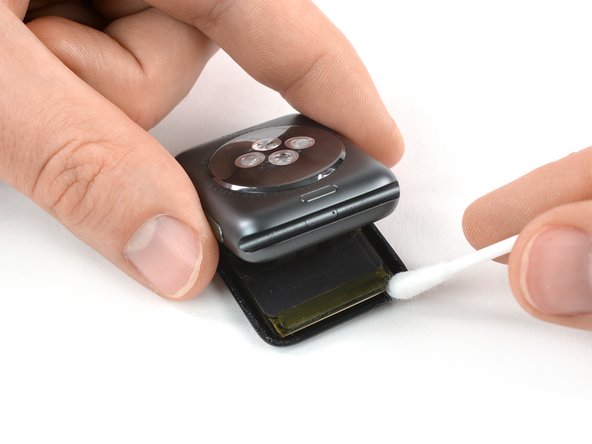
Step 13

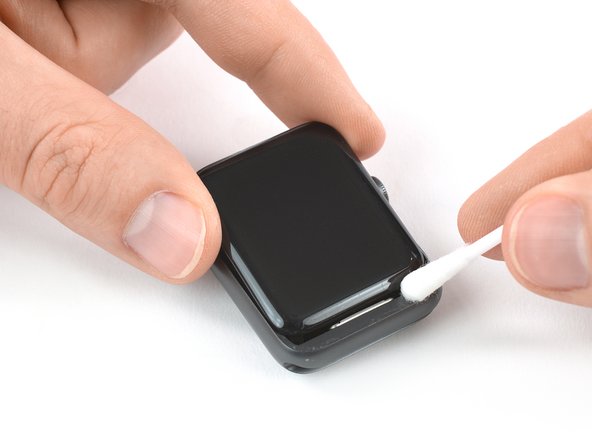
To loosen the adhesive under the display cables, gently hold the display almost closed and carefully peel it away from the edge while cleaning. Keep it steady and avoid forcing anything—patience is key. If you need a hand with this step, you can always schedule a repair.
- Grab a Q-tip or a cleaning pad and give it a little dip in some isopropyl alcohol (make sure it's over 90%!). Gently wipe away any leftover adhesive from that former force touch gasket. You're doing great!
Step 14

- Let's get started by flipping that watch upside-down, so the display is flat and ready for action. Just lift up the case slightly to get things moving.
- Now it's time to get rid of any leftover adhesive on the back of the display. Take your time and be gentle, we're making progress!
Step 15

Keep the gasket positioned so the connector pins are pointing away from you—otherwise, you’ll end up peeling the liner off the wrong side.
- Grab a pair of tweezers and gently peel off the protective liner from the bottom of your new Force Touch gasket, revealing the sticky side underneath. Easy peasy—just take your time and keep it neat. If you need help, you can always schedule a repair.
Tools Used
Step 16


- Hold the Force Touch gasket diagonally and slide it over the display like you're threading a needle – smooth and steady.
- Tilt the display slightly forward to get a good angle, making it easier to line up that gasket with the frame.
- Start at the corner opposite the Force Touch gasket connector, gently set the gasket onto the frame, and press down to secure it in place.
Step 17

- Time to get this repair started! Use a pry tool to gently fold the connector plate of the Force Touch gasket down into its cozy little recess.
- Now, let's get that flex cable reconnected. Simply press it down gently, and you'll be one step closer to fixing your device. If you're unsure, don't worry, it's an easy step!
Step 18

Before you plug the battery back in, double-check that your display is hooked up—give those connectors a quick peek!
- Take your trusty spudger and nudge the battery connector back where it belongs.
- Give the battery flex cable a gentle press to snap it back into place.
Tools Used

Step 19

- Grab some tweezers and carefully position that metal plate back over the battery connector — think of it as placing a tiny puzzle piece where it belongs.
- Screw in the Tri-point #000 screw to secure everything in place—firm but gentle, just like tightening a friendship.
- Before sealing everything up, it’s a good idea to power on the device and do a quick check to make sure all systems are go. If you need a hand, you can always schedule a repair.
Tools Used
Step 20

- Grab your tweezers and carefully peel off the protective film on top of the Force Touch gasket—keep it smooth and gentle!
Tools Used
Step 21

- Ready to say goodbye to your e-waste? Make sure to drop it off at an R2 or e-Stewards certified recycler!
- Things not going as smoothly as you hoped? No worries! Give some basic troubleshooting a shot, or check out our Answers forum for a helping hand.
- If you need help, you can always schedule a repair.