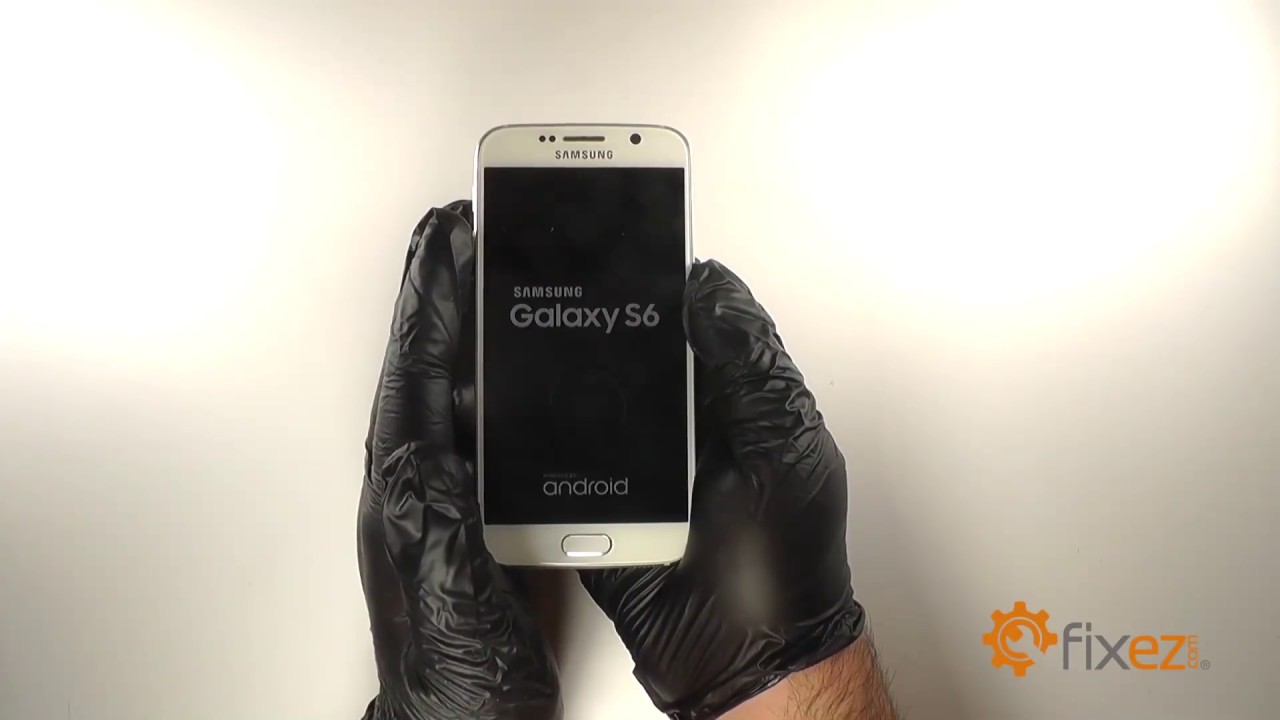
DIY Tutorial: Samsung Galaxy S6 Front-Facing Camera Replacement Guide
Duration: 45 minutes
Steps: 17 Steps
Hey there! Looks like it’s time to roll up your sleeves and dive into this step. Don’t worry, you’ve got this! If you need help, you can always schedule a repair.
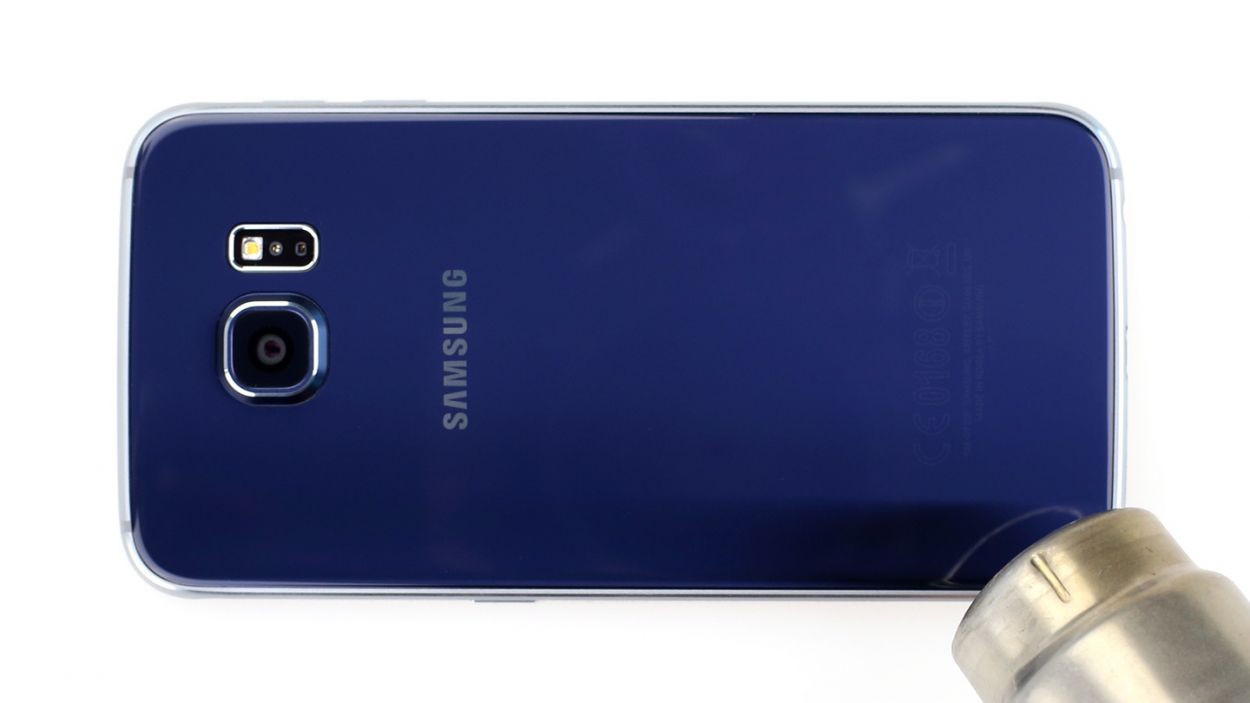
Hey there! So, it looks like your selfies are just not turning out as Insta-worthy as you’d like. You might be facing some camera action, am I right? Fear not, friend! Check out this guide on swapping out that front-facing lens on your Samsung Galaxy S6. Don’t worry, it’s a breeze! Just remember, we’ll be taking that back glass for a spin later. If you need a little help, you can always schedule a repair.
Step 1


– Grab a paper clip or SIM eject tool and slide it into the small hole located on the same side as the power button of your phone.
– Give it a gentle push to pop out the SIM card tray.
Step 2

– Hey, you got this! Let’s put on our superhero repair suits and get that SIM card tray outta there. Worst case scenario, you can always schedule a repair and let our techs lend a hand. schedule a repair
Step 3


It’s a good idea to give your microwave a quick clean before diving in. That way, any pesky residue hanging out at the bottom won’t hitch a ride on your iOpener!
– Pop the iOpener right in the middle of the microwave.
Tools Used

Step 4

Hey there! Just a friendly reminder to keep an eye on that iOpener during your repair journey. We don’t want it getting too hot and potentially bursting into a surprise! Aim to keep it under 100˚C (212˚F) for safety.
If your iOpener looks like it’s been hitting the gym and is a bit swollen, steer clear! Safety first!
Still too toasty to handle in the middle? No worries! Keep using it while it cools down a bit more before you give it another round of heat. A well-heated iOpener should stay nice and warm for up to 10 minutes—just the right amount of cozy!
– Pop the iOpener in the microwave for 30 seconds.
– As it cools down, give it another 30-second blast in the microwave whenever needed.
Tools Used
Step 5

The iOpener gets super toasty, so handle it with care! An oven mitt can be your best buddy here.
– Carefully take the iOpener out of the microwave, gripping it by one of the flat ends to steer clear of that hot center. Stay cool!
Tools Used
Step 6


No microwave? No problem! Just pop that iOpener into some boiling water and let it soak up the heat.
– Grab a pot or pan and fill it up with enough water to give your iOpener a nice bath.
– Get that water boiling! Once it’s bubbling away, turn off the heat.
– Now, gently place your iOpener into the hot water for about 2-3 minutes. Make sure it’s taking a nice dip and is fully submerged.
– Using some tongs (safety first!), carefully lift the heated iOpener out of the water.
– Give the iOpener a good dry with a towel. We want it nice and cozy!
– And voila! Your iOpener is all set for action! If it needs a little more warmth later, just repeat the boiling routine, and it’ll be ready to go in no time.
Tools Used
Step 7


You can use a hair dryer, heat gun, or hot plate to warm things up a bit, but keep an eye on the heat! Remember, the OLED display and internal battery can be a bit sensitive to too much warmth. So, let’s keep it cool while we get things fixed!
Opening your phone? Just a heads up—you’re stepping into the world of adventure, and that means the waterproof seals will be waving goodbye! Make sure you’ve got some replacement adhesive on standby before you dive in, or be super careful to keep your phone away from any liquid if you’re reassembling without the adhesive.
If your glass is all cracked up, no worries! Just slap on some packing tape over the shattered panel to keep it all in one piece while you work your magic during the removal process.
– Place the heated iOpener on the rear panel for a couple of minutes to soften the adhesive around the glass edges.
– Move the iOpener to heat the rest of the panel for another two minutes.
Tools Used
Step 8


If you’re feeling adventurous, after slipping in the pick, consider adding a couple of drops of isopropyl alcohol into the gap. It can help loosen that stubborn adhesive for the next steps ahead.
– Once the rear glass feels warm to the touch, place a suction cup near the bottom edge of the glass.
– Pull up on the suction cup to create a small gap beneath the rear glass, then slide an opening pick into the gap.
Step 9


When moving on to the next step, consider keeping the pick in place and grabbing a second pick. This little trick will make sure the glue you just separated doesn’t sneak back into place.
Feel free to give the rear glass a little more heat if needed to keep the glue from cooling and becoming as hard as ice.
– Glide the pick along the bottom edge of your phone to gently slice through the adhesive keeping that rear glass in place.
Step 10


– Heat and cut along the other three sides of your phone—you’re almost there!
– Slip an opening pick under each edge to keep that sticky adhesive from sealing back up.
Step 11


– Grab an opening pick and slice through any remaining sticky stuff.
– Peel off that rear glass.
Step 12


– Let’s get that new rear glass on there:
– If you’re reusing the old rear glass or using one without adhesive pre-installed, follow this guide.
Step 13

– Get ready to say goodbye to those thirteen 3.5mm Phillips #00 screws that are holding the midframe in place on your phone!
Step 14


Before you dive into this step, don’t forget to give the SIM card tray a little breather and eject it first.
– Get a solid grip on the midframe assembly, like you’re about to give it a high five!
– Now, gently lift the midframe assembly while pushing down on the battery—this will help you separate them like a pro.
– If you’re finding it tricky to separate the midframe, no worries! Just warm things up with an iOpener on the edges of the display to loosen that stubborn adhesive.
Tools Used
Step 15

– Gently lift the midframe assembly to free it from the rest of the phone. You’ve got this!
Step 16


– Alrighty, tech-savvy friend! Let’s unzip that battery connector and let it fly free from its socket. It’s like liberating the motherboard’s squirmy friend. If you get stuck, remember, you’ve got the whole fix world at your fingertips, so don’t hesitate to seek a helping hand. Just tap schedule a repair and ace this task!
Tools Used

Step 17
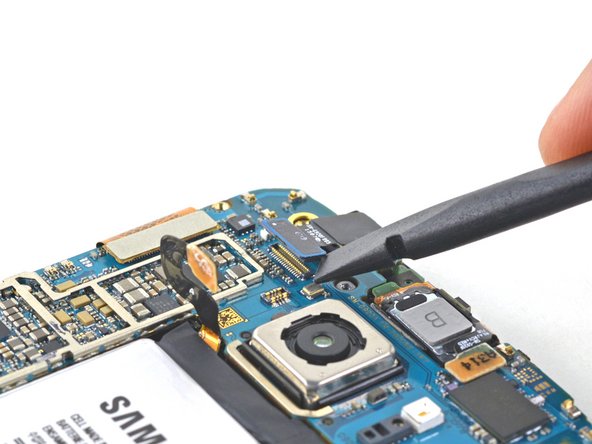


– Get ready to rock and roll with the flat end of a spudger! Pry up and disconnect the front-facing camera from the motherboard like a pro.
– It’s time to bid farewell to the front-facing camera. Remove it smoothly and confidently.
Tools Used