Samsung Galaxy S4 Mini Motherboard Replacement Guide Verizon
Duration: 45 minutes
Steps: 13 Steps
Heads up, tech whiz! Make sure you’ve got your tools ready and your workspace clear. Let’s keep things neat and safe as we dive into this fix. If you hit a snag, remember, help is just a click away at schedule a repair.
Get ready to dive into the world of motherboard replacement with this guide tailored for the Verizon Samsung Galaxy S4 Mini, model number SCH-I435. It’s time to roll up your sleeves and tackle this repair like a pro! If you need help, you can always schedule a repair.
Step 1

– Hold down the END key to turn off your phone. Let’s power down in style!
Step 2

– Pop open the back cover of your phone with a plastic opening tool. Let’s keep it snappy and crack-free!


Step 6

– Unscrew the ten cheeky 4.0 mm screws holding the back of your phone hostage using the #00 Phillips screwdriver.
Step 7


– Kick things off at the USB port! Grab your trusty plastic opening tool and gently slide it around the edge of the phone, right between the rear housing and the frame. As you glide along, you’ll feel those clips giving way—it’s like a little victory dance!
– Now, with a bit of care, gently pull apart the rear housing from the mid-frame. This will unveil the inner workings of your phone, like opening a treasure chest!
Step 8

– Grab a trusty pair of tweezers and gently lift those two charging assembly press fit connectors free. You’ve got this!
Tools Used
Step 9

Heads up! If your device sports a duo SIM setup, this part might look a little different. No worries, just follow along and you’ll do great. If you need help, you can always schedule a repair.
– Grab your trusty nylon spudger and gently lift the headphone jack press-fit connector to free that ribbon cable. You’ve got this!
Tools Used
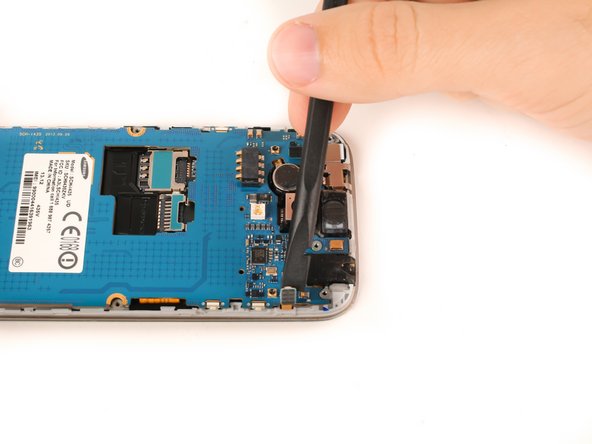
Step 10

– Grab your trusty nylon spudger and gently lift that infrared sensor press-fit connector to set the ribbon cable free. You got this!
Tools Used
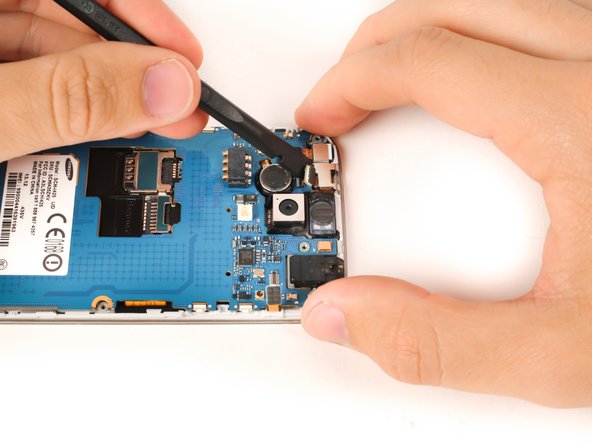
Step 11

– Grab the flat end of your trusty nylon spudger and give that front-facing camera connector a gentle nudge upwards to free the ribbon cable. Easy does it!
Tools Used
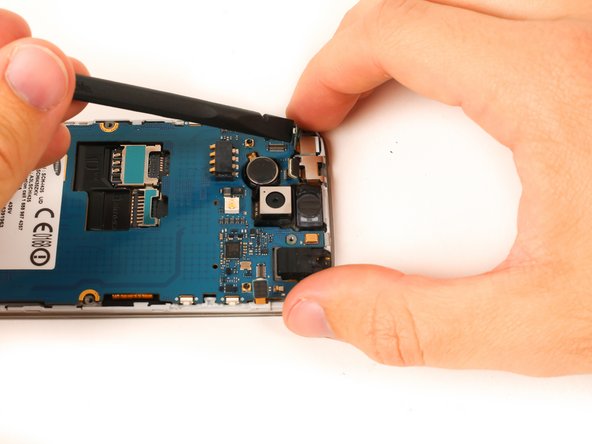
Step 12

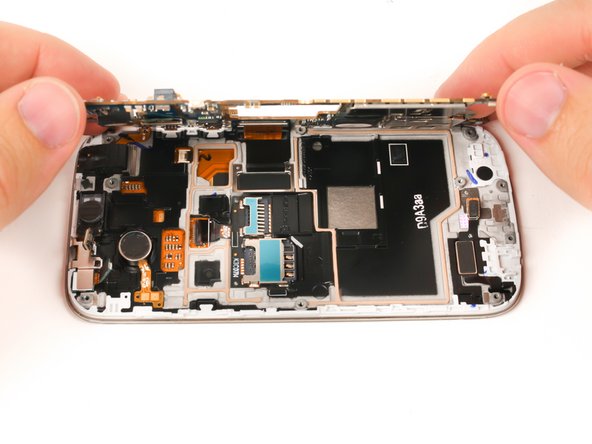

Hey there! No worries if you see a teeny-tiny ribbon cable hanging out from your motherboard – it’s just playin’ hide and seek. If you need help, you can always schedule a repair!
– Carefully lift the motherboard up and ease it slightly away from the device. If you need help, you can always schedule a repair
Step 13


– Slide the flat end of a nylon spudger under the edge of the digitizer press-fit connector and gently lift to pop it free, giving the motherboard some breathing room.
Tools Used