Samsung Galaxy S4 Active Motherboard Replacement Guide
Duration: 45 minutes
Steps: 11 Steps
Heads up, tech whiz! Make sure you’ve got your tools ready and your workspace clear. It’s time to dive into this repair with some positive vibes and a can-do attitude!
Follow this fabulous guide to swap out a wonky motherboard in your Samsung Galaxy S4 Active. Let’s bring your device back to life with some flair!
Step 1


– Use a plastic opening tool, or even your fingernail, to gently pry in the little notch just left of the rear camera, near the power button. It’s like tickling your device open!
– Now, lift the rear case from the corner near that notch and whisk it away from the phone. Voilà, it’s off!
Step 2

– Time to unleash your inner gadget whisperer! Gently pry open that microSD card slot with a trusty plastic opening tool or your very own superhero fingernail. Once you hear that cheerful click, the card will be ready to say hello… or goodbye, if that’s what you’ve got planned. Mission accomplished, you Repair Wizard, you!
Step 3

– Pop open the battery compartment using a plastic opening tool or even your finger, and gently lift the battery up and out. Easy peasy!
Step 4

– Get ready to rock ‘n roll – grab a plastic opening tool or use your trusty fingernail to gently nudge that SIM card further into its slot until you hear a satisfying click.
– Boom! Once you hear that click, release the card and watch it do a little pop out dance from its slot.
– Time to say goodbye to the SIM card – remove it like a pro!
Step 5

– Let’s kick things off by using the tip of a spudger to gently remove the four metallic pads chilling in each corner of the device.
– Grab a Phillips #00 screwdriver, and unscrew the 12 screws that are currently holding the midframe hostage. Show ’em who’s boss!
Tools Used


Step 6

– Grab your trusty plastic opening tool and gently work your way around the entire edge of the midframe to free it from the front case. You’ve got this!
Step 7

– Gently coax the volume button out using a pair of blunt nose tweezers. Remember, patience is key!
Step 8


– Grab the flat end of a plastic opening tool to unplug the USB board connector like a boss.
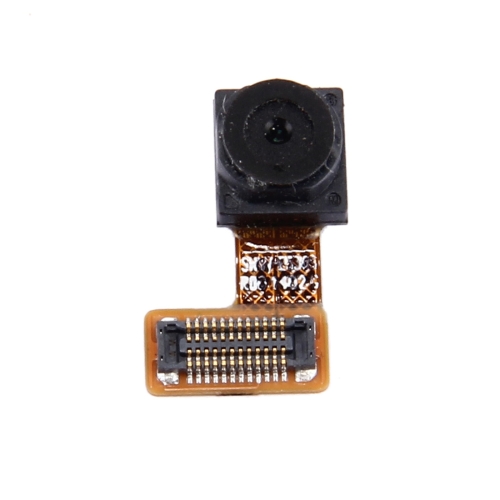
– Pop off the front-facing camera cable connector with a gentle touch.
– Ease out the earpiece speaker assembly cable connector without breaking a sweat.
– Unhook the headphone jack assembly cable connector with a smooth move.
– Detach the display/digitizer cable connector like you mean business.
– Disconnect the antenna cable connector with finesse.
Step 9

– Unscrew the tiny 2.4 mm Phillips #00 screw that’s keeping the motherboard assembly snug. Let’s get that little guy out of there!

Step 11

– Give it a snazzy flip!