Nintendo Game Boy Teardown
Duration: 45 minutes
Steps: 9 Steps
Long before the Switch hit the scene, the Nintendo Game Boy was the pocket-sized champion of portable gaming. Decades later, this classic still holds a nostalgic spot for gamers everywhere. In honor of its 30th birthday, we’re cracking it open to see what made the original Game Boy so legendary. Ready for more teardowns and repair tips? Check out our Instagram, Twitter, and Facebook pages for the latest updates. Want the news sent right to you? Sign up for our newsletter.
Step 1


Here’s a fun little tidbit: the LCD display back in the day could only show four colors—yep, all different shades of green!
– While it wasn’t the very first portable gaming device to make its debut, the Game Boy definitely took the crown and set the stage for the booming world of handheld gaming.
– Tech Specs:
– 4.19 MHz 8-bit processor – it’s not the fastest, but it’s got some charm!
– 8 KB of RAM – small, but just enough to get those classic games running.
– 2.6″ 160×144 STN LCD display – not HD, but a nostalgic blast from the past.
Step 2


Even though it’s all labeled under one model number, the Game Boy actually had a bunch of different versions throughout the years, each with its own little tweaks in the circuitry.
– Model DMG-01 (that’s Dot Matrix Game, for the curious) can run on four AA batteries or an AC power adapter. If your adapter’s vanished into the great unknown, you’re not alone.
– Fun fact: that 800 number still connects to Nintendo’s support line. So, if your Game Boy woes get real, you can give them a call—or, if you want a hand with any tricky issues, you can always schedule a repair.
Step 3


– The case is held in place by six tri-point Y1 screws. Nintendo definitely knew what they were doing when they picked these screws back in 1989—definitely not your standard, easy-to-undo type. But don’t worry, with our Mako Driver Kit, you’ve got the right tool to get the job done.
– Nintendo also made life a little easier by adding an indentation inside the battery compartment, so our driver fits just right. No fumbling around here.
Step 4


– Gently work the two halves of the outer shell apart and prepare for a sneaky ribbon cable surprise! But no worries, this ribbon cable is much sturdier than those fragile ones found in newer gadgets.
– A firm grip and a quick pull on the ribbon cable is all it takes to fully separate the front and back. You’re almost there!
Step 5


– Now that we’re in, it’s just you and a bunch of Phillips screws. The display’s circuit board is locked down with ten of them—nothing wild.
– Gently work your way from the top, prying as you go. The display and circuit board are sticking to the case a bit, so take it slow and steady.
Step 6


– The LCD display is held onto the circuit board with some clips and a couple of screws. Just a heads up: the display’s cable is soldered directly to the board, so replacing it isn’t the simplest task around, but don’t worry—patience is key.
– The speaker, which is usually a modular piece in many devices these days, is also soldered onto the board. Luckily, it’s just two wires with straightforward solder points—nothing too intimidating.
Step 7


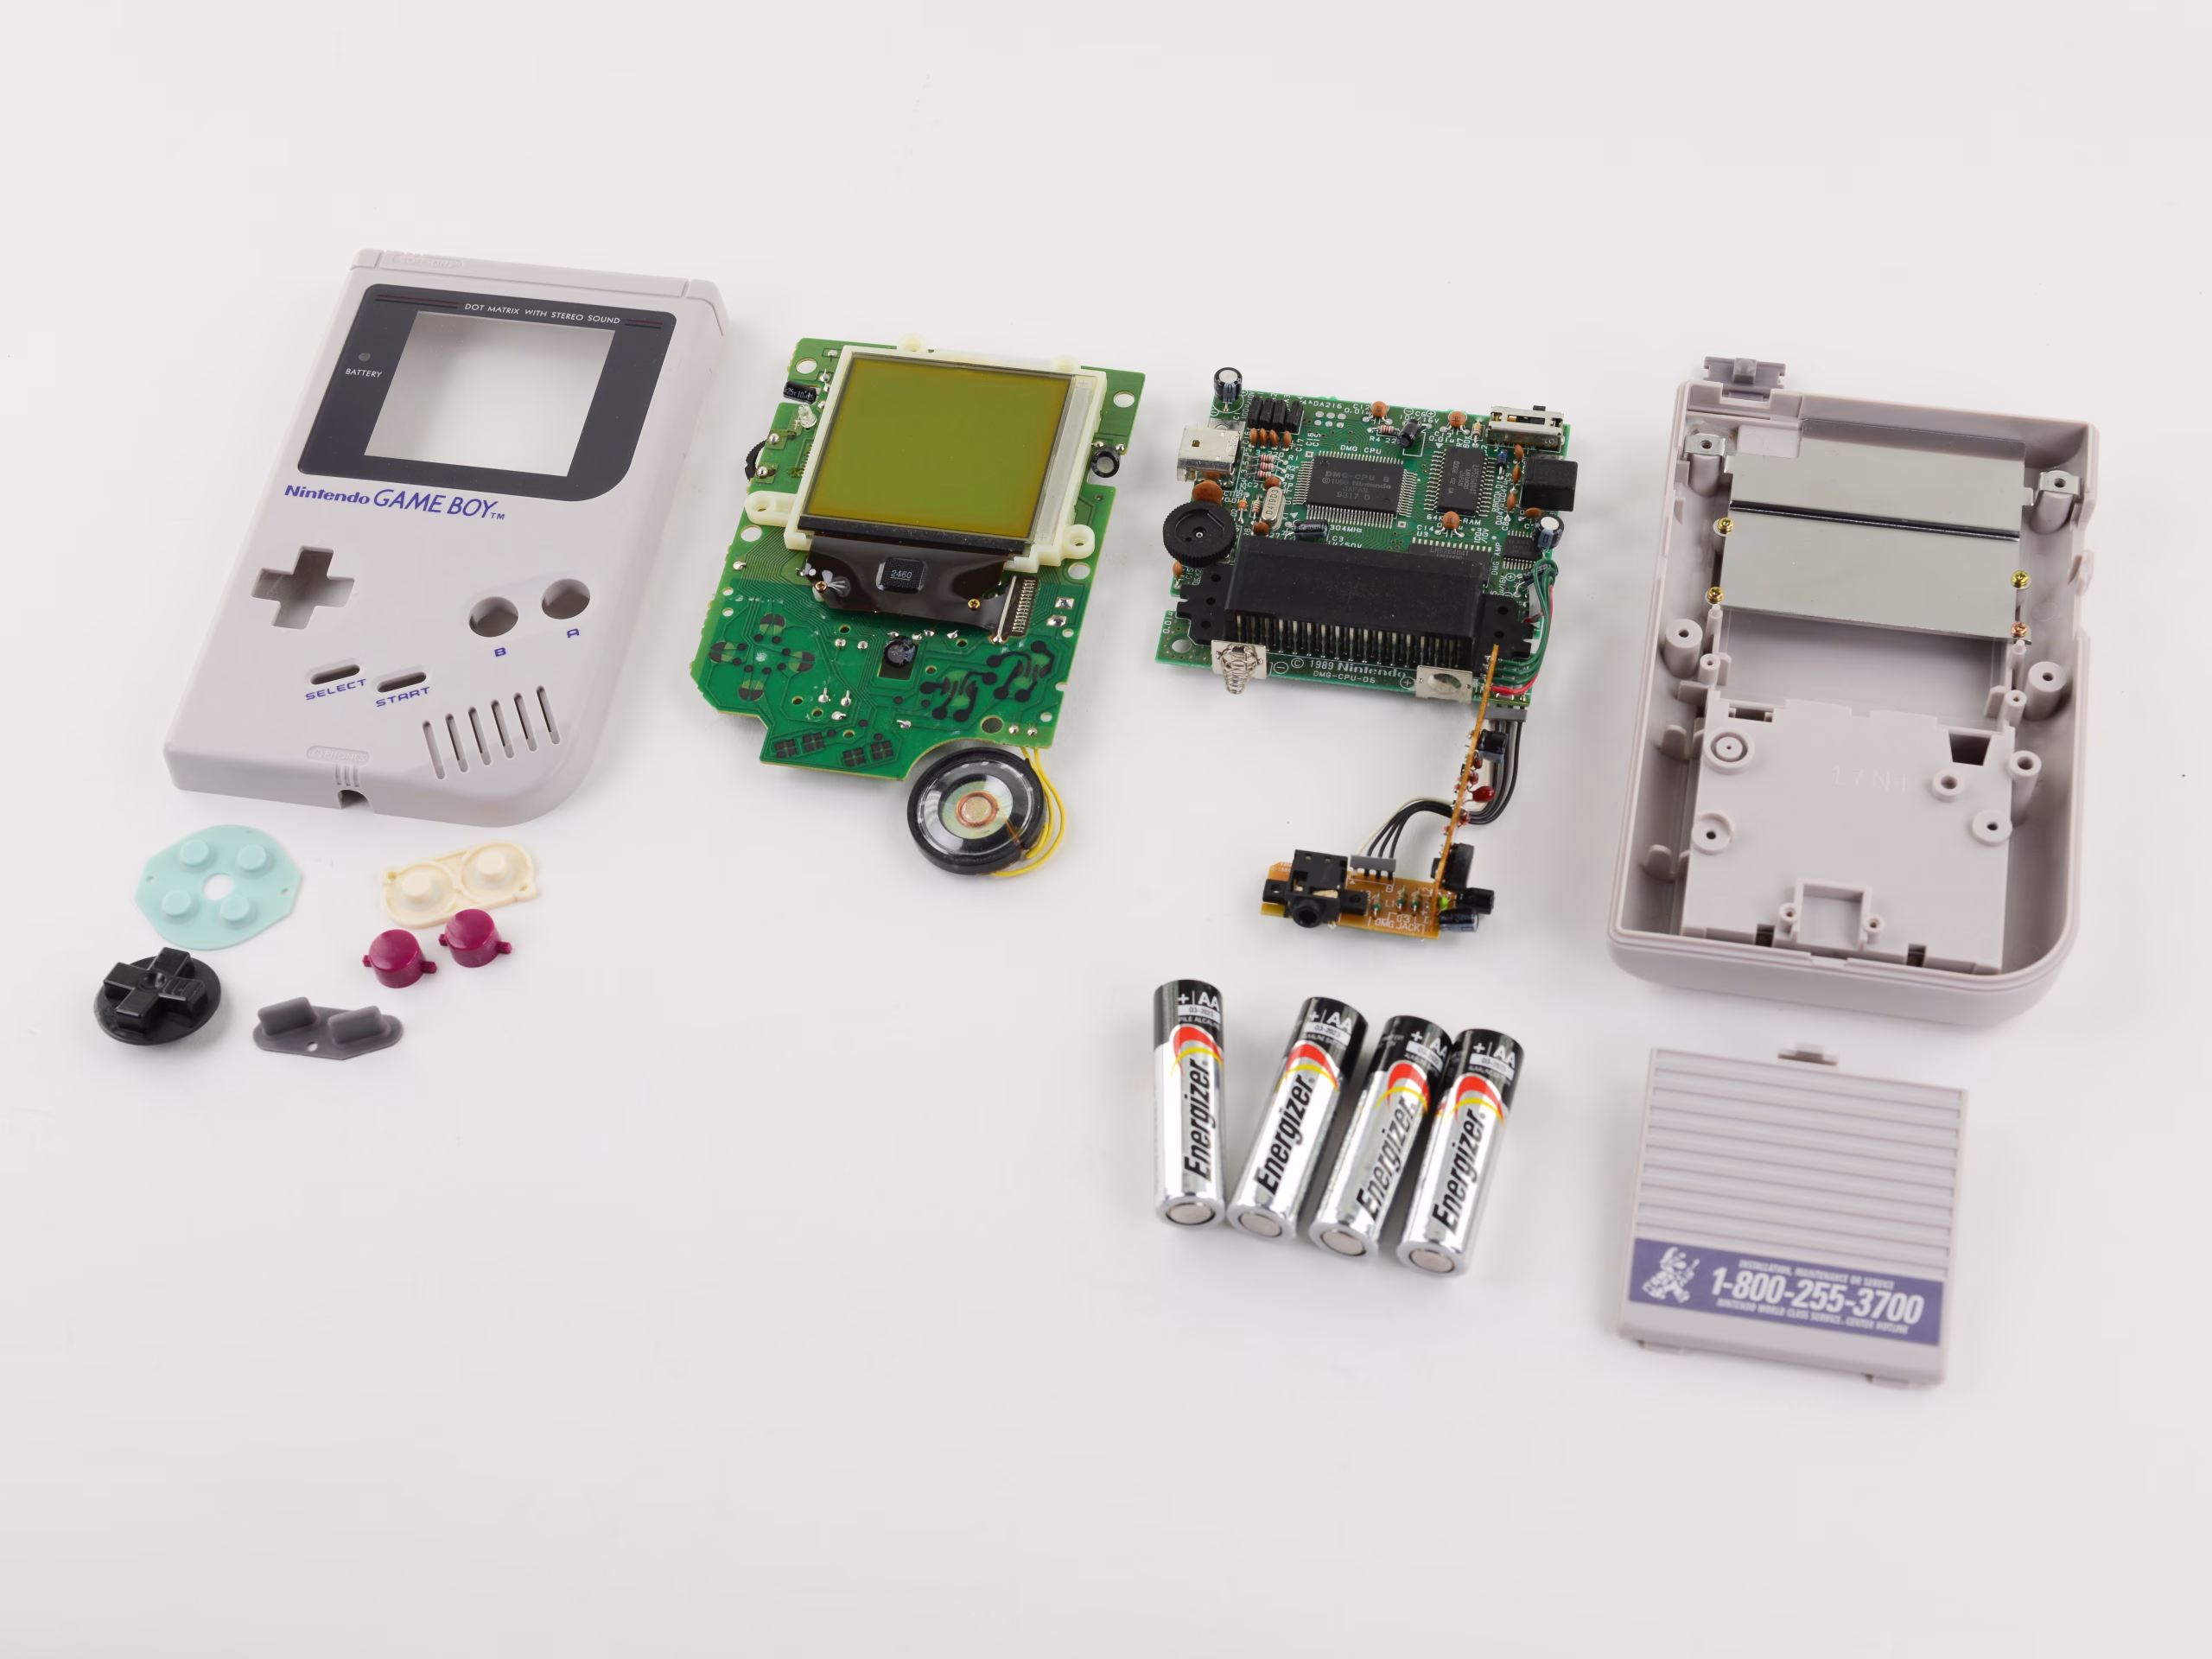
The mainboard, power board, and jack board are all buddies—they come out together in one smooth move.
– Removing the circuit boards inside the rear case is a breeze — just four screws and no sticky adhesive to fight through! Easy does it.
– Just like with the display and speaker wires, the headphone jack and other ports are all soldered directly onto the boards, so handle with care.
Step 8

– Here’s a quick look at what makes up the main board of this model: the Sharp LR35902 4.19 MHz CPU, the LSI Logic LH5264N4T 8 KB VRAM, the LSI Logic LH5264N4T 8 KB WRAM, and the Sharp IR3R40 amplifier. Understanding these components helps you get a sense of what’s under the hood. If you need a hand along the way, you can always schedule a repair for professional support.
Step 9

– We hope you enjoyed this step-by-step guide
– Now that we’ve walked you through the process, it’s time to put everything back together and get your device up and running again. If you need help, you can always schedule a repair
