How to Replace Samsung Galaxy S4 USB Board Tutorial
Duration: 45 minutes
Steps: 17 Steps
Heads up, tech adventurer! Make sure to double-check your tools and keep that coffee away from your workspace. Remember, a tidy space is a happy repair space!
Follow this fabulous guide to swap out the USB port board on your Samsung Galaxy S4. It’s easier than you think and totally doable! If you hit a snag, remember you can always schedule a repair with the pros at Salvation Repair.
Step 1
– Grab a plastic opening tool or use your superhero fingernail to tackle the little nook to the left of the rear camera, right near the power button. Let’s pry it open with style!
Step 2
– Alright superstar, grab the rear case from the corner closest to the little notch, lift it off, and voilà, it’s free from the phone!
Step 3
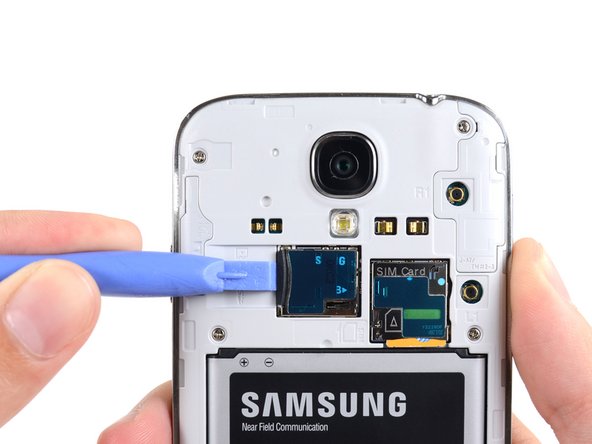
– Grab your trusty spudger or just use your fingernail to gently press the microSD card further into its snug home until you hear a satisfying click.
– Once you hear that click, ease off the pressure and the card will spring out just a bit, ready for removal.
– Go ahead and take the microSD card out.
– When putting it back together, just push the microSD card back into its slot until you feel it click into place, secure and sound.
Tools Used
Step 4
– Wiggle a plastic opening tool, or even a daring fingertip, into the secret lair of the battery compartment and gently coax the battery to freedom.
– Liberate that battery from its mobile confines!
Step 5
– Nudge the SIM card deeper into its slot using a plastic opening tool or your fingernail, until you hear a satisfying click.
– Once you hear the click, let go of the card and watch it spring out of its slot like magic.
– Go ahead and remove the SIM card.
– When putting it back, just push the SIM card into the slot until you hear that reassuring click again.
Step 6
– Unscrew the nine 4.0 mm Phillips #00 screws that are holding the midframe snug against the display assembly. Let’s get those little guys out!
Step 7
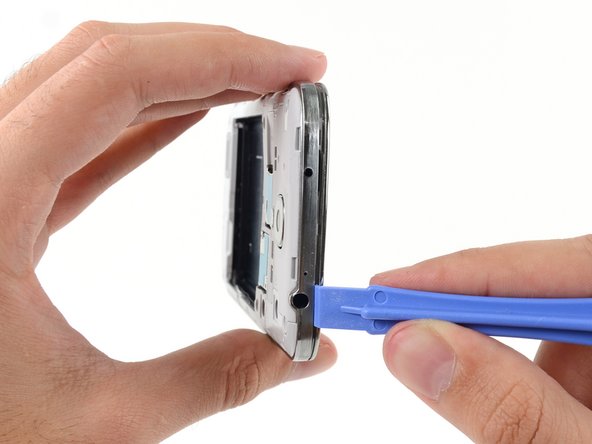
– Begin on the side of the phone with the volume buttons. Insert your plastic opening tool between the chrome bezel surrounding the display glass and the larger chrome border. Look for the seam that separates these two components.
– Gently slide the opening tool along this seam, detaching the plastic clips as you proceed.
Take it easy and be super gentle when prying—just enough to let those plastic clips know who’s boss. Keep in mind, the midframe’s got some delicate spots that could crack if they’re flexed too much. Let’s keep it cool and crack-free!
Step 8
– Keep the groove going around the corner of your phone with your prying tool.
– Glide your opener along the bottom seam where the midframe meets the display, popping open those pesky plastic clips.
Step 9
– Alright, let’s nudge around that corner again, heading towards the power button side!
– Glide the opening tool down the seam like you’re spreading butter on toast.
Step 10
Now’s a great time to give that plastic opening tool one more victory lap around your device’s perimeter, just to be sure all those sneaky plastic clips are totally freed up. Keep it groovy and make sure nothing’s left clinging on!
– Keep cruising with that opening tool along the top edge of your phone. You’re almost there—just a few more clips to pop open, and voilà! The midframe will part ways with the display assembly like an easy, breezy, beautiful cover girl.
Step 12
– Grab the flat end of your spudger and gently pop off the USB board cable connector from its motherboard hangout.
Tools Used
Step 14
– Yank off that zippy USB port bracket from its cozy spot.
– It’s a bit springy, so it’ll snap right back onto those two screw posts when you’re putting it back together. Easy peasy!
Step 15
Heads up! Your carrier might have sneaked an extra antenna cable in there. If it’s peeking out, go ahead and give it a gentle nudge with a spudger to detach it from the USB board. Easy does it!
– Unplug the soft button cable from the USB board cable—it’s like unplugging a superhero from their power source!
– Pop off the antenna cable connector from the USB board like you’re disconnecting your spaceship from the mothership!
Tools Used
Step 16
Heads up! If your carrier added some extra flair with an additional antenna cable on the USB board’s backside, treat it like a delicate dance. Pry gently, and if it feels like it’s starting to tango back, hold up! Take it easy, and remember, no bending the board—let’s keep it chill and intact!
Tools Used


