Game Boy Headphone Jack Replacement
Duration: 45 minutes
Steps: 11 Steps
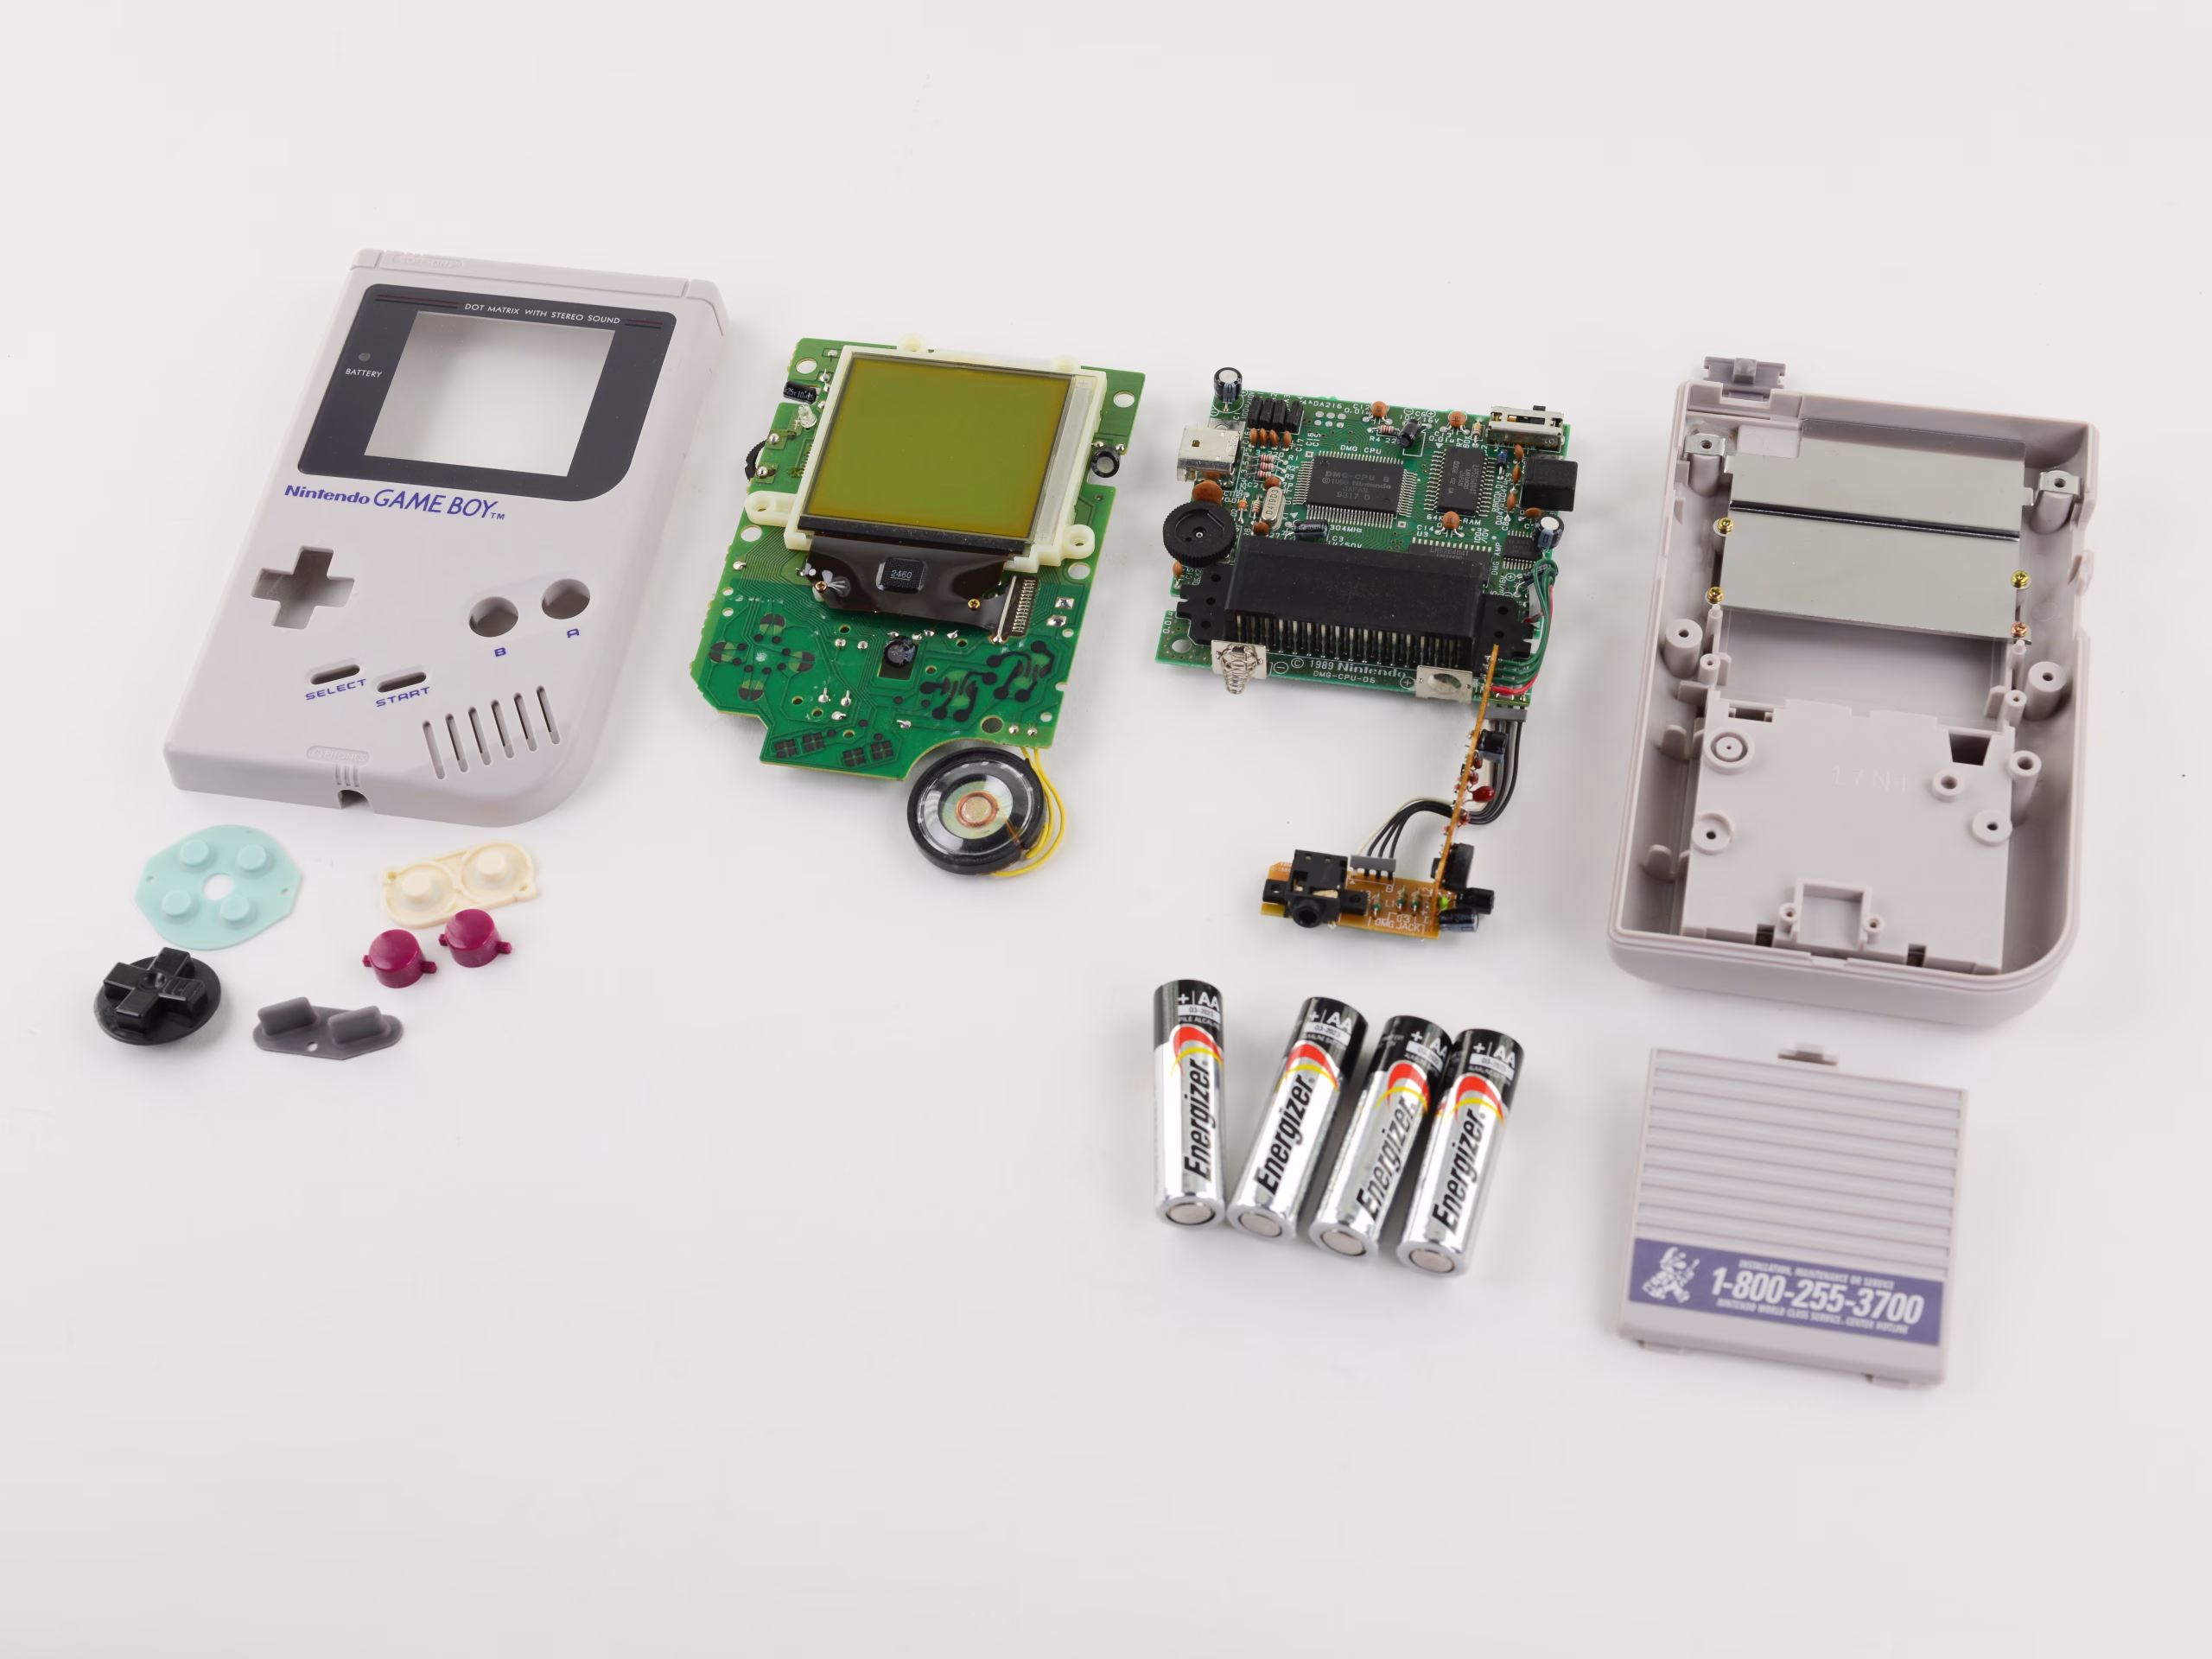
Ready to give your Game Boy a new lease on life? This guide will walk you through replacing the headphone jack on the original Game Boy system. You’ll need to brush up on your soldering skills for this one, so if you’re new to it, check out our soldering technique guide for some helpful tips. If you need help, you can always schedule a repair.
Step 1


– Power down your Game Boy and gently pop out the cartridge to get started.
Step 2


The release latch is a little plastic spring clip. If your Game Boy has seen a few decades, go easy—old plastic can be a bit fragile.
– Grab a fingernail (or a small coin) and give the battery door latch a gentle press to pop off the cover.
– When you’re putting the cover back on, make sure the two plastic tabs on the bottom of the battery compartment slide neatly into their slots before snapping the cover back into place.
Step 3


Remember to responsibly dispose of used batteries! Proper recycling helps protect the environment and keeps everyone safe. If you need help, you can always schedule a repair.
Heading out on a long break? Take the batteries out of your Game Boy so they don’t leak or cause trouble while it’s in storage.
– Gently use your fingernail to pop each battery out, starting from the positive (+) end. Easy does it!
Step 4

– Unscrew the six Triwing screws from the back of your device. These little guys are what keep everything in place, so take them out gently and set them aside. You’ve got this!
Step 5

Be gentle when working around the casing halves—they’re still connected by a big ribbon cable, so avoid pulling them apart completely to prevent any cable damage.
– Once the screws are out, carefully pop the front and back casings apart—take it slow and easy, like you’re opening a bag of chips you don’t want to spill.
Step 6

– Gently slide the front of the casing downward to reveal the ribbon cable connector. Keep it steady and be careful not to rush — patience pays off in these moments. If you need a hand, you can always schedule a repair.
Step 7

– Gently grasp the ribbon connector with your thumb and forefinger. Pull down softly—just enough to dislodge the connector from its socket, making sure not to tug on the ribbon itself.
– Carefully separate the front and back casings to continue with your repair.
Step 8


– Find the headphone jack tucked away on the bottom edge of the rear casing, close to the battery compartment—it’s like a little secret spot.
– Grab a Phillips #00 screwdriver and unscrew the two screws securing the headphone jack. Easy peasy!
Tools Used

Step 9


Once you’ve unplugged the headphone jack, it’ll be hanging by the wires connected to the main circuit board. No worries — those connections are solid and won’t break easily. If you hit any snags, you can always schedule a repair.
– Grab a Phillips#00 screwdriver and unscrew the two screws holding the main circuit board in place. This opens up access to the headphone jack’s connection points, so you can get to work!
Step 10


– Grab a plastic opening tool and gently pry the main circuit board out of its casing, giving it a little wiggle if needed.
– Once the main board is free, carefully set aside the outer shell to keep everything organized.
Step 11


Want to up your soldering game? Check out Salvation Repair’s guide on soldering techniques for some handy tips!
– Gently heat up the four wires connecting the headphone jack to the motherboard and carefully desolder them.
– Take your time to remove the four wires from the headphone jack, one by one, with care.
– Now, use a pair of tweezers to lift out the headphone jack. No need to rush, just take it slow.
Tools Used

Success!