How to Replace Samsung Galaxy S4 Midframe DIY Guide Step-by-Step
Duration: 45 minutes
Steps: 11 Steps
Heads up, tech whiz! Before diving into your gadget’s innards, make sure you’ve powered it down and unplugged any cables. Safety first, fun repair second!
Follow this groovy guide to swap out the midframe on your Samsung Galaxy S4. It’s a simple, fun way to give your phone a little TLC!
Step 1
– Use a plastic opening tool or even your fingernail to gently pry in the little notch next to the rear camera, just by the power button. It’s like tickling your device open!
Step 2
– Grab the rear case near the little divot and whisk it off the phone like you’re unveiling a magic trick!
Step 3
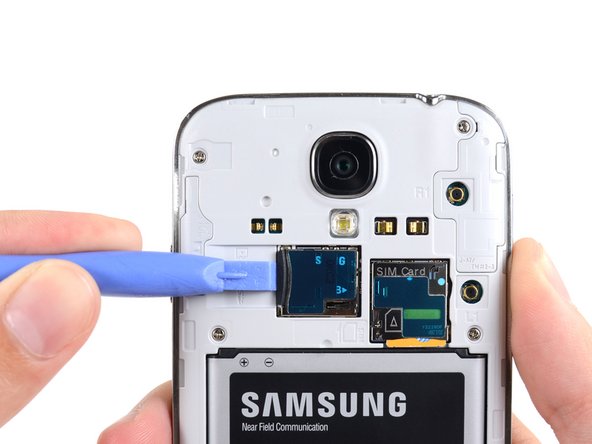
– Grab a spudger or use your cool fingernail to gently push the microSD card a bit deeper into its cozy slot until you hear a satisfying click.
– Once you hear that click, let go of the card and watch it spring out of its slot like magic.
– Go ahead and remove the microSD card.
– For putting it back together, just push the microSD card into the slot until it cheerfully clicks into place.
Step 4
– Wedge a plastic opening tool—or even your trusty finger—into the groove of the battery compartment and pop that battery out like a toast from a toaster.
– Lift the battery away from your phone. Voila! It’s out!
Step 5
– Grab your trusty plastic opening tool or just use your fingernail to gently push the SIM card deeper into its slot until you hear a satisfying click.
– Once you hear that click, let go of the card and watch it spring out of its slot.
– Go ahead and remove the SIM card from its slot.
– When putting it back together, just push the SIM card back into the slot until you hear that click to know it’s securely in place.
Step 6
– Unscrew the nine 4.0 mm Phillips #00 screws that are holding the midframe cozy against the display assembly. Let’s get those little guys out!
Step 7
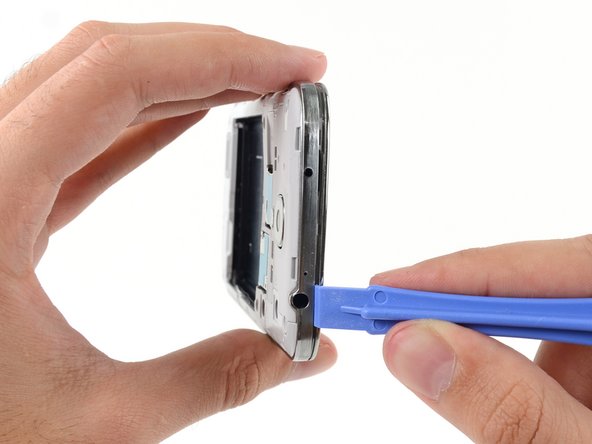
– Begin at the volume button side of your phone and insert a plastic opening tool between the display glass’s chrome bezel and the larger chrome border. Look for the seam connecting the two components.
– Gently slide the opening tool along the seam to detach the plastic clips as you move along.
Take it easy with the prying—just a gentle nudge is enough to pop those clips. Remember, treat it like your favorite brittle cookie; too much bending might just snap the thin spots on the midframe bezel!
Step 8
– Keep on prying around the phone’s corner like a pro!
– Glide your opening tool along the gap between the midframe and display at the bottom of the device, popping open those pesky plastic clips.
Step 9
– Let’s give the corner a little nudge again, right by the power button—just coax it gently.
– Keep the groove going by sliding the opening tool along the seam. You’re doing great!
Step 10
Now’s a good time to take your plastic opening tool for another victory lap around the device’s edge to ensure all those sneaky plastic clips have popped free.
– Keep grooving with the opening tool along the top edge of your phone. Pop those last clips to liberate the midframe from the display assembly. Almost there, champ!
Step 11
– Time to liberate the midframe from the display assembly! Go ahead and gently ease it out. You’re doing great!


