How to Replace Samsung Galaxy S4 Bare Screen Tutorial
Duration: 45 minutes
Steps: 25 Steps
Hey there! Working on your Samsung Galaxy S4? If it’s looking ‘difficult’ or like it’s been through a demolition derby, you’ve got a bit of a challenge ahead! But hey, you’ve got this!
Ready to give your Samsung Galaxy S4 a fresh start with a new LCD? This guide will help you replace a cracked or faulty bare LCD (sans frame). Heads up—this task is tricky, and there’s a good chance the old screen might end up in screen heaven. For a smoother experience, consider grabbing a replacement with the display already mounted on the frame and check out our Samsung Galaxy S4 display assembly replacement guide.
Step 1


– Use a plastic opening tool or even your own fingernail to gently pry in the little notch next to the rear camera, close to the power button. Let’s pop this open with style!
Step 2


– Grab the rear case at the corner near the little divot and gently lift it off your phone. Voila!
Step 3


– Nudge your microSD card a tad deeper into its cozy slot using the flat end of a spudger or even your trusty fingernail, until you hear that satisfying click.
– Once you hear the click, let go and watch the card spring out, ready to be freed.
– Gently remove the microSD card.
– For popping it back in, just press the microSD card down into the slot until you feel it click into its home sweet home.
Tools Used

Step 4


– Wedge a plastic opening tool, or even a daring finger, into the groove of the battery slot and give it a gentle upward nudge.
– Eject the battery from your phone with a flourish.
Step 5


– Slide a plastic opening tool or even your fingernail into the SIM card slot and gently press the SIM card a bit deeper until it clicks.
– Once you hear that click, let go, and the SIM card will spring out of its slot.
– Take the SIM card out.
– When putting it back, just push the SIM card into the slot until you hear a satisfying click.

Step 7


– Begin on the side of the phone where the volume button is located. Use a plastic opening tool to gently pry into the seam between the display glass’s chrome bezel and the larger chrome border. Search for the seam to start.
– Carefully slide the opening tool along the seam to detach the plastic clips, continuing until they are separated.
Step 8


– Keep the groove going and pry around the corner of the phone.
– Whoosh your opening tool along the bottom seam between the midframe and display, popping open those sneaky plastic clips as you go.
Step 9


– Once more, give it a gentle pry near the corner, heading towards the power button side. It’s like coaxing a cat out from under the bed—patience is key!
– Now, whoosh your opening tool along the seam like a mini magic carpet ride. Keep it smooth and steady!
Step 10


Now might be a good time to give the perimeter of your device another go with your plastic opening tool, just to double-check that all those sneaky plastic clips are fully unhooked!
– Keep grooving with the opening tool along the top edge of your phone, dancing past the last clips. Pop the midframe right off the display assembly with a victorious snap!


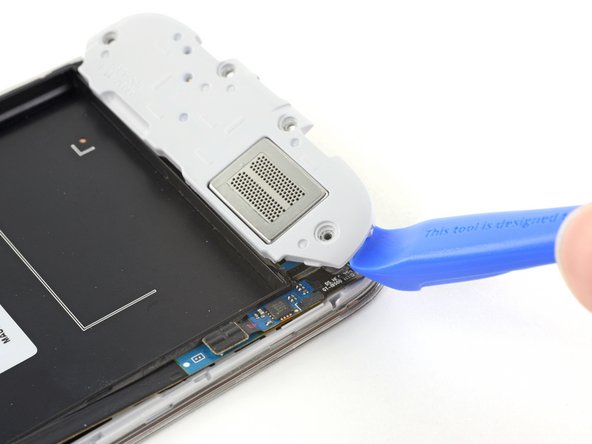
Step 12


– Grab your trusty spudger and gently unplug the USB board connector like a pro.
– Pop off the front-facing camera cable connector with a swift flick.
– Unhook the earpiece speaker assembly cable connector with flair.
Tools Used
Step 13


– Unplug the headphone jack assembly cable connector like a boss.
– Gently disconnect the display/digitizer cable connector with style.
– Carefully detach the antenna cable connector. You’re doing great!
Step 14

– Unscrew the lone 2.4 mm Phillips #00 screw holding your motherboard assembly together. It’s just one little screw, you got this!
Step 15


Grip the edges of the motherboard like it’s a fragile treasure map, steering clear of any sneaky cables as you lift it out of the display assembly. Remember, no sudden moves!
– Carefully coax the motherboard out of its cozy home.
Step 16

– Grab your trusty opening tool and give a cheer as you gently unclip the speaker assembly at the bottom of your phone. It’s showtime!
– Lift away the speaker assembly with a flourish. Voilà! Step completed.
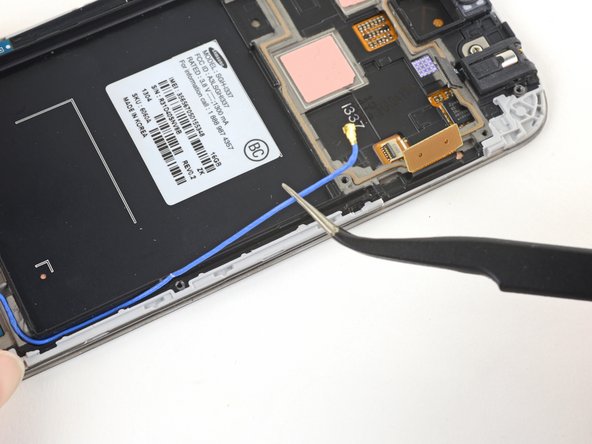


Step 18

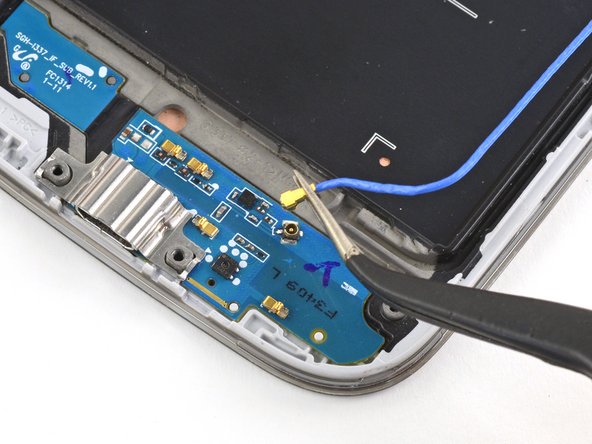
– Give that antenna connection a gentle upward tug to pop it off the speaker daughter board.
– Wave goodbye to that antenna cable as you completely remove it.


Step 22


Alright, the next three steps are like handling delicate pastries. Make sure you’re working on a surface where a little mess won’t be a big deal. It’s going to be a fun little cleanup party afterwards!
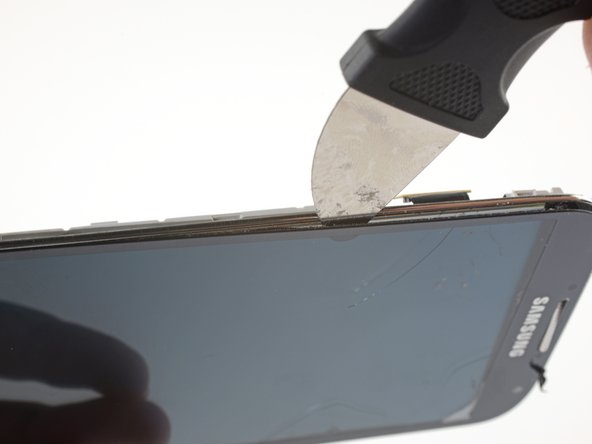
– Now that the screen glass has been freed up from the edges, go ahead and lift it off the phone. Woohoo! You’re doing great!
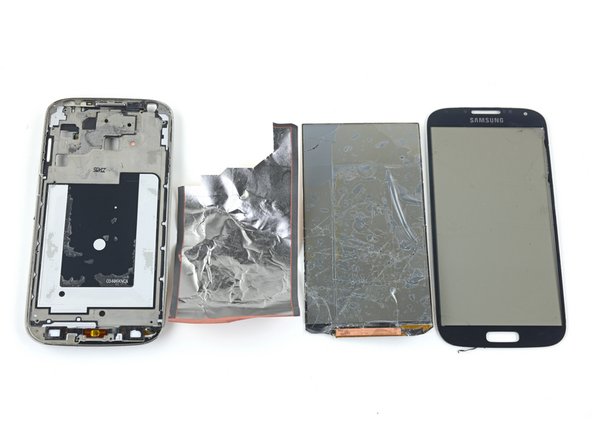
Step 23


– Gently convince the old, cracked LCD to leave its home by peeling it off the frame. It’s time for a fresh start!
– Wave goodbye to the old LCD and remove it from the device.
Step 24

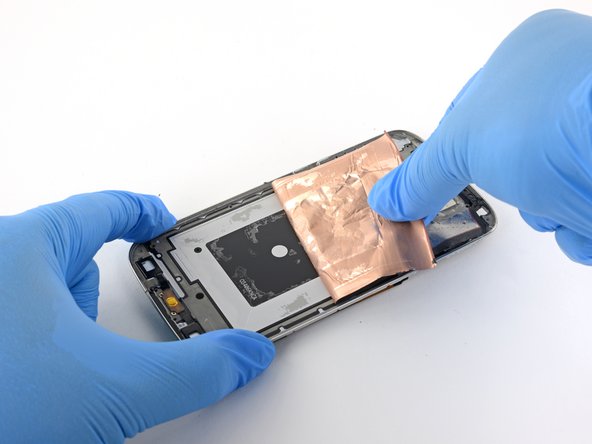
– Snag the shiny foil liner under the LCD and give it a gentle tug away from the case. It’s like unwrapping a present, so have fun with it!
Step 25


– Grab your tweezers and play a little ‘pick up the old sticky stuff’ from your phone case. Make sure it’s spick and span for the new display!
– Alright, it’s showtime for the new display! Carefully snake the display cable through the secret passage (aka the little hole) on the back of the case.
Tools Used