
Samsung Galaxy S II T989 Volume Control Button Replacement
Duration: 45 minutes
Steps: 10 Steps
Heads up, tech adventurer! Make sure to have your tools ready and wear your safety gear. Let’s keep those fingers safe as you dive into the repair!
Meet your phone’s volume control button, the nifty little plastic pal that’s ready to pump up the jams or tone it down just with a press! Snuggled into your phone’s frame, this button is your go-to DJ, linking directly to the motherboard’s volume wizardry.
Step 1


– Spot the tab highlighted with a cheeky red outline to begin the adventure of removing the rear cover.
– Pop that cover off with your fingernail, like a pro, but gently—no need to rush the magic!
Step 2


Power down your device before you pop out the battery, safety first!
– To remove the battery, press up on the bottom right edge as shown by the red rectangle.
– Once the battery starts to lift, grab it with your hand and take it out.
Step 3


– Spot that tiny white champion? Yep, that’s your SIM card, cozily nestled inside the red rectangle.
– Ready for a quick magic trick? Gently press down on the SIM card and shimmy it to the left until it’s free from its metallic embrace!
Step 4


– Look for the media card in the space highlighted by the red rectangle. It’s a tiny black card, which might be a bit tricky to spot at first glance.
– Once you’ve found the card, carefully slide it to the right using your fingers until it’s free from the metal contacts.
Step 5


– Alright, team! You’ll find six cheeky little screws securing the inner plate, each one measuring a sneaky 1/16 of an inch (1.6 mm).
– Grab your trusty Philips head precision screwdriver and show those screws who’s boss!
– Now, let’s keep those escape artist screws from getting lost. Park them safely on a magnetic mat or tuck them into a cozy plastic bag.
Step 6

Before you dive into the inner sanctum of your device, make sure to either park it on a grounded surface or strap on that snazzy anti-static wristband. Safety first, style close second!
– Once you’ve zapped those screws out, the only thing cozying up the inner plate to the phone is a few snappy plastic tabs!
– Give the edge a good pinch, like you see in the snap, and whip that plate out from the frame.
– Struggling to snag the inner plate? No sweat! Whip out the spudger to pry that stubborn plate free.
Step 7


Hey there! Just a heads-up: the motherboard is like the brain of your device, packed with tiny, sensitive components. Handle with care to avoid any tech tragedies!
– To pop out the motherboard, start by loosening the three tabs highlighted by the red outlines. You can use a small flat-head screwdriver or even your thumbnail for this task.
– Besides the trio of tabs at the top, there’s a sneaky fourth tab lurking at the bottom of your phone that needs your attention too. If you need help, you can always schedule a repair.
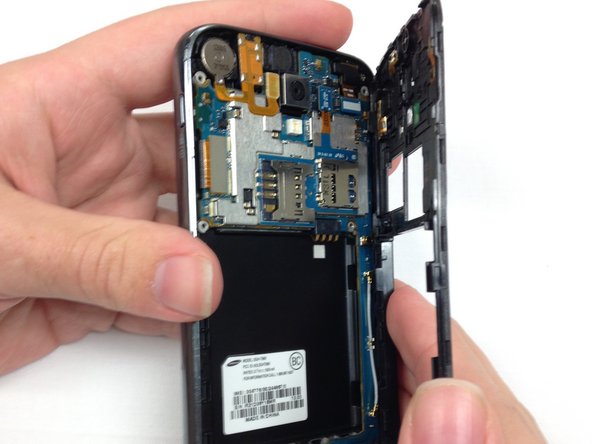
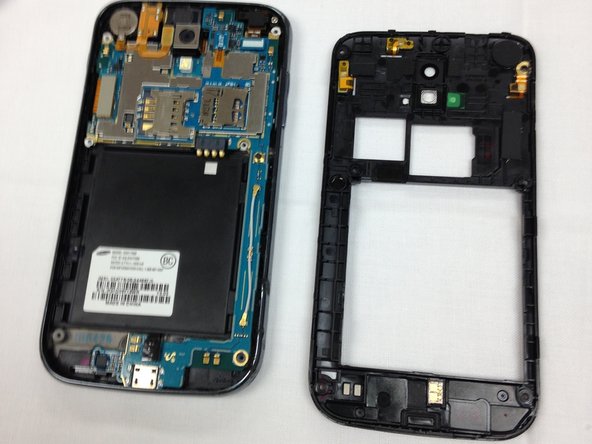
Step 8


– Gently persuade all those tabs to disconnect, then give a smooth, upward nudge along the motherboard’s edges.
– Having a bit of a struggle? Try a little shimmy left and right to coax those stubborn corners out from their snug spots.
Step 9
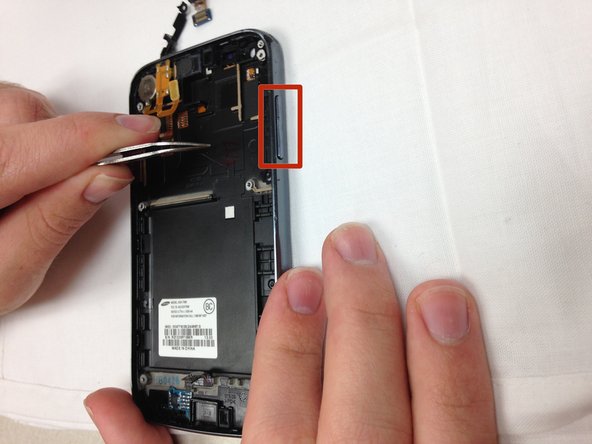

– Grab your tweezers and gently lift the tab indicated by the red rectangle. Let’s make this repair sparkle!
Tools Used

Step 10

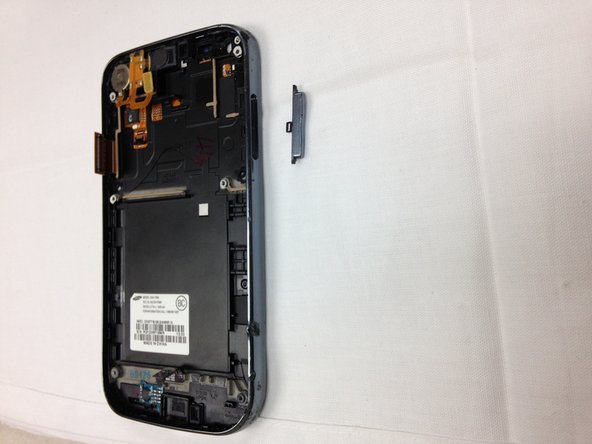
– Lift that tab like a pro and give the volume control button a gentle nudge inwards until it pops out like a toast from a toaster.
– Grab a pair of tweezers and channel your inner surgeon to delicately extract the volume control button from its frame.
Tools Used