DIY Guide to Replace iPhone SE 2020 Home Touch ID Sensor
Duration: 45 minutes
Steps: 27 Steps
Whoa there, buddy! Not all replacement home buttons are created equal. Make sure you’re picking one that’s compatible and won’t give you the runaround. If you need help, you can always schedule a repair.
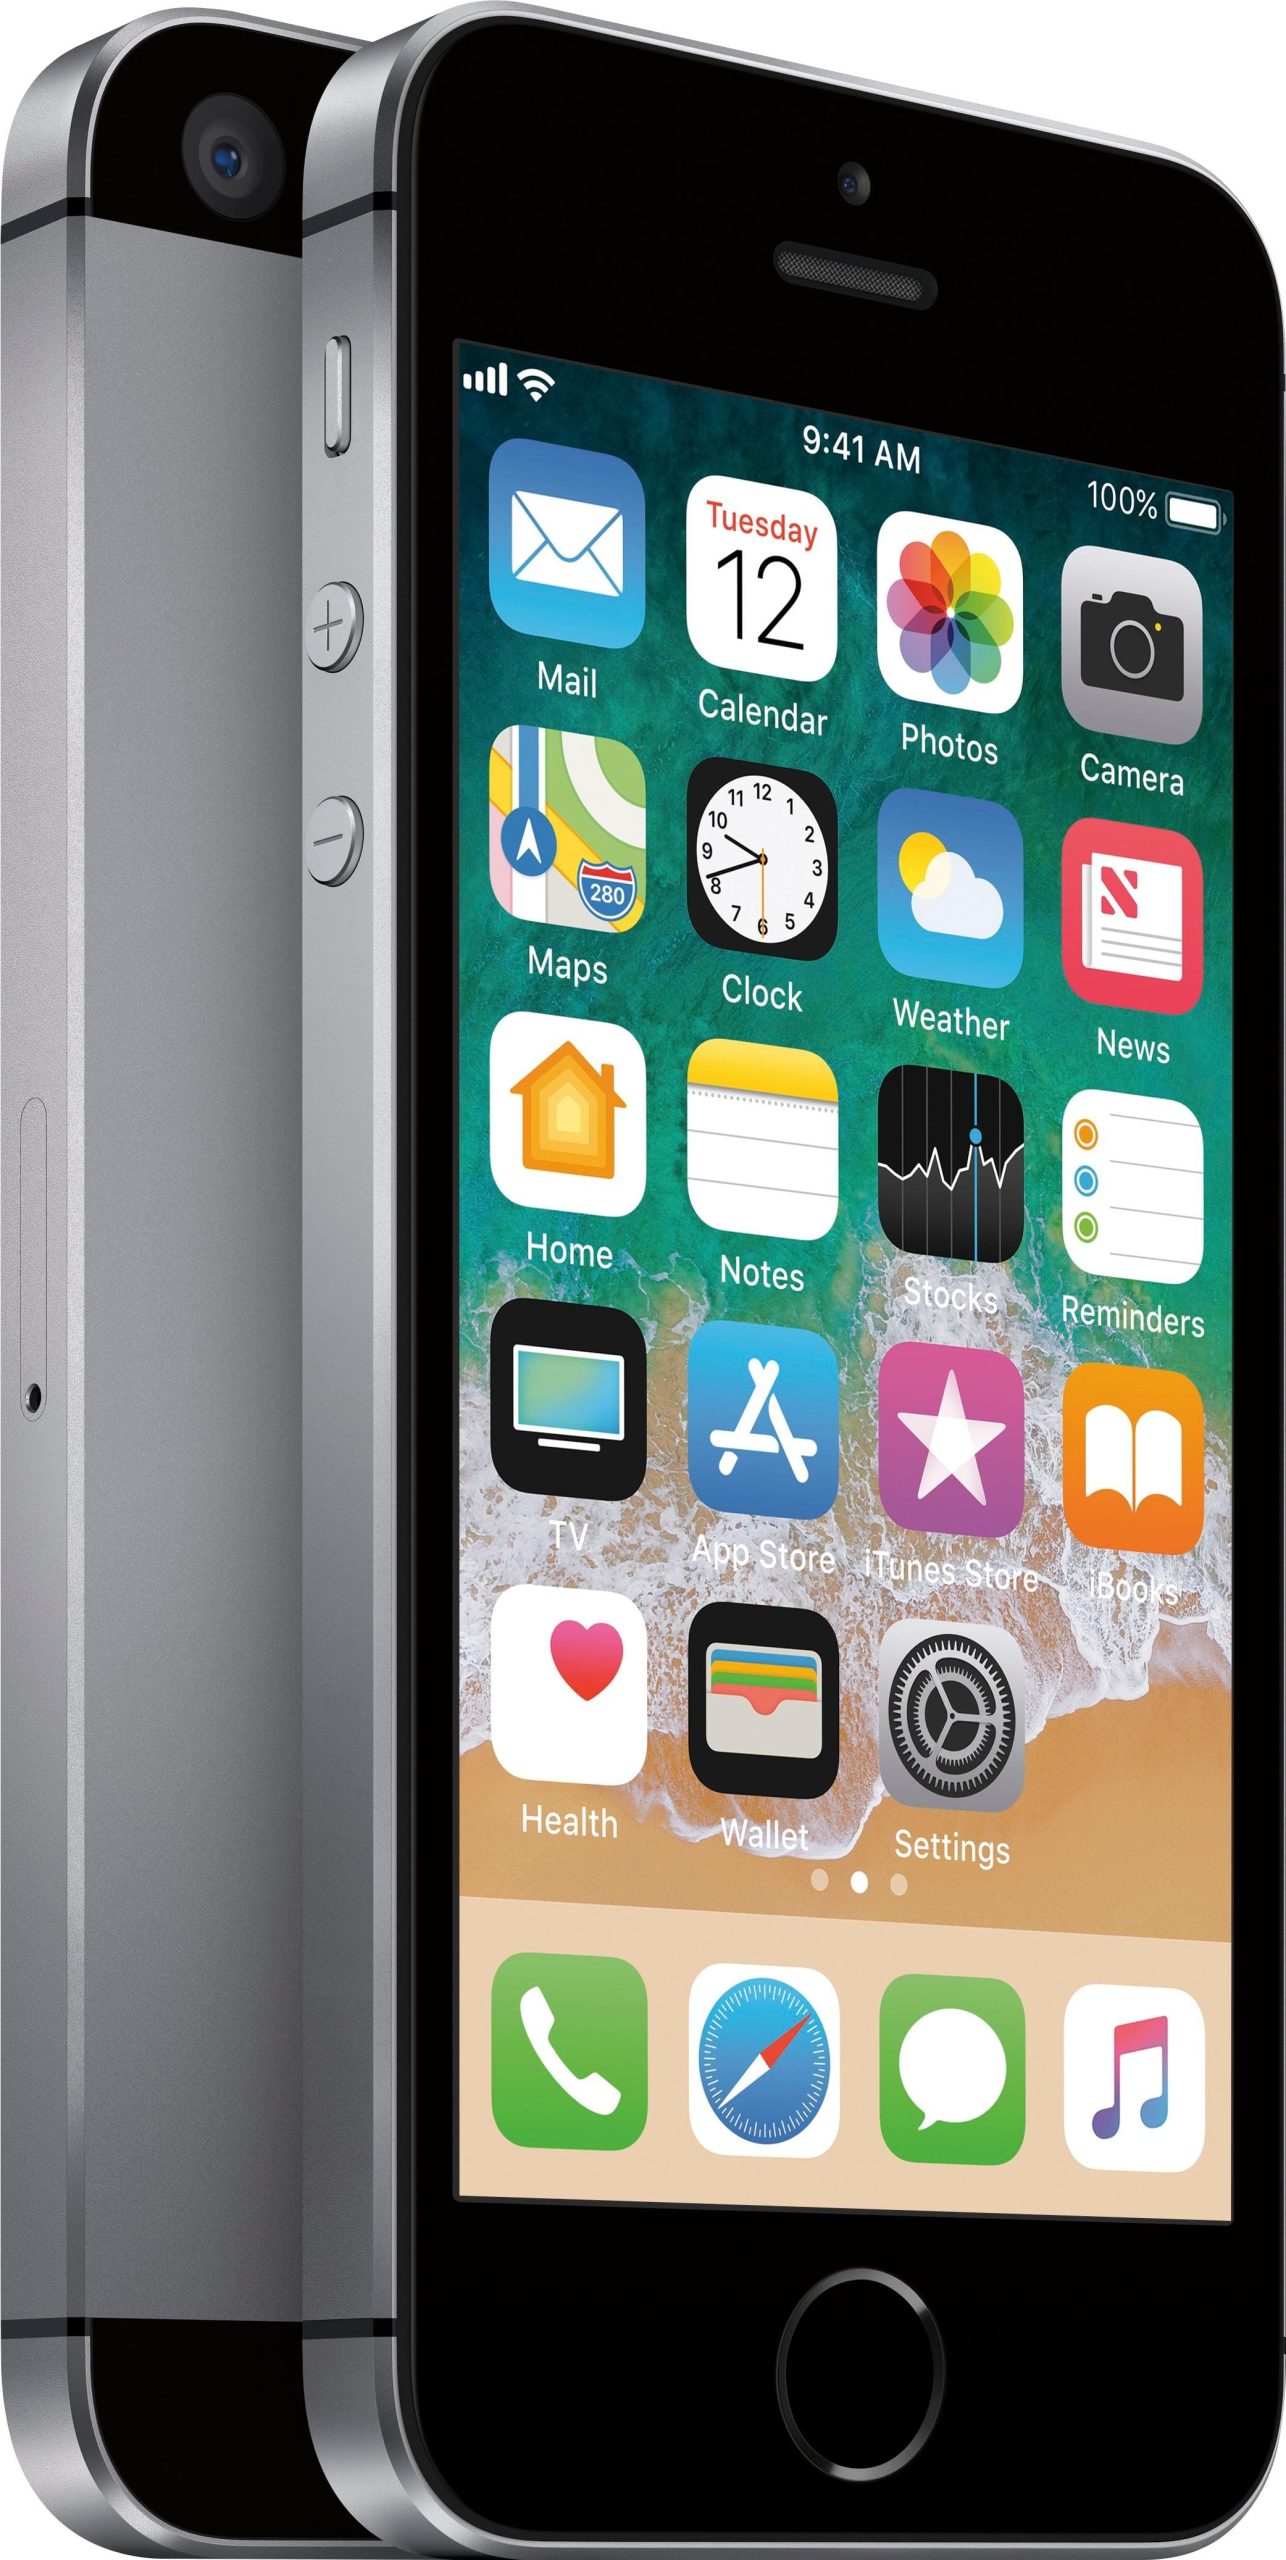
Hey there! So, the home ‘button’ on your iPhone SE 2020 is actually a cool solid-state sensor that comes with Touch ID (fingerprint recognition) magic. But here’s the kicker—most replacement home buttons are a no-go, so double-check before diving into your repair adventure! Your iPhone’s original home button is like a special snowflake, paired with the logic board right at the factory. Without Apple’s secret calibration process, even a genuine button from another iPhone is just not gonna cut it. If your home button is on the fritz, the way to go is to grab a specially-made, universal-style home button. Just a heads up—these replacements will only work as a button, so Touch ID won’t be in the mix. If you’re just swapping out a broken screen, this guide will help you carefully remove and transfer your original home button to a new screen, keeping all its functions, including Touch ID, intact. To keep things smooth and avoid any accidental display cable drama, it’s best to fully detach the display assembly before tackling the home/Touch ID sensor. But hey, if you’re feeling confident, you can skip the display assembly section and head straight to the home/Touch ID sensor part. Happy repairing!
Step 1
– Gently unscrew those two 3.5 mm pentalobe screws hugging the bottom of your iPhone like it’s their job. If you need help, you can always schedule a repair.
Hey there! To kick things off, make sure your iPhone battery is feeling below 25% – it’s party time for repairs, but we don’t want any exploding surprises!
Before the fun begins, it’s time to power down your iPhone – no disassembly dance party is complete without cutting the power!
Popping open your iPhone’s display is going to mess with those waterproof seals. Make sure you’ve got new ones on hand if you’re going beyond this point, or be extra cautious about keeping your device away from water if you skip replacing the seals. If you need help, you can always schedule a repair.
Step 2
To avoid causing any harm to your device, make sure not to push the opening pick in too deep. Here’s a cool trick for marking your pick to keep things smooth and safe.
– Find a spot 3 millimeters away from the edge and give it a cool mark using a permanent marker.
Step 3
Alright team! The next three steps spotlight the Anti-Clamp, the nifty gadget we cooked up to ease the door-cracking operation. If you’re not Team Anti-Clamp, hop down three steps for the alternate route! Remember, if things get sticky, you can always schedule a repair.
– Give that blue handle a gentle nudge backwards to release the Anti-Clamp’s arms.
– Glide those arms smoothly over either the left or right edge of your iPhone.
– Find the sweet spot near the bottom edge of the iPhone just above the home button—one suction cup on the front, and one on the back.
– Give those cups a friendly squeeze to get that suction action going.
Step 4
– Hey there repair hero! Give that blue handle a gentle tug forward to lock those arms in place.
– Now, show that handle who’s boss by giving it a smooth clockwise spin of 360 degrees or until those cups start to stretch.
– Keep those suction cups in perfect alignment like two buddies on a road trip. If they seem to wander off, just give them a little breather, then bring them back in line. You got this!
Step 5
– Warm up that iOpener and slide it through the arms of the Anti-Clamp like a pro.
– Bend the iOpener so it rests comfortably on the bottom edge of your iPhone.
– Take a breather for a minute to let the adhesive loosen up and create a little opening.
– Gently slide an opening pick into that gap you’ve created.
– Feel free to skip the next three steps; you’ve got this!
Tools Used
Step 6
Get ready to rock and roll! The next trio of steps will guide you through the process of delicately separating the screen using a trusty suction cup.
– To make things easier, gently warm up the lower edge of your iPhone. This will help loosen the adhesive holding the display in place, allowing you to open it up with no hassle.
– Grab a hairdryer or use an iOpener to heat up the lower part of your phone for around 90 seconds. This will soften the adhesive underneath and make your job a breeze.
Tools Used
Step 7
– Pop a suction cup on the lower half of the screen, right above the home button. If you need help, you can always schedule a repair
Step 8
– Give the suction cup a firm, steady pull to open up a teeny gap between the screen and the frame.
– Slide an opening pick into the gap like you’re slipping a secret note past a door frame.
The adhesive that’s keeping your screen secured is seriously tough stuff, so getting a start on it might take some elbow grease. If you’re struggling, just add a little more heat and gently wiggle the screen up and down to break that sticky bond. Once you’ve got enough space, slip in your tool. If you need help, you can always schedule a repair.
Step 9
Avoid trying to wiggle the top edge of the display away from the rear case, as it’s secured by some plastic clips that could easily snap. Just take it easy and let them be!
– Gently slide the opening pick along the left edge of the phone, starting from the bottom and working your way up toward the volume controls and silent switch. This step is all about loosening the adhesive that keeps the display snug.
– Pause just shy of the top left corner of the display.
Step 10
Watch out for the delicate cables snuggled along the right edge of your iPhone! Inserting your pick here could lead to some unwanted damage, and we definitely don’t want that!
Step 11
– It’s time to get groovy with your repair! Place your tool at the lower right corner of the device, then slide it around and up the right side to loosen up that adhesive. Let’s make this repair a breeze!
Step 12
– Carefully tug on the suction cup to pop up the bottom edge of the display.
– Grab the little nub on the suction cup to peel it off from the front panel.
Step 13
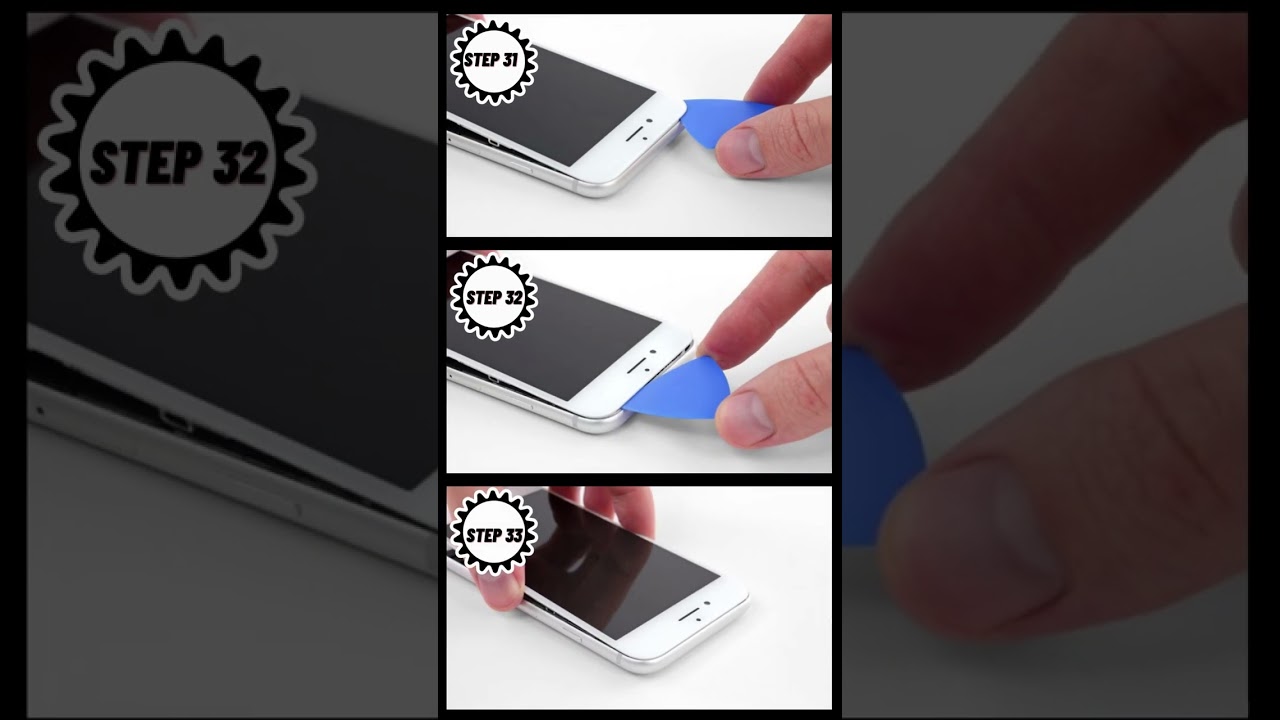
– Gently slide your opening pick under the display at the top left corner and shimmy it along the top edge of your phone to loosen that last stubborn bit of adhesive. If you need help, you can always schedule a repair
Step 14
– Gently slide the display assembly down a bit, away from the top edge of the phone, to pop those clips free from the rear case. You’ve got this!
Step 16
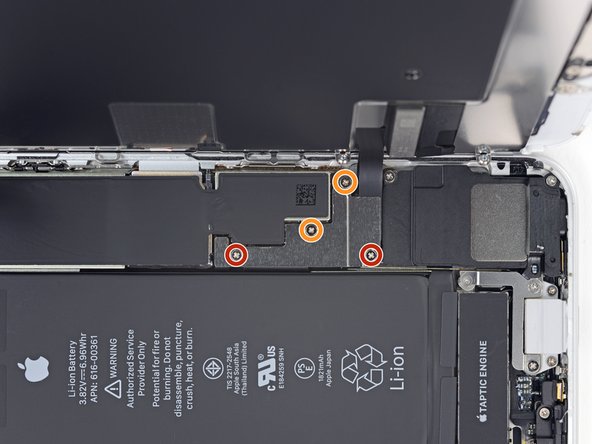
– Unscrew those four Phillips screws holding the lower display cable bracket to the logic board. They come in different lengths, so keep an eye on them!
– As you work through this guide, make sure to keep track of your screws. Each one has its special spot for reassembly, and putting one in the wrong place could lead to some serious trouble.
– Now, go ahead and remove the bracket!
Step 17
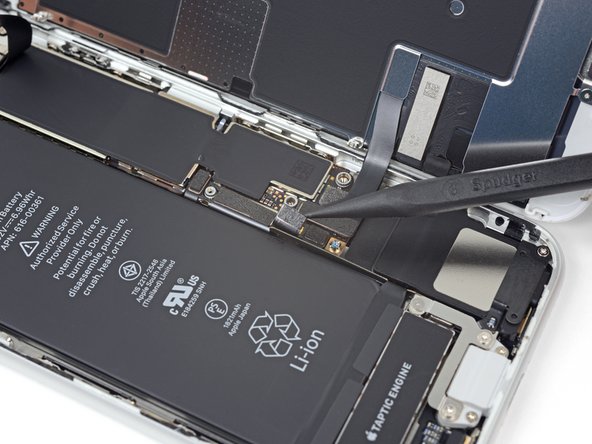
– Grab your trusty spudger and gently nudge the battery connector out of its cozy little home on the logic board.
– Give that battery connector cable a slight bend away from the logic board. This little move will keep it from accidentally reconnecting and powering up your device while you’re in the zone fixing things!
Tools Used
Step 18
– Grab your trusty spudger and gently nudge the lower display connector out of its cozy socket. It’s like a little game of peek-a-boo!
– When it’s time to reconnect, give that connector a firm press on one side until you hear a satisfying click, then do the same on the other side. Just a friendly tip: avoid pressing down in the middle! If the connector isn’t lined up just right, it could bend and create a real headache. So let’s keep it safe and sound.
Tools Used
Step 20
– Let’s get started by removing the three 1.3 mm Phillips screws that hold the bracket in place over the front panel sensor assembly connector. Take your time and make sure they’re all out.
– Now that the screws are out, you can go ahead and remove the bracket. Easy peasy! If you need help, you can always schedule a repair
Step 21
– Take the spudger’s tip and gently pop off the front panel sensor assembly connector. If you need help, you can always schedule a repair
Tools Used
Step 23
– Alright, let’s get groovy with those screws! Unscrew the four Y000 screws holding the bracket over your home/Touch ID sensor.
– Now, gently take off that bracket like you’re peeling off a sticker.
– When you’re ready to put everything back together, remember not to crank those screws too tight! Otherwise, your home button might go on strike. And hey, if things get tricky, you can always schedule a repair.
Step 24
– Grab your trusty opening tool and gently slide it under the left edge of the home button cable connector. Give it a little nudge to disconnect it from its cozy socket. You’ve got this!
Step 25
Warming up the area around the home/Touch ID sensor is a great way to loosen that stubborn adhesive holding the delicate cable. This will make it a whole lot easier to remove it safely, so let’s get that heat going!
– Let’s get flipping! Turn over the display assembly. Grab your trusty hairdryer or whip out an iOpener. Press it gently against the bottom edge of the display for roughly 90 seconds, allowing the adhesive to loosen up.
Tools Used
Step 26
– Grab an opening pick and carefully work your magic to separate the adhesive keeping the home/Touch ID sensor cable snug against the back of the display panel. You’re doing great!
Step 27
– Time to bid farewell to the home/Touch ID sensor assembly! Lift it out from the front side of the display with a gentle touch.
– Now for the reunion! Begin by guiding the cable through the front display hole, just like magic!
– Guess what? Your new replacement part might bring along some tiny Y000 screws hiding near the Home Button. Show them the way out to make room for the home button bracket. Let’s keep it neat and tidy!
